Math in Nuke, the series: Merge & Premultiplication · The Grade Node · ColorCorrect · Saturation, Hue & HSV · Keying · Despill · Matching Colour & Light · Edge Extend · Lin, Log & Gamma · Filtering & Resampling · Edge Detection · Vectors · Trigonometry · Expressions & Curves
Edge mattes are everywhere in compositing: to blur only the edge of a key, to add grain or despill where the matte is soft, to make a rim light, to sharpen the outlines and not the flat areas. Behind every one of them there's the same question: where does the image change quickly? That's a derivative. This page builds edge detection from the derivative up, measures what Nuke's EdgeDetect node really outputs (it's not what most people think), and ends with the edge tools I build from it, including the ideas behind my EdgeDetectPRO, LaplacianPRO and EdgeRimLight gizmos.
Useful Links
- Foundry: the EdgeDetect node
- Wikipedia: Sobel operator
- Wikipedia: Canny edge detector
- OpenCV: Canny edge detection
- Stanford EE368: edge detection (slides, PDF)
- Houdini Copernicus: Edge Detect
- How a kernel works (Matrix page)
- Edge mattes with erode and dilate (Morphology page)
Index
- 01. An edge is a slope
- 02. Derivatives as kernels
- 03. The gradient: how much and which way
- 04. Nuke's EdgeDetect, measured
- 05. Noise and scale
- 06. The second derivative: Laplacian and high pass
- 07. Canny: thin, connected edges
- 08. The edges of a matte
- 09. Edges facing the light: rim
- 10. The edge of the frame
- Edge Detection Lab (try it here)
- Nodes to paste in Nuke
01. An edge is a slope
Take one row of pixels across the outline of an object. Far from the outline the values are flat; at the outline they climb from one level to the other, over one pixel if the edge is sharp, over many if it's defocused or motion blurred. An edge is where the value changes fast, so the tool to find it is the one that measures change: the derivative, the slope of the curve.
Two ways to point at the edge follow from this picture: look for where the first derivative is large (Sobel, Prewitt and the rest, chapters 02 to 04), or where the second derivative crosses zero (the Laplacian, chapter 06). Both are fast to compute, both have a weakness: a derivative is as happy to find grain as to find edges (chapter 05).
02. Derivatives as kernels
An image is made of samples one pixel apart, so the derivative becomes a difference. The simplest is the next pixel minus this one, I(x+1) − I(x), a kernel [−1 1]. It measures the slope half a pixel to the right, so it shifts the edge. The central difference uses the pixels on both sides, kernel [−1 0 1] divided by 2, and is centred on the pixel. On a ramp that climbs 0.1 per pixel both give 0.1.
A one-row kernel sees one row: a single noisy pixel above or below doesn't exist for it, and neither does an edge that isn't perfectly vertical. The 3×3 operators add a small blur along the edge, across the three rows, to the difference across it. That's all Prewitt, Sobel and Scharr are: the same difference with different blurs.
| operator | Gx kernel (top row = row above) | = blur × difference | divide by |
|---|---|---|---|
| Prewitt | −1 0 1 | [1 1 1] × [−1 0 1] | 6 |
| Sobel | −1 0 1 | [1 2 1] × [−1 0 1] | 8 |
| Scharr | −3 0 3 | [3 10 3] × [−1 0 1] | 32 |
| Roberts | 1 0 and 0 1 | two diagonals | √2 (on the magnitude) |
Gy is the same kernel turned by 90°. The "divide by" column is the sum of the positive weights times 2: divide by it and a ramp of 0.1 per pixel gives 0.1, the real slope. Without it, Sobel gives 8 times the slope and Prewitt 6 times, which matters as soon as you threshold the result. Sobel's weights 1 2 1 are a tiny Gaussian; Scharr's 3 10 3 were optimised to make the strength and the angle as even as possible in every direction; Sobel and Prewitt get diagonal edges slightly wrong. The Roberts cross is the oldest and the smallest (2×2): fast, sharp and very noisy, and it sits half a pixel off centre.
In Nuke you can type any of these in a Matrix node. I checked the orientation in Nuke 17: the top row of the Matrix multiplies the row of pixels above, the left column the pixels on the left, exactly as you read it. More on kernels on the Matrix page.
03. The gradient: how much and which way
Gx says how fast the image changes going right, Gy going up. Together they form a vector, the gradient, which points towards the brighter side:
|G| = √(Gx² + Gy²) θ = atan2(Gy, Gx)
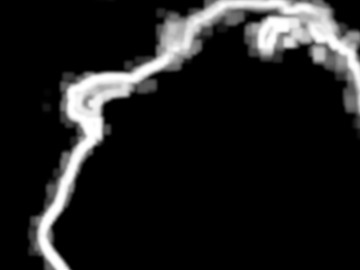
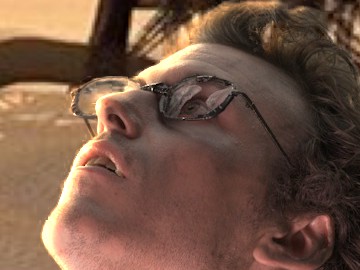
The magnitude |G| is the steepness, the same whatever the direction of the edge: it's the edge matte. The angle θ is the direction across the edge (see Trigonometry for atan2). Below, Gx and Gy of a photo shown around grey (darker = going down, brighter = going up), then the magnitude, then the angle as a colour: the same hue means the same direction, so the two sides of the thin beams get opposite colours.
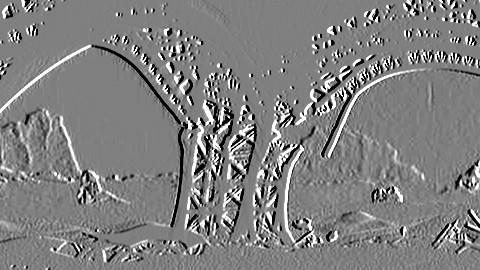
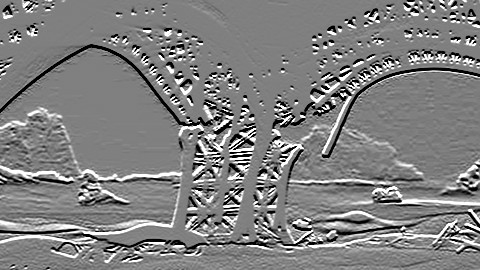
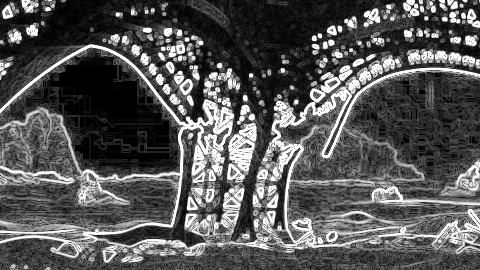
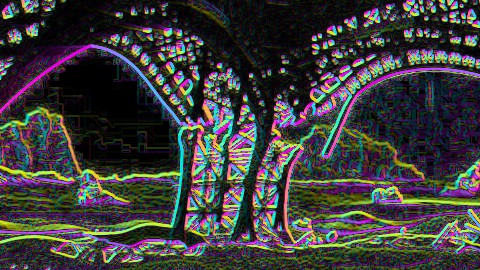
A cheaper magnitude, popular when square roots were expensive, is |Gx| + |Gy|. It's exact on vertical and horizontal edges and √2 (41%) too strong on diagonal ones. Keep it in mind: it's what Nuke's own node uses.
04. Nuke's EdgeDetect, measured
Foundry's documentation lists the three choices of the EdgeDetect node (simple, sobel, prewitt) and its knobs, but not what it computes. I measured it in Nuke 17 with ramps, steps and single pixels. There are actually two nodes: EdgeDetect, the operator itself, and EdgeDetectWrapper, the one you get from the Filter menu, which adds the erode and blur knobs.
| simple | sobel | prewitt | |
|---|---|---|---|
| what it is | |Laplacian|, 8 neighbours | |Gx| + |Gy|, Sobel | |Gx| + |Gy|, Prewitt |
| ramp of slope s | 0 | 8 s | 6 s |
| step of 1 | 3 on the 2 pixels | 4 on the 2 pixels | 3 on the 2 pixels |
| diagonal ramp (s on x and y) | 0 | 16 s | 12 s |
- The magnitude is |Gx| + |Gy| without normalisation: a ramp of 0.1 per pixel gives 0.8 with sobel, a diagonal one 1.6, not 1.13.
- The channels are added up. With channels set to rgb, the alpha is the sum of the three channels' edges: a grey ramp gives 3 × 0.8 = 2.4. Red going right and green going up give the same as one channel going diagonally.
- Only the output channel changes (alpha by default); the rgb passes through untouched.
- threshold is a hard cut on that sum: a value below the threshold becomes 0, a value at or above it is kept as it is (0.8 stays 0.8, it isn't reduced by the threshold).
- simple is not a simple difference: it's the absolute value of the 8-neighbour Laplacian, 8 × the pixel minus its 8 neighbours. A single white pixel gives 8 on itself and 1 on each neighbour, a ramp gives 0.
So on a real image the values go well above 1: a hard edge from black to white is 4 per channel, 12 on rgb. The viewer shows it as a solid white mess. That's why most people think the node "doesn't work" or reach for a Grade straight after it.
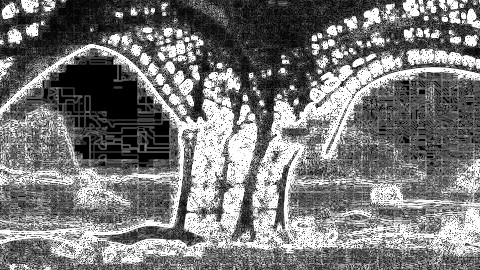
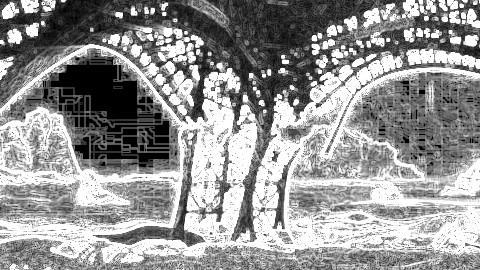
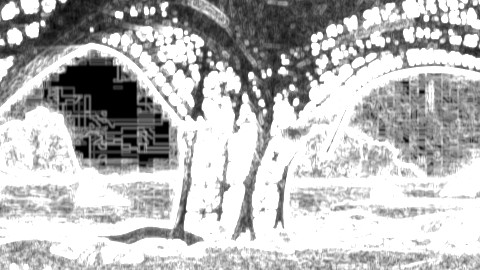
The menu node (EdgeDetectWrapper) does more than add an erode and a blur. Even with both at 0 it changes the result: it multiplies it by about 1.88 (a flat gradient that EdgeDetect calls 0.08 comes out as 0.15), spreads the edge over its neighbours, differently for vertical and horizontal edges, and clamps the result to 1. Its erode is not a plain morphological erode either: a positive erodesize of 1 removed a two-pixel edge completely in my tests, and on a flat gradient too. None of this is documented. It's fine for a quick matte; for anything you want to control, build the gradient yourself (chapter 03, or my GradientEdges node below).
05. Noise and scale
A derivative amplifies everything that changes from one pixel to the next, and nothing in a plate changes faster than grain. On a sharp edge the slope is huge and wins; on a soft edge (defocus, motion blur, a cheek) the slope is a few hundredths per pixel and the grain is just as big. The cure is to blur before you differentiate: the blur removes what's smaller than its size, the derivative finds what's left.
And because blurring and differentiating are both convolutions, the order doesn't matter: a Gaussian blur followed by Sobel is one kernel, the derivative of a Gaussian. Its size is the scale of the edges you're asking for. Small finds hair, pores and grain, large finds the silhouette and ignores the detail:
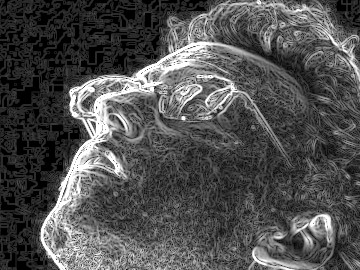
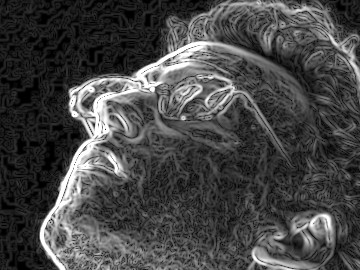
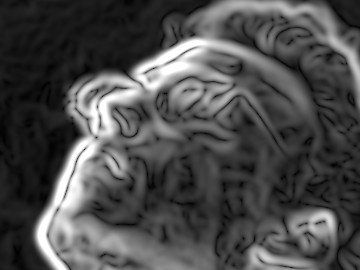
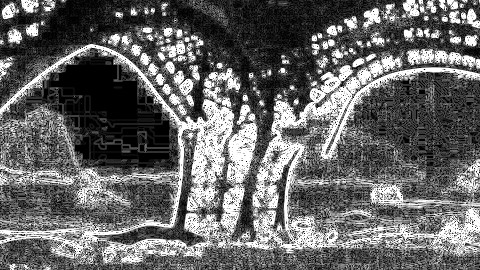
Look at the green screen on the left of the first image: the squares are the 8×8 blocks of the JPEG compression of the plate, invisible in the image and obvious in its derivative. Edge detection is a great way to check a plate for compression, banding and dead pixels.
06. The second derivative: Laplacian and high pass
The Laplacian adds the second derivatives in x and y. As a kernel it's the pixel against the average of its neighbours:
∇²I → [0 1 0; 1 −4 1; 0 1 0] or with 8 neighbours [1 1 1; 1 −8 1; 1 1 1]
It's zero on flat areas and on ramps, so it ignores smooth gradients of light completely; it's large where the curve bends, and it changes sign across the edge (chapter 01). No direction, one kernel instead of two. It's also even more sensitive to noise than the gradient, so it's always used after a Gaussian: the Laplacian of Gaussian (LoG).
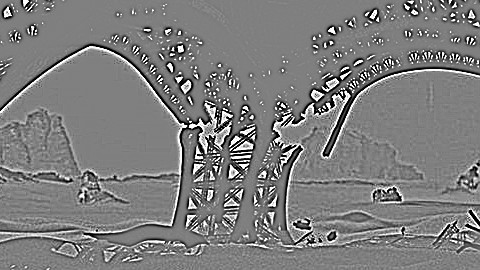
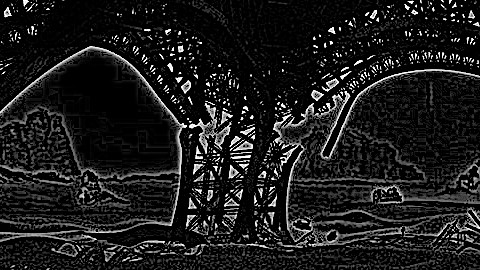
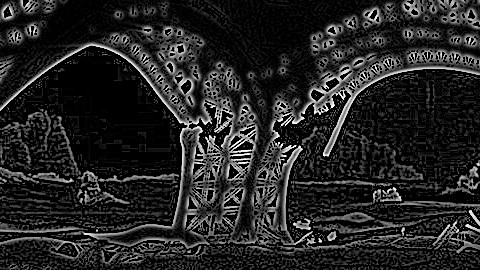
And there's a shortcut every compositor already uses without calling it that. The image minus its blur, I − blur(I), the high pass of a sharpen or a frequency separation, behaves like minus the Laplacian of a Gaussian: a blur averages the neighbours, so the difference is how much the pixel stands out from them. Subtract two blurs of different sizes and you get the difference of Gaussians (DoG), a band pass that keeps only the details between the two sizes.
The sign is the useful part: the positive half is a thin line on the bright side of every edge, the negative half on the dark side. Clamp one of the two and you choose which side you get, the in/out switch of my LaplacianPRO gizmo. On a matte (white subject on black) the bright side is inside the subject and the dark side outside.
07. Canny: thin, connected edges
The gradient magnitude is a soft band a few pixels wide, and a threshold on it gives either broken lines or thick ones. The Canny detector (1986), still the standard in computer vision, turns it into lines one pixel wide in four steps:
1. Blur with a Gaussian (chapter 05).
2. Gradient: magnitude and direction, usually with Sobel.
3. Non-maximum suppression: walk across the edge, along the gradient direction, and keep a pixel only if it's larger than its two neighbours in that direction. The band becomes its crest line.
4. Hysteresis: two thresholds. Pixels above the high one are sure edges; pixels between the two are kept only if they're connected to a sure one. A line that fades a little along the way stays whole, an isolated speck of grain never makes it.
Nuke has no Canny node and you rarely need one: compositing wants soft mattes, not one-pixel lines, and the non-maximum step needs to look at neighbours chosen per pixel, which is awkward with nodes (a BlinkScript does it easily). It's in the Lab below, because it shows clearly what "an edge" means to a computer: the crest of the gradient.
08. The edges of a matte
In compositing, the image we take edges of is most often an alpha. The gradient of a key is a thin line along its outline, as wide as the transition of the alpha: wide in the hair, one pixel on the sharp parts. Useful to see where the edge is, but for a mask you usually want a band of a chosen width, the same everywhere, and that's morphology, not derivatives:
band = dilate(a) × (1 − erode(a))
The dilated alpha reaches out, the eroded alpha stays inside, and the product is 1 between the two. Blur each side separately and you control the softness inside and outside independently: that's what the IN and OUT sections of my EdgeDetectPRO do, and what my EdgeBand node below does. (The Morphology page shows the hard version, dilate minus erode.)
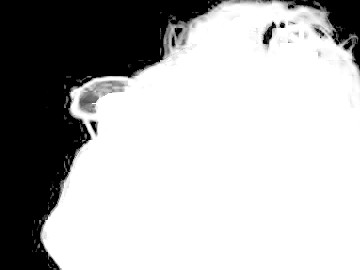
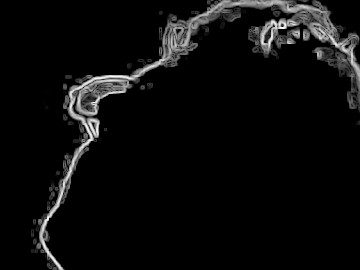
What edge mattes are for: edge blur (a small blur of the comp through the band hides a hard key line), edge despill and edge colour (the despill or the edge extend of the Edge Extend page only where it's needed), light wrap (the background bleeding over the inside of the edge), grain where a soft key has thinned the plate's grain, and the core/edge split of the Keying page. In every case the band says where, the rest of the tree says what.
09. Edges facing the light: rim
The gradient of an alpha points inwards, towards the subject, perpendicular to the outline: it's a normal of the silhouette. And what can you do with a normal? Light it, with the dot product of the Vectors page. With L the direction the light comes from:
rim = max(0, −∇a · L) = max(0, −(Gx cosθ + Gy sinθ))
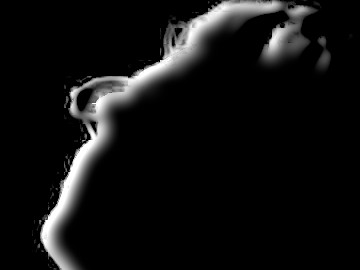
It's positive only on the edges that face the light, and largest where they face it straight on, like a real rim light. Blurring the alpha first sets how far the rim goes into the subject, a power on the result sets how wide it is. My EdgeRimLight and EdgeDetectPRO gizmos do the same with sixteen fixed directional kernels, a 3×3 kernel for each step of 22.5°, picked with a "rotate" knob; the dot product gives every angle with two kernels.

10. The edge of the frame
One more edge that compositors need: the border of the frame, for vignettes, lens softening, chromatic aberration that grows towards the corners, or to fade an effect before it hits the edge. My Frame_EdgeDetect gizmo builds it with nodes: a white frame with black outside, inverted, dilated and blurred. It's simpler as maths: the distance of the pixel from the border,
dx = max(0, size − min(x, width − x)) dy = the same with y and height edge = clamp(hypot(dx, dy) / size)falloff
The length of the two distances (hypot) gives round corners; max(dx, dy) instead gives square ones. It's one Expression node, it works at any resolution and it costs nothing; it's the FrameEdge node below.
Edge Detection Lab
Three sources: a photo, a face on green screen and the key of that face. Choose an operator; drag the image to compare with the source, hover to read Gx, Gy, the magnitude and the angle.
Loading…
The Lab works on the linear luminance, with the gradients normalised to the real slope (chapter 02), then multiplied by the gain; the blur is three box blurs, close to a Gaussian. Try the face with no blur and then with 2, Canny on the photo with a high threshold of 0.3 and 0.6, and the rim on the key alpha.
Nodes to paste in Nuke
Click a box, copy it (Ctrl+C / Cmd+C) and paste it in Nuke's Node Graph (Ctrl+V / Cmd+V).
GradientEdges. Sobel, Prewitt or Scharr on the luminance, normalised to the real slope, with a pre blur. View the magnitude, Gx and Gy, or the direction as a colour. Alpha = magnitude.
HighPassEdges. Image minus blur, the idea of my LaplacianPRO: signed, only the bright side, only the dark side, or both.
EdgeBand. A band around the edge of the alpha: inside erode and blur, outside dilate and blur, like the IN and OUT of my EdgeDetectPRO. Outputs the band in rgba, ready to use as a mask.
RimFromAlpha. The rim of chapter 09: the gradient of the blurred alpha dotted with the light direction. Angle, width, spread, gain. Outputs the rim in rgba: use it as the mask of a Grade.
FrameEdge. The edge of the frame of chapter 10 in one Expression node: size in pixels, falloff, round or square corners.
The math series
The other pages about maths in Nuke:
Merge & Premultiplication
The Grade Node
ColorCorrect
Saturation, Hue & HSV
Keying
Despill
Matching Colour & Light
Edge Extend
Lin, Log & Gamma
Filtering & Resampling
Vectors
Trigonometry
Expressions & Curves
And if you like this, have a look at the Matrices in Nuke series.