Math in Nuke, the series: Merge & Premultiplication · The Grade Node · ColorCorrect · Saturation, Hue & HSV · Keying · Despill · Matching Colour & Light · Edge Extend · Lin, Log & Gamma · Filtering & Resampling · Edge Detection · Vectors · Trigonometry · Expressions & Curves
Every keyer in Nuke answers the same question: how much of this pixel is foreground? The answer is the alpha, and each node computes it with different maths. Most of those maths are not documented, so I measured them: I ran Nuke 17 from the command line, fed each keyer colours I chose, read the numbers back and looked for the formulas that give exactly those numbers. Then I checked the formulas on real green screen plates, pixel by pixel. Where a formula on this page says measured, it matches Nuke to at least four decimals. Primatte and Ultimatte are the exception: their algorithms are proprietary and too complex to rebuild from samples, so for them I explain what Foundry documents.
Useful Links
- https://learn.foundry.com/nuke/content/reference_guide/keyer_nodes/keyer_nodes.html
- https://learn.foundry.com/nuke/content/reference_guide/keyer_nodes/keylight.html
- https://learn.foundry.com/nuke/content/tutorials/written_tutorials/tutorial3/image_based_keying.html
- https://learn.foundry.com/nuke/content/comp_environment/keying_with_primatte/how_primatte_works.html
- https://learn.foundry.com/nuke/content/comp_environment/keying_with_ultimatte/keying_ultimatte.html
- Natron's PIK, an open keyer inspired by IBK
- Ben McEwan: Deconstructing Despill Algorithms
- Ben McEwan: When to utilize a different colourspace (keying in log)
- Tony Lyons, Compositing Mentor: Advanced Keying Breakdown
- Steve Wright: Digital Compositing for Film and Video (the classic book on colour difference mattes and despill)
- Nukepedia: Additive Keyer
- Keheka: Additive keying techniques in Nuke
- Nukepedia: lp_HairKey, an additive / multiplicative hair keyer
- https://github.com/Psyop/Cryptomatte
Index
- 01. What a key is
- 02. Luma key
- 03. Keyer: ten simple keys and a trapezoid
- 04. Difference
- 05. HueKeyer
- 06. The colour difference key
- 07. IBK
- 08. IBKColour: how the clean plate is made
- 09. Keylight
- 10. ChromaKeyer
- 11. Primatte
- 12. Ultimatte
- 13. The additive keyer
- 14. Core, edge and garbage: combining keys
- 15. Cryptomatte is not a keyer
- Keying Lab (try it on real plates)
- Nodes to paste in Nuke
01. What a key is
A key is one number per pixel, the alpha: 1 where the foreground is solid, 0 where you see only the screen, in between on hair, motion blur, smoke and glass. With it you comp:
comp = fg × α + bg × (1 − α)
That's the over of the Merge page. The keyers in Nuke fall into two families. The first only makes the alpha and leaves the colours alone: luma keys, Keyer, Difference, HueKeyer. The second also cleans the colour, removing the screen from the edges: IBK, Keylight, ChromaKeyer, Primatte, Ultimatte. Removing the screen from the colour is a big topic of its own, so it has its own page: Despill.
All the numbers below are linear values, as Nuke works on them.
02. Luma key
The simplest key of all: the alpha is the brightness of the pixel, remapped between a low and a high value.
α = clamp( (Y − low) / (high − low) ) Y = 0.2125 r + 0.7154 g + 0.0721 b
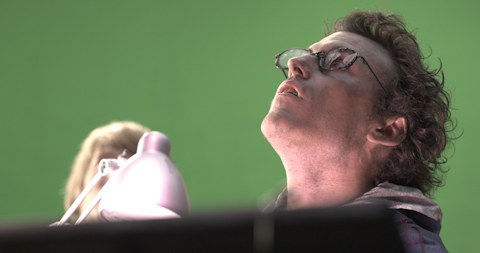
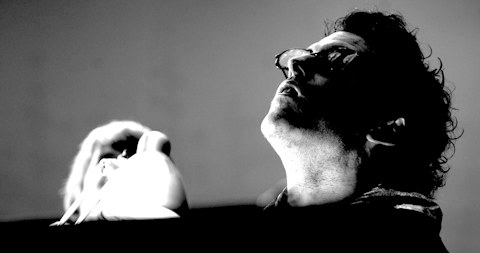
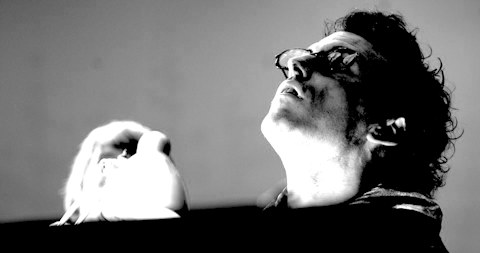
In Nuke it's the luminance key operation of the Keyer node (I measured it: it uses exactly these Rec.709 weights), with A as low and B as high. It's the key for anything brighter or darker than its surroundings: a sky behind a building, a window, smoke, sparks or fire shot on black. Two things to know:
- Saturated elements. Fire is mostly red, and red counts only 21% in Y: a bright red flame can have a lower luminance than a dull grey. For those, the max keyer (max(r, g, b)) is the better luma key.
- Elements shot on black are already premultiplied. On black, every pixel is "element × coverage + black × (1 − coverage)", which is exactly a premultiplied colour. So you comp them with the plate as it is and the luma key as alpha: plate + bg × (1 − α). Premultiplying again would darken the soft parts twice. And if the element emits light (fire, sparks, flares), you often don't need a key at all: a plus or a screen merge adds the light on top of the background, which is what light does.
03. Keyer: ten simple keys and a trapezoid
The Keyer node computes one value per pixel with the operation you choose, then shapes it with the range graph. These are the operations, measured:
| operation | value = |
|---|---|
| red / green / blue keyer | r / g / b |
| luminance key | 0.2125 r + 0.7154 g + 0.0721 b |
| saturation key | (max − min) / max, the S of HSV |
| max keyer / min keyer | max(r, g, b) / min(r, g, b) |
| greenscreen | 1 − (g − max(r, b)) |
| bluescreen | 1 − (b − max(r, g)) |
| redscreen | 1 − (r − max(g, b)) |
The range graph has four handles, A, B, C, D, and makes a trapezoid with straight sides (I checked: it's linear, not smooth):
α = 0 below A, (v − A) / (B − A) from A to B, 1 from B to C, down to 0 from C to D
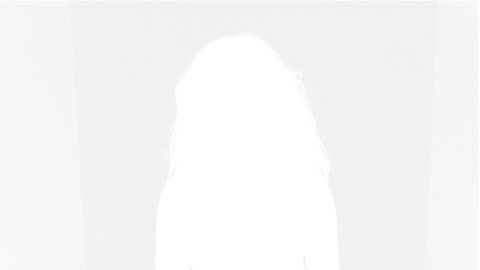
The screen operations are worth a closer look. g − max(r, b) is "how much greener than both other channels" the pixel is: high on the screen, around 0 on neutral colours, negative on reds and blues. One minus that is near 1 on everything except the screen, which is why the default range (0, 1, 1, 1) gives an almost white alpha. On a plate the screen sits close to 1, so you put A just above the value of the screen and B a little higher. In linear light a screen with g 0.085 and r 0.002 gives 0.917, so A at 0.92 and B at 0.97 is a sensible start. The Keyer writes only the alpha: add a Premult after it.
04. Difference
Difference compares the plate with a clean plate of the same shot, without the subject. Measured:
α = clamp( gain × [ (Ar−Br)² + (Ag−Bg)² + (Ab−Bb)² ] − offset )
It's a sum of squares, not a distance: a difference of 0.1 in one channel gives an alpha of only 0.01. Small differences almost disappear, which hides grain but also hides a subject that is close in colour to the background. That's why you usually raise the gain a lot and use offset to push the noise back to 0. The node needs a locked-off camera (or a well tracked clean plate) and no lighting changes: shadows and reflections of the subject on the background count as "different" too. It's the classic tool for garbage mattes and for objects shot in front of a real set.
The node outputs the alpha only; the colour of the A input passes through untouched.
05. HueKeyer
HueKeyer reads a curve over the hue, like HueCorrect, but with a different axis. Measuring it, the horizontal axis turns out to be hue / 60° + 1: 1 red, 2 yellow, 3 green, 4 cyan, 5 blue, 6 magenta (HueCorrect goes from 0 = red). The key is:
key = amount(hue) × min(1, S / sat_thrsh) α = 1 − key (invert is on by default)
S is the HSV saturation and sat_thrsh is 0.1 by default, so greys and nearly grey pixels are never keyed. The default amount curve is 0 up to 2, rises to 1 between 3 and 4 and goes back to 0 at 5: it keys greens and cyans. Change the curve and you can key any colour, which helps with unusual screens or with picking one coloured object out of a plate. It doesn't touch the colour and it inherits the weakness of hue: noisy and unstable in dark, unsaturated pixels.
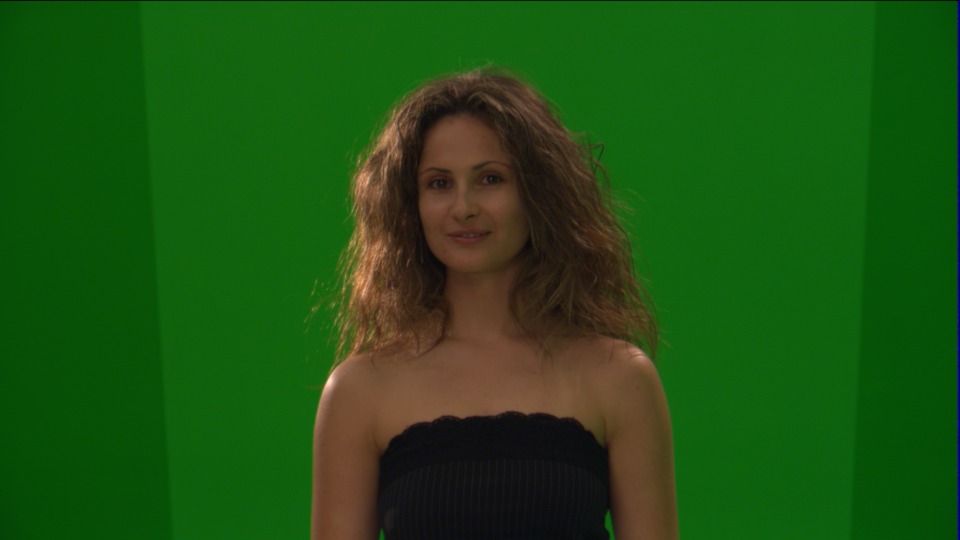
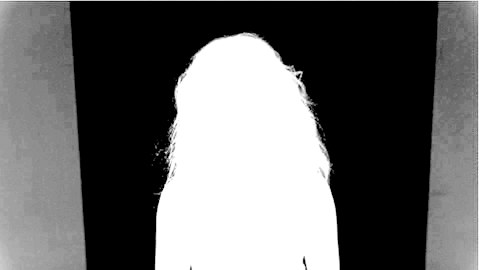
Not bad for zero settings, but look at the black top: its dark, nearly grey pixels have an unreliable hue and get partly keyed.
06. The colour difference key
The colour difference matte is the idea behind most professional keyers, from the optical printers of the sixties (Petro Vlahos) to IBK, Keylight, ChromaKeyer and Ultimatte. It starts from one quantity, how much the screen channel exceeds the other two:
s = g − f(r, b) on a green screen
f is some mix of red and blue, and that choice is the main difference between the keyers. A neutral colour (grey, white, black) has s = 0. The screen has its own value, call it Ss. A pixel that is half screen and half grey has s = Ss / 2. So the transparency is just the ratio:
α = 1 − s / Ss
The classic version, the one you find in compositing books such as Steve Wright's, uses the larger of the other two channels: s = g − max(r, b). It's the same quantity as the greenscreen operation of the Keyer node, but normalised by the screen, so that the screen goes exactly to 0 without hunting for the A handle. The matching despill comes for free: limit green to min(g, max(r, b)) and s becomes 0 everywhere, so no pixel has more "screen" in its colour than the matte allows. The Lab below has this classic key, and there's one to paste at the bottom.
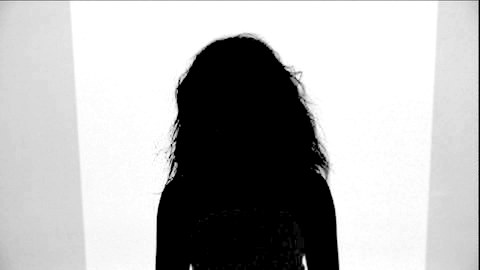
The ratio s / Ss is the transparency, so α is simply this image inverted. The side walls of the set are a darker green: their s is lower and they don't reach white.
| keyer | f(r, b) = |
|---|---|
| classic colour difference, Keyer node | max(r, b) |
| IBK | rw · r + bw · b (0.5 and 0.5 by default) |
| Keylight, ChromaKeyer | a balance between the two channels (chapter 09) |
max(r, b) is the strictest choice: a colour must be greener than both red and blue to count as screen, so yellows and cyans stay opaque, but greenish edges (spill) stay too. The average lets more of the screen through, and more of the yellows. This is why colour difference keys handle hair and motion blur so well, a mixed pixel gets a mixed alpha automatically, and also why they struggle with greenish foregrounds (s > 0 without any screen) and with uneven screens: if one side of the screen is darker, its s is smaller than Ss and the alpha there isn't 0. That last problem is what IBK's clean plate solves.
07. IBK
IBKGizmo is a gizmo around a compiled node called IBK. The core formula is the one quoted for years on the forums, and my measurements confirm it to six decimals:
α = 1 − (g − r · rw − b · bw) / (Cg − Cr · rw − Cb · bw) clamped to 0…1
rw and bw are the red weight and the blue/green weight, 0.5 and 0.5 by default (for a blue screen swap b and g). C is the screen colour: one picked colour in pick mode, or a whole image in C-green/C-blue mode, the clean plate made by IBKColour. That's the real strength of IBK: with a per-pixel screen colour, the darker corner of the screen has its own C and keys as well as the bright centre.
What the measurements add:
- The colour output. With screen subtraction on, IBK outputs the plate minus the screen it found, measured exactly as rgb = max(0, fg − t × C) with t = 1 − α before the clamp (and never negative). The result is already premultiplied. With screen subtraction off, it outputs fg × α.
- Bright pixels. The gizmo switches on a hidden knob of the IBK node, rgbal, and with it the alpha becomes max(α, luminance of the output colour). A highlight or a reflection brighter than the screen leaves a bright colour after the subtraction, and this rule makes it opaque. Without it, a pixel of (0.8, 0.8, 0.2) on a (0.1, 0.6, 0.15) screen gets α 0.37; with it, 0.47.
- The weights. Lowering the red weight makes red foregrounds more transparent at the edges, and vice versa: the help suggests several IBKGizmos with different weights, mixed with KeyMix.
- Luminance match and autolevels modify the colours before the key (pixels brighter than the screen become more opaque; saturated yellows, cyans and magentas are corrected). Their exact formulas didn't come out of my samples, so I won't invent them.
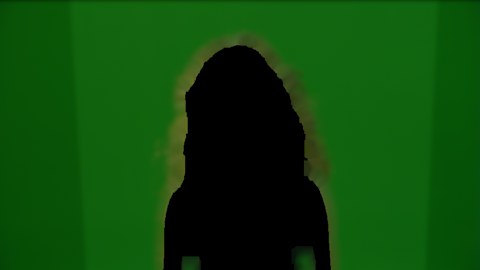
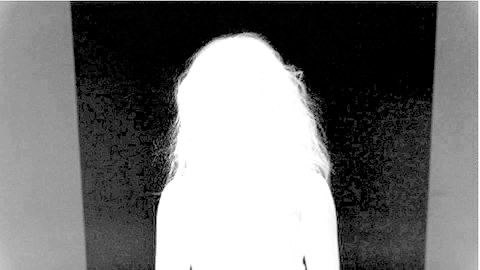
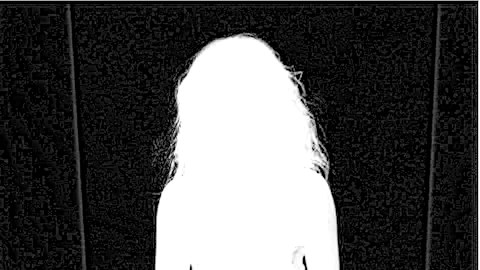
The same curly hair with the three colour difference keys of this page, each with the same picked screen colour:
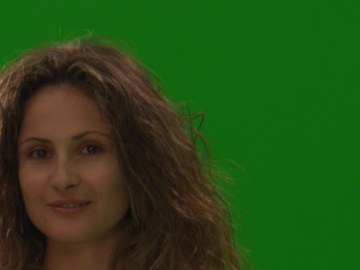
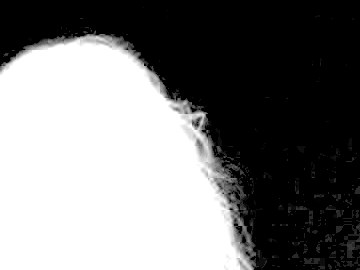
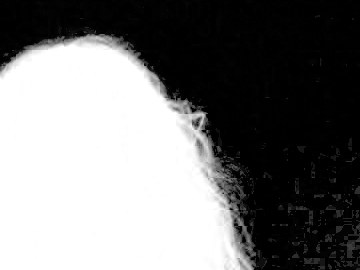
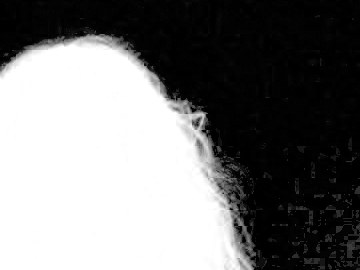
max(r, b) is the strictest: it keeps the most hair and the most noise in the screen. IBK and Keylight measure against the average, so they key more screen and lose a little more hair. With these settings IBK and Keylight give the same alpha, as chapter 09 explains.
08. IBKColour: how the clean plate is made
IBKColour is a gizmo, so you can read its nodes. In short:
1. A Grade with darks and lights, then a Clamp: the plate is pushed until only screen colour and black are left.
2. An IBK makes a hard key of the foreground, which is inverted and eroded (erode) to stay away from the edges.
3. The foreground is cut out with Premult, then Blur (size) and Unpremult. This is the trick that fills the holes:
filled = blur(plate × m) / blur(m)
where m is 1 on the screen and 0 on the subject. The division turns the blur into an average of the screen pixels only, so the hole is filled with the colour of the screen around it, without the subject bleeding in.
4. patch black repeats the fill with bigger blurs to close holes that are still black.
The output is a soft image of the screen without the subject: exactly the C that IBKGizmo divides by.
09. Keylight
Keylight is an OFX plugin and none of its maths is published in the Nuke docs. This is what I measured:
s = g − [ (1 − balance) × lo + balance × hi ]
lo and hi are the two other channels, ordered as they are in the screen colour: lo is the one that is smaller in the screen, hi the larger. On a green screen with less red than blue, balance 0 measures green against red, balance 1 against blue, 0.5 against their average (the same as IBK by default). Careful: some old documentation describes balance as min/max of the pixel; in Nuke 17 it weights two fixed channels.
t = gain² × s / sscreen α = 1 − t
Yes, screen gain is squared: I checked it with gains of 0.5, 0.8, 1.2, 1.5, 2 and 3 and it always fits. A gain of 1.5 makes the transparency 2.25 times stronger. Then:
- clip black / clip white: α = (α − min) / (max − min), clamped, a straight levels.
- colour: max(0, fg − t × screen), the same screen subtraction as IBK.
- bright pixels: α = max(α, max(r, g, b) of that colour). IBK uses the luminance, Keylight the brightest channel.
- alpha bias: the plate and the screen colour are divided by the bias colour before everything else. Grey biases change nothing; a coloured bias changes what counts as neutral.
- despill bias: the same division, but used only for the colour, not for the alpha.
- screen replace (Soft Colour by default) recolours the pixels whose alpha was changed by the clips.
On the real plate of the Lab, this model matches Keylight within 0.006 everywhere (with screen replace off). The Intermediate Result view outputs the original colour with the alpha, for when you want to despill separately.
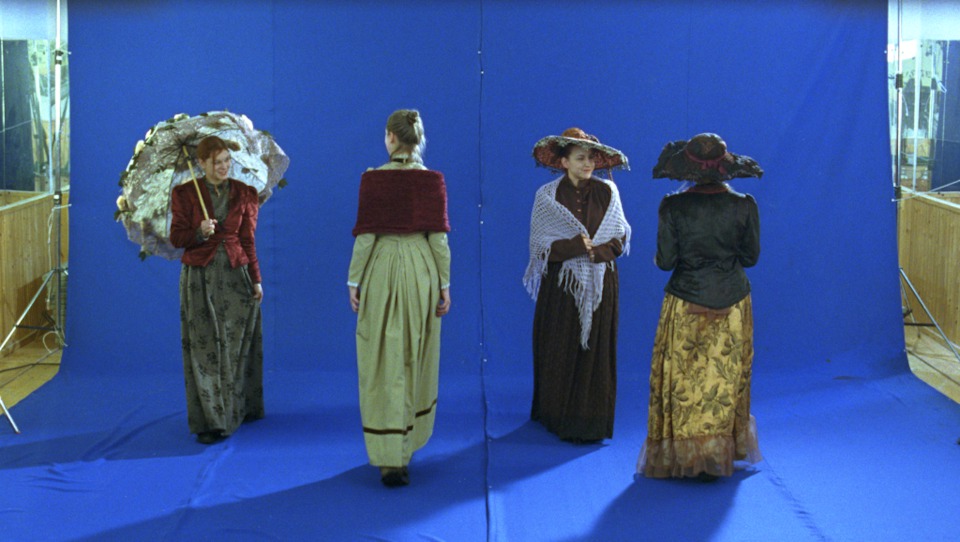
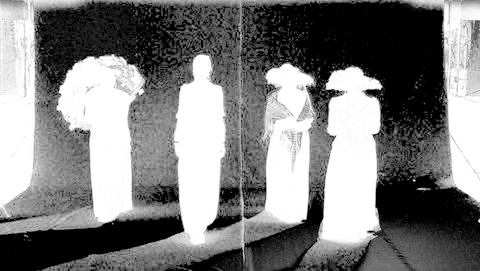
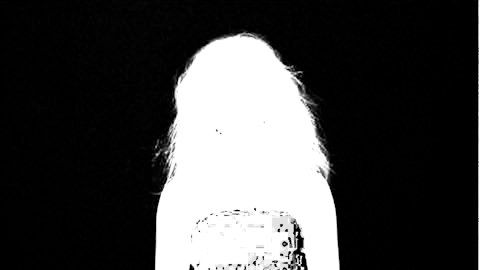
On a blue screen the same maths runs on the blue channel. Note the shadows on the floor: they are darker blue, so their s is smaller and they come out grey. That's correct (a shadow is a partial occlusion of the screen light) and it's what lets you keep the shadows in the comp. The lace shawl comes out as a fine pattern, and the side areas, which aren't screen, are white: they need a garbage matte.
10. ChromaKeyer
ChromaKeyer is Foundry's GPU keyer, and it looks a lot like Keylight. The measurements say it's more than a look: the alpha is identical to Keylight's, with the same balance and the same squared gain. The difference is the output: with preMultiply on (the default) the cleaned colour is multiplied by the alpha once more; switch it off and the colour is exactly Keylight's. The black point and white point controls are a smooth levels on the alpha.
11. Primatte
Primatte doesn't compute a colour difference: it carves the RGB cube. Foundry describes three nested polyhedra around the screen colour. Colours inside the small one are pure screen (α 0); between the small and the medium one are the transparent edges (partial α, with spill removal); between the medium and the large one are solid foreground colours that still need spill removal; outside the large one is untouched foreground. Every click of Smart Select BG Color, Clean BG Noise, Restore Detail and so on pushes or pulls the faces of these shapes. That's why Primatte can key colours that a colour difference can't separate, and why its result depends on where you click. The faster PrimatteRT algorithm replaces the polyhedra with a single plane.
12. Ultimatte
Ultimatte comes from the family that invented the colour difference matte (Petro Vlahos, who received an Oscar for it), and Foundry describes it as a colour difference keyer with AdvantEdge technology. You sample the screen, then work in passes, each with its own tab: screen correct (evens out the screen using an overlay of the clean areas), matte density, shadow (keeps shadows on the floor), spill suppression (by cool, warm, darks, midtones, brights), cleanup and color conformance. Its strength is the final comp, with fine detail and spill handled together.
13. The additive keyer
The additive keyer isn't a keyer in the usual sense: it makes no matte. It's a way to bring back the finest detail, single hairs, motion blur, smoke, glass, that every key loses. The idea, as the Nukepedia and Keheka tutorials explain it: subtract the screen from the plate. Where there's only screen the result is 0; where there's detail it's a small positive or negative number. Add that to the background:
detail = plate − screen comp = key comp + Y(detail) × (1 − α)
Y(detail) is the detail desaturated (subtracting green leaves a magenta cast, so you keep only its luminance), and (1 − α) puts it only where the main key is transparent. Bright hair against the screen adds light to the background; dark hair takes it away. The screen can be a picked colour or, better, a clean plate (IBKColour), so that an uneven screen also goes to 0.
There's a multiplicative version too, better for dark detail like shadows and dark hair: divide the plate by the screen, so the screen becomes 1, and multiply the background by it:
comp = key comp with the bg part × Y(plate) / Y(screen)
Both transfer everything that isn't screen: grain, wrinkles, tracking markers, shadows. So denoise the plate first, use them only on the soft edges, and hold them out with a garbage matte. Ready-made versions exist on Nukepedia (Additive Keyer, AdditiveKeyer_MM, lp_HairKey, which has both an additive and a multiplicative mode); Tony Lyons shows the Additive Keyer Pro of the Nuke Survival Toolkit in his keying tutorials. In the Lab you can switch it on over any of the keyers.
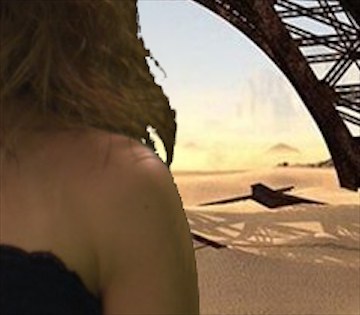
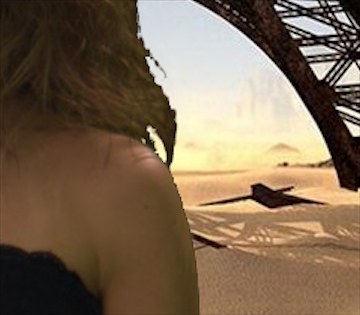
The detail brings back the strands at the edge without touching the core of the key. Against the bright sky the dark hair darkens the background, exactly as the real hair would.
14. Core, edge and garbage: combining keys
No single key does everything, which is the main point of Tony Lyons' Advanced Keying Breakdown series. A production key is usually several keys combined:
- core: a hard, slightly eroded key (or a roto) that is 100% solid inside the subject.
- edge: a soft key tuned only for the transitions, hair, motion blur.
- garbage: a roto that removes everything far from the subject (rigs, the edges of the screen).
- holdout: a roto that forces areas that must stay solid (a green shirt on a green screen).
α = max(core, edge, holdout) × (1 − garbage)
max is the "union" of the mattes (a Merge set to max, or the union mode of the Keyer); KeyMix lets you use a different key in different areas. The colour follows the same logic: a strong despill on the edges, a gentle one (or none) on the core, see the Despill page. Two good habits from Ben McEwan's articles: judge the key on the frame with the most motion blur, and look at it with the saturation pushed up, where green hair and fringes jump out. And when an overexposed screen makes Keylight struggle, try keying a log version of the plate.
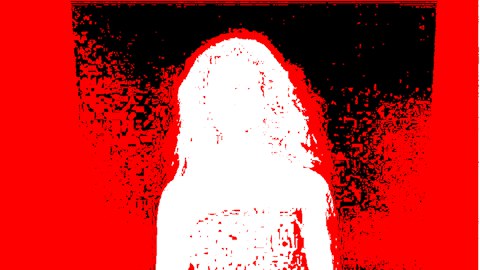
The status view (there's a node at the bottom of the page) shows what the alpha view hides: the red speckles in the screen are values just above 0, the red in the dress are values just below 1. Those are the pixels the core and garbage mattes are for.
15. Cryptomatte is not a keyer
Cryptomatte mattes come from the renderer, not from colours. Each pixel stores a few pairs of (ID, coverage), ranked by coverage, where the ID is a hash of the object or material name stored as a float. The matte of an object is simply the sum of the coverages whose ID matches the one you picked. That's why Cryptomatte gives perfect antialiased edges with no keying at all, and why it only exists for CG.
Keying Lab
Four real plates, five keyers with the formulas above (the measured ones for Keyer, IBK and Keylight), and the additive keyer on top. Choose a plate and a keyer, move the knobs, switch the view: comp over a new background, alpha, status (black 0, white 1, grey anything in between: look for the grey speckles) or the colour output. Use Pick screen and click the plate to choose another screen colour. Hover to read the numbers; drag to compare with the plate. The box writes the node with the same settings.
Loading the plate…
The "Green, glasses" plate is a frame of Tears of Steel, (CC) Blender Foundation | mango.blender.org. The background is an image from my portfolio. The Lab is 8-bit and works on the JPEGs, so it can't be as clean as Nuke on the original plates, but the maths is the same.
Nodes to paste in Nuke
Click a box, copy it (Ctrl+C / Cmd+C) and paste it in Nuke's Node Graph (Ctrl+V / Cmd+V).
The classic colour difference key. g − max(r, b), normalised by the screen colour in the User tab, with the matching despill. The output is premultiplied.
IBK in one Expression. The IBK formula of chapter 07 with the screen colour and the two weights in the User tab, plus the bright-pixel rule. It matches IBKGizmo in pick mode to six decimals.
The additive keyer. B: the plate, A: a Constant with the screen colour or a clean plate. It outputs the luminance of the detail: plus it onto your background, masked by the inverted key.
Status view. Shows the alpha as black (0), white (1) and red (anything in between): every red speckle in the screen or in the subject is a pixel to fix.
Fill the holes with the screen. The premult, blur, unpremult trick of IBKColour on its own: put a matte of the subject in the alpha (white = subject) and it replaces the subject with the colour of the screen around it.
The math series
The other pages about maths in Nuke:
Merge & Premultiplication
The Grade Node
ColorCorrect
Saturation, Hue & HSV
Despill
Matching Colour & Light
Edge Extend
Lin, Log & Gamma
Filtering & Resampling
Edge Detection
Vectors
Trigonometry
Expressions & Curves
And if you like this, have a look at the Matrices in Nuke series.