

An iPhone can shoot plates good enough for visual effects: a feature film, 28 Years Later, was shot mostly on iPhones. But the phone is designed to make a nice video on its own, not a plate for compositing: it changes frame rate, exposure, lens and colour by itself, sharpens, stabilises and compresses. Every one of those helps a holiday video and hurts a track, a key or a match. This page is the list of what to set before you press record, which apps give you the controls the native Camera hides, what to shoot on set besides the take, and how to get the clips into Nuke without losing frames. The Nuke parts I tested in Nuke 17.0v1: what it reads, what it doesn't, and what a variable frame rate clip does to a Read node.
Index
- 01. Can you really shoot VFX on an iPhone?
- 02. Which iPhone does what
- 03. The settings that matter
- 04. Lab: shutter, flicker and ND
- 05. Camera apps: the native one and the others
- 06. Tracking, LiDAR and scanning apps
- 07. What to shoot on set besides the take
- 08. HDRIs and 360° images with the iPhone
- 09. Gaussian splats with the iPhone
- 10. Scanning objects in 3D with the iPhone
- 11. Rig and accessories
- 12. From the phone to Nuke
- 13. The metadata of an iPhone clip
- 14. Matchmoving iPhone footage
- 15. Lab: a variable frame rate clip in Nuke
- 16. Apple Log in Nuke
- 17. Lab: Apple Log against the other log curves
- 18. The checklist before you press record
- 19. Helper: your iPhone clip in Nuke
- 20. Useful links
01. Can you really shoot VFX on an iPhone?
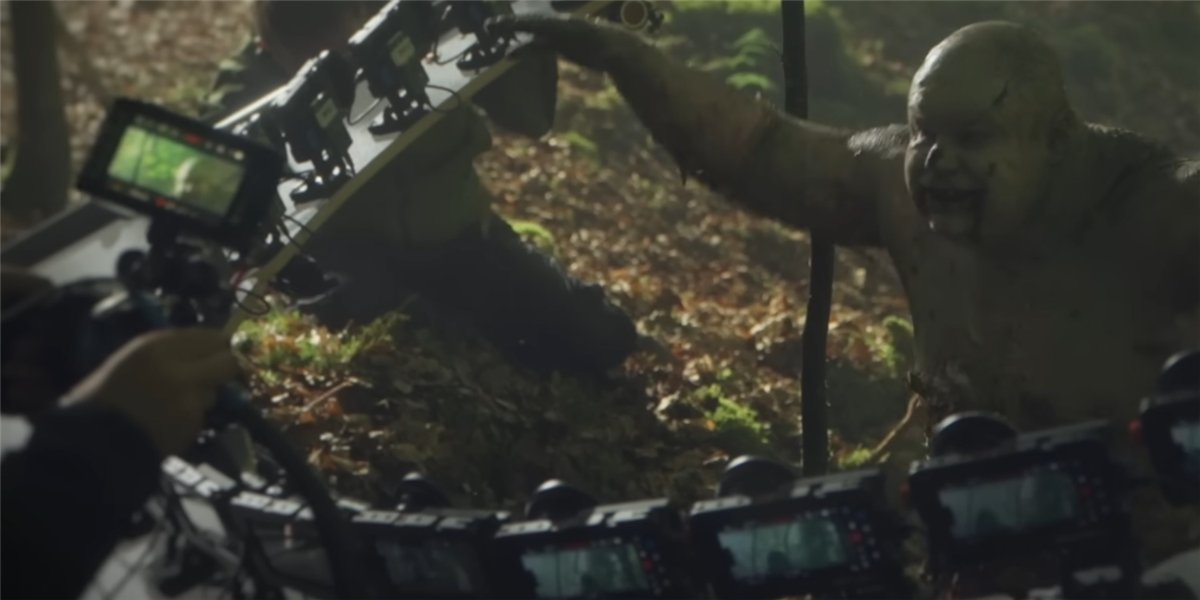
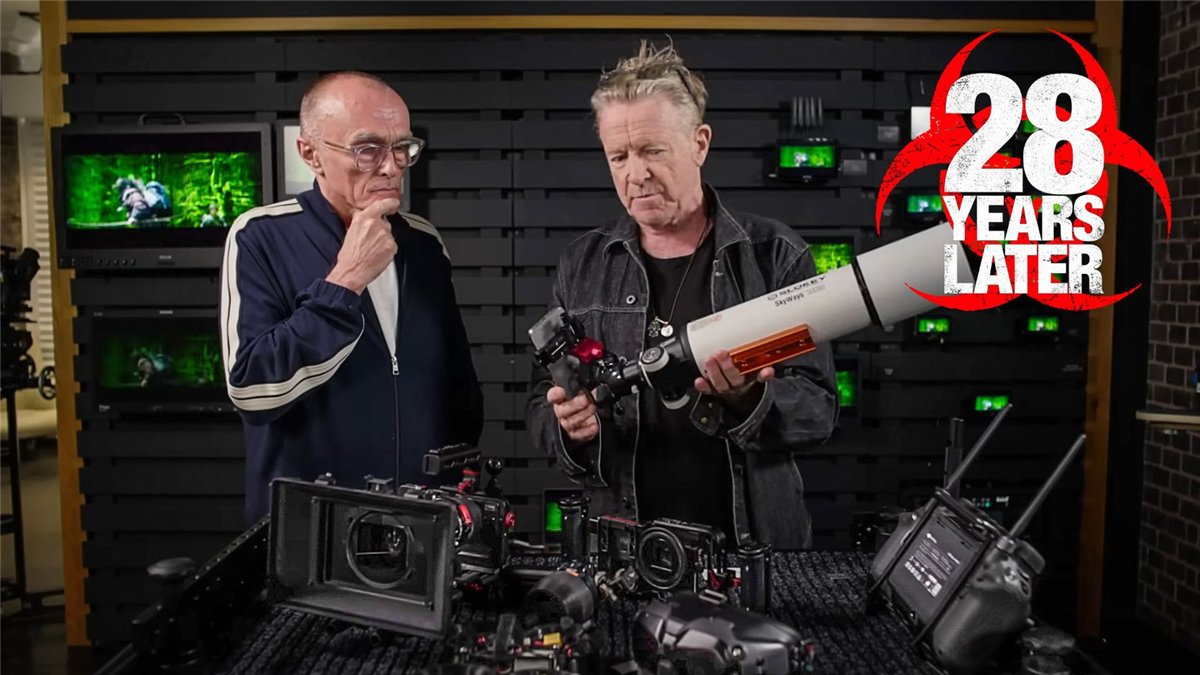
Yes, with the right settings and with a clear idea of where the phone is weaker than a cinema camera. The best known example is 28 Years Later (2025): Danny Boyle and the cinematographer Anthony Dod Mantle shot it with the iPhone 15 Pro Max as the main camera, in cages with cinema lenses and filters, together with other cameras and drones. For some shots they built rigs of 8, 10 and 20 iPhones side by side, firing together, a "poor man's bullet time" that lets the editor pick the angle or sweep around the action.
 28 Years Later: Danny Boyle on shooting with the iPhone (Apple TV)
What the phone gives you, and what it costs in comp:
| the phone | why it matters for VFX | what to do |
|---|---|---|
| A small sensor | More noise in the shadows, less dynamic range than a cinema camera, and almost everything in focus. | Expose well (don't rescue it later), shoot Log, degrain before keying, and add defocus in comp when you need depth. |
| A fixed aperture | Up to the 17 Pro the phone can't close the iris: in daylight the only way to get less light is a faster shutter, which kills the motion blur. The 18 Pro main camera can stop down to f/4, about 2.3 stops: it helps, it doesn't replace the ND. | Use ND filters to keep a 180° shutter (section 04). |
| A rolling shutter | The sensor is read line by line: fast pans lean verticals, and flashes or strobes light only part of the frame. | Move the camera slower, and know that the tracker has to deal with it; mention it to the matchmove artist. |
| Heavy processing | Sharpening adds halos to every edge, noise reduction smears fine detail and grain: both make keys and edge work harder. | Shoot Log and ProRes, and lower sharpening and noise reduction where the app lets you. |
| Automatic everything | Exposure, white balance, focus, lens and even frame rate change during the take. | Lock all of them, or use an app that does (sections 03 and 05). |
| Electronic stabilisation | It crops, moves and warps every frame differently: the lens distortion is no longer the same from frame to frame, so tracks and undistorts don't hold. | Turn it off, put the phone on a tripod or a gimbal. |
| Compressed files | HEVC and H.264 throw detail away, have 8 or 10 bits and, the iPhone way, can have a variable frame rate. | ProRes 422 HQ for anything that goes to VFX, and convert the others before comp (section 12). |
| Always with you | The best camera for reference: HDRIs, textures, set photos, LiDAR scans, Gaussian splats, witness cameras. | Even on a shoot with a cinema camera, a phone on set saves the comp (sections 07 to 10). |
02. Which iPhone does what
For VFX the line is the Pro models: only they record ProRes and Log. The non-Pro iPhones record HEVC and H.264 only; they can still shoot good reference and tracking data, but a plate from them is a compressed, processed video.
| model | ProRes | Apple Log | record to an external SSD | ProRes RAW, Apple Log 2, genlock |
|---|---|---|---|---|
| iPhone 13 Pro / 14 Pro | Yes, internal | No | No (Lightning port) | No |
| iPhone 15 Pro | Yes, internal; 4K60 only to an external drive | Yes | Yes, USB-C (USB 3) | No |
| iPhone 16 Pro | Yes | Yes | Yes | No |
| iPhone 17 Pro | Yes, up to 4K120 to an external drive | Yes, and Apple Log 2 | Yes | Yes: ProRes RAW, Apple Log 2, genlock with compatible hardware |
| iPhone 18 Pro (2026) | Yes, up to 4K120 to an external drive | Yes, Apple Log 2 | Yes | Yes, plus ACES and a variable aperture on the main camera |
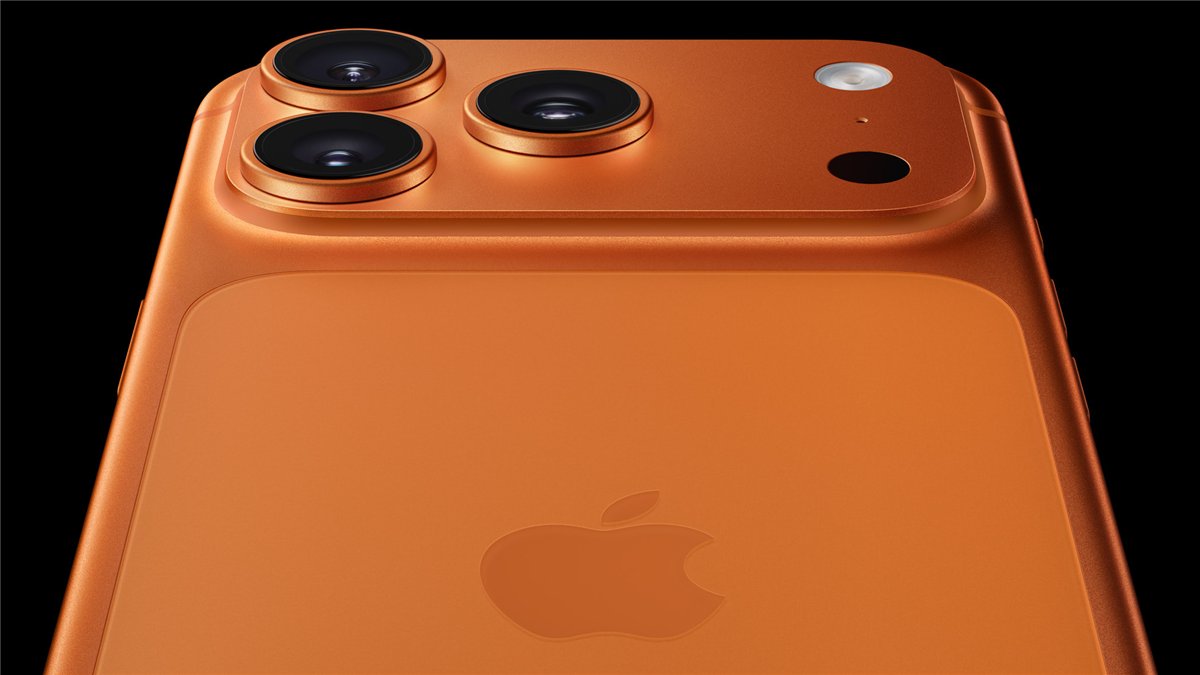
The iPhone 17 Pro has three 48MP cameras: the 13mm ultra wide (f/2.2), the 24mm main (f/1.78, with a 48mm crop) and the 100mm telephoto (f/2.8, with a 200mm crop). The focal lengths Apple gives are 35mm equivalents, not the real focal lengths of these tiny lenses (section 14 has the real ones, and why it matters in the tracker).
The iPhone 18 Pro keeps the 13mm ultra wide and the 100mm telephoto, and has a new main camera: a new sensor behind a 24mm lens with the first iris on an iPhone. Six blades, four stops: f/1.48, f/1.8, f/2.8 and f/4. The 48mm crop shares it.
- Storage. ProRes is big: Apple says ProRes files are up to 30 times larger than HEVC. On the 128 GB models Apple limits internal ProRes to 1080p at 30 or 25 fps, whatever the model. Record to an external SSD (from the 15 Pro), which also keeps the phone cooler.
- The iris on the 18 Pro is for exposure more than for depth of field: on a sensor this small, f/4 against f/1.48 changes the depth of field only a little, and f/4 is about where diffraction starts to soften. What it gives you is 2.9 stops less light without an ND, and sunstars with six points. Lock it for plates, and keep the same f-stop for a whole setup: the lens grid and the bokeh must match.
- Apple Log 2 (17 Pro, 18 Pro) uses the same curve as Apple Log with a new, wider colour space, Apple Wide Gamut. Before you shoot it for VFX, check that your colour pipeline has it (section 16): the configs in Nuke 17.0 only have Apple Log.
- ProRes RAW (17 Pro and 18 Pro, external recording) keeps the sensor data before most of the processing: white balance and ISO can be changed later. It needs software that reads it: Nuke lists ProRes RAW as a format it reads, but check your version, and many pipelines convert it to EXR first.
- Genlock (17 Pro and 18 Pro, with compatible hardware such as Blackmagic's dock) syncs the sensor to an external signal: needed for LED walls and for several phones shooting together.
03. The settings that matter
In order of importance. The native Camera app hides some of these in Settings > Camera, and doesn't have others at all (shutter speed, ISO, Kelvin white balance): for those you need one of the apps in section 05.
1. Log, not HDR or SDR
- Apple Log records the image flat, with the highlights the sensor can hold and without the tone curve and the "look" the phone normally burns in. It's the closest the iPhone gets to a cinema camera file: the same image you can grade later, or convert to linear in Nuke.
- The default HDR video (Dolby Vision, HLG) is a format for HDR screens, with a tone curve and a look already applied. It's not made to be converted back to linear: avoid it for plates.
- In the native app: Settings > Camera > Formats, turn on Apple ProRes and set the ProRes Encoding to Log. On the 15 and 16 Pro the native app records Log only in ProRes.
- Log looks grey and flat on the phone screen. That's normal: judge exposure with the tools of the app (false colour, zebras) or with a viewing LUT, not by eye on the flat image.
2. ProRes 422 HQ, not HEVC or H.264
- ProRes is an intra-frame codec: every frame is stored on its own, 10 bits, with little compression. Nuke reads it directly and quickly.
- HEVC (H.265) is what the iPhone records by default. Nuke 17.0 doesn't read it: I tested 8-bit and 10-bit HEVC in .mov and .mp4, and every Read gives "unsupported codec". You have to convert it first.
- H.264 ("Most Compatible" in the settings) is read by Nuke, but it's 8-bit and very compressed: fine for reference, not for a plate.
3. A fixed frame rate
- Choose the frame rate of the project: 24 (or 23.976) for film, 25 in countries with 50 Hz mains, 30 or 29.97 in countries with 60 Hz.
- Turn off Settings > Camera > Record Video > Auto FPS. With it on, the phone drops to 24 fps in low light by itself.
- Phone video can be VFR, variable frame rate: the time between frames changes during the clip. A VFR clip read in Nuke loses frames and gives errors; section 15 shows what I measured and the command that fixes it. ProRes from a good camera app is constant; check anyway.
4. A 180° shutter, and the ND to get it
- The shutter angle says how long each frame is exposed, as a fraction of the frame: 180° is half the frame, 1/48 s at 24 fps, 1/50 at 25. It's the motion blur audiences are used to, and the blur you will have to match on every CG element.
- The native app chooses the shutter by itself: in daylight it goes to 1/1000 s or faster, and moving things become sharp and stuttering. A plate like this is hard to match: CG with the right motion blur looks wrong next to it.
- Because the iPhone has a fixed aperture, the only way to have a slow shutter in the sun is an ND filter. Outside, count on 6 to 8 stops. The lab in section 04 computes it.
- The 18 Pro is the exception: its main camera (and the 48mm crop) has an iris with four stops, f/1.48, f/1.8, f/2.8 and f/4. Lock it like exposure: in automatic the phone opens it by itself when the light drops, and an aperture change in the middle of a take changes exposure and depth of field together. At f/4 you need about 2.3 stops less ND than at the 17 Pro's f/1.78.
- Use the same shutter for the whole sequence, and write it down: the comp needs it.
5. No flicker
- Many lights pulse twice per mains cycle: 100 times a second in countries with 50 Hz, 120 with 60 Hz. If the exposure isn't a whole number of pulses, the brightness changes from frame to frame, and with a rolling shutter you also get bands rolling through the image.
- Flicker is very expensive to remove in comp and impossible to remove perfectly. Choose the shutter for the lights: the lab tells you which one.
- LED panels and screens can flicker at other frequencies. Shoot a test and look at it on a big screen before the take.
6. Lock exposure, white balance, focus and lens
- Exposure and focus: in the native app, press and hold on the screen until AE/AF LOCK appears; drag the sun icon to correct the exposure. A plate where the exposure breathes can't be matched with one grade.
- White balance: Settings > Camera > Record Video > Lock White Balance (iOS 17 and later) locks it while you record. The camera apps let you set it in Kelvin: choose it once for the scene and leave it.
- Lens: the iPhone changes camera by itself, for example to the ultra wide when you get close (macro) or to the main camera in low light when you're on the tele. Turn on Settings > Camera > Record Video > Lock Camera, and turn on Settings > Camera > Macro Control so you can stop the automatic switch to macro with the flower button. A lens change in the middle of a take is a new lens, new distortion and a new track.
7. Stabilisation off
- Enhanced Stabilization (on by default in recent iOS versions) crops the image and moves it: turn it off. So does Action mode, which crops much more.
- Electronic stabilisation corrects every frame with a different crop and warp, also to hide the rolling shutter. The lens distortion and the optical centre move from frame to frame: undistortion and 3D tracking don't hold any more.
- The optical stabilisation of the sensor (sensor-shift) still works and can't be switched off in the native app: on a tripod it's quiet, but don't count on a perfectly locked frame.
- Want a steady shot? Tripod or gimbal, with the electronic stabilisation off.
8. The rest
- Resolution: 4K. More pixels help tracking, keying and stabilising in comp. If your app has an open gate mode (the whole 4:3 sensor; on the 17 Pro in ProRes RAW, and in Blackmagic Camera at 1920×1440 in Apple Log), it gives room to reframe and to stabilise.
- Lens correction: the phone corrects the distortion of its lenses, especially the ultra wide. Whatever you choose, keep the same setting for the whole shoot, and shoot a grid with that setting.
- Sharpening and noise reduction: lower them where the app lets you. Grain and noise can be removed in comp; halos and smeared detail can't be put back.
- Cinematic mode: no. The depth of field is fake and burned into the image, with errors around hair and edges that you would have to fix.
- Heat and battery: ProRes 4K heats the phone; when it's too hot it lowers the screen brightness and can stop recording. Shade, a cage that lets it breathe, a power bank, an external SSD.
- Airplane mode and Do Not Disturb: a call in the middle of the take stops the recording.
04. Lab: shutter, flicker and ND
Choose the frame rate, the lights you shoot under and the scene. The lab gives the 180° shutter, tells you if it flickers under those lights (and the closest shutter that doesn't), and how much ND you need with the aperture of the lens you chose (on the 18 Pro, the f-stop you set).
Shutter, flicker and ND
Exposure in EV at ISO 100, the photographers' scale: the numbers are typical, use a light meter app for the real scene. The ND is rounded to the nearest stop.
- The tricky pairs are 24 or 23.976 fps under 50 Hz lights (1/48 is 2.08 pulses: use 1/50, 172.8°) and 25 fps under 60 Hz (use 1/60, 150°). With 25 fps in Europe and 30 fps in the US, 180° is always safe.
- A variable ND is quick, but at the strong end (6 stops and more) many show a dark cross or colour shifts, worst on the ultra wide. For plates, fixed NDs are cleaner.
- Raising the ISO in the dark adds noise that you'll then have to remove before keying: a light is better.
05. Camera apps: the native one and the others
The native Camera app is simple and reliable, but it has no shutter, ISO or Kelvin control. For plates, a camera app that works like a cinema camera is worth it. The two free ones, Blackmagic Camera and Final Cut Camera, are the best place to start. I shoot with Blackmagic Camera and ProCam.
| app | price | what it gives you | good for |
|---|---|---|---|
| Camera (Apple) | Built in | ProRes, Apple Log, locks for exposure, white balance and lens. No shutter, ISO or Kelvin. | Reference, quick plates when you can't install anything. Use AE/AF lock and the locks in Settings. |
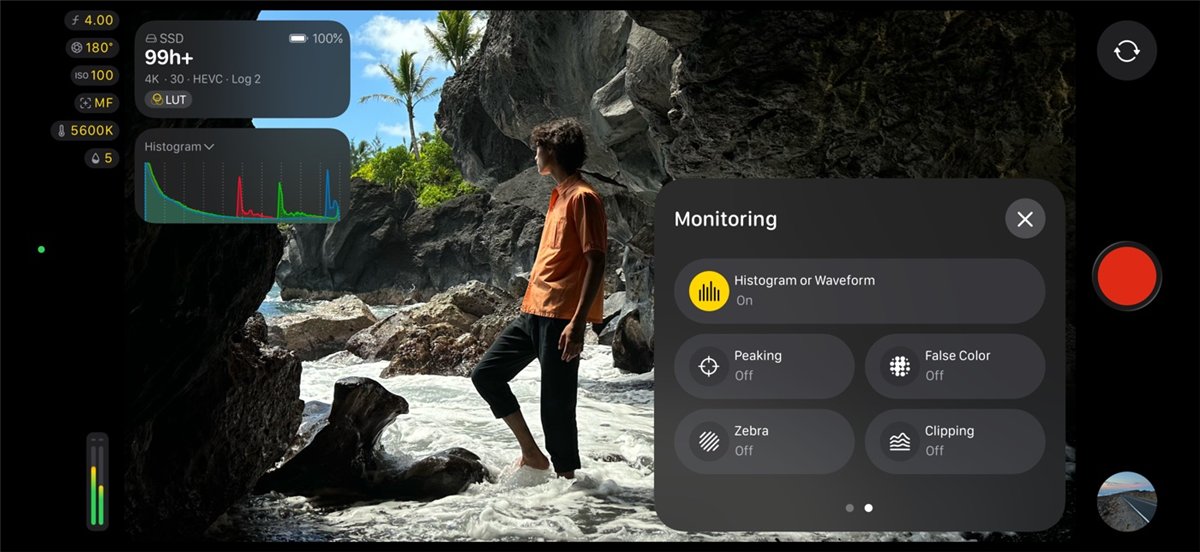
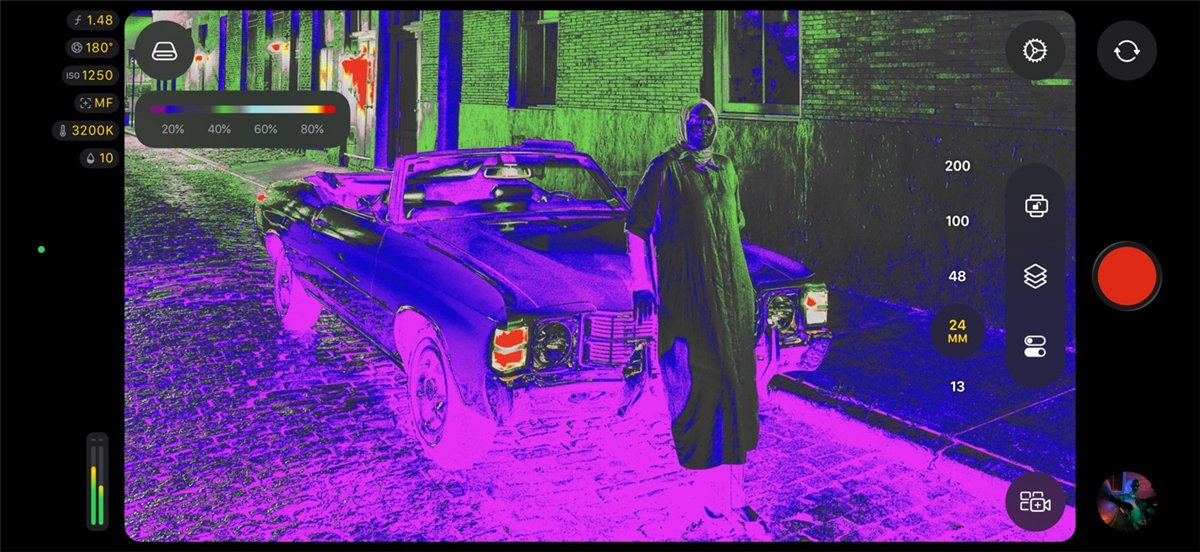
| Blackmagic Camera | Free | The controls of a Blackmagic cinema camera: shutter in degrees or speed (with lock), ISO, Kelvin and tint, manual focus with focus assist, zebras, false colour, histogram. ProRes 422 HQ to Proxy, ProRes RAW to external storage, HEVC, H.264, a 1080p proxy alongside. Rec.709, Rec.2020, P3, Apple Log and Apple Log 2. Stabilisation off, lens correction, noise reduction and sharpening options, open gate, anamorphic desqueeze, timecode with Tentacle Sync, slate metadata (scene, take, lens), LUTs, recording to an external drive, Blackmagic Cloud. From version 3.5, manual iris on the 18 Pro. | The best free choice for plates. The metadata (shutter, ISO, lens, take) goes into the file, and the comp will thank you. |
| Final Cut Camera (Apple) | Free | Manual shutter, ISO and white balance; Apple Log 2 in ProRes or HEVC; ProRes RAW and open gate on the 17 Pro; Live Multicam with up to four devices; timecode and genlock with compatible hardware; manual aperture on the 18 Pro (version 2.4). Some features need iOS 26 or a 17 Pro or later. | Apple's own manual app, and multicam if you edit in Final Cut Pro. |
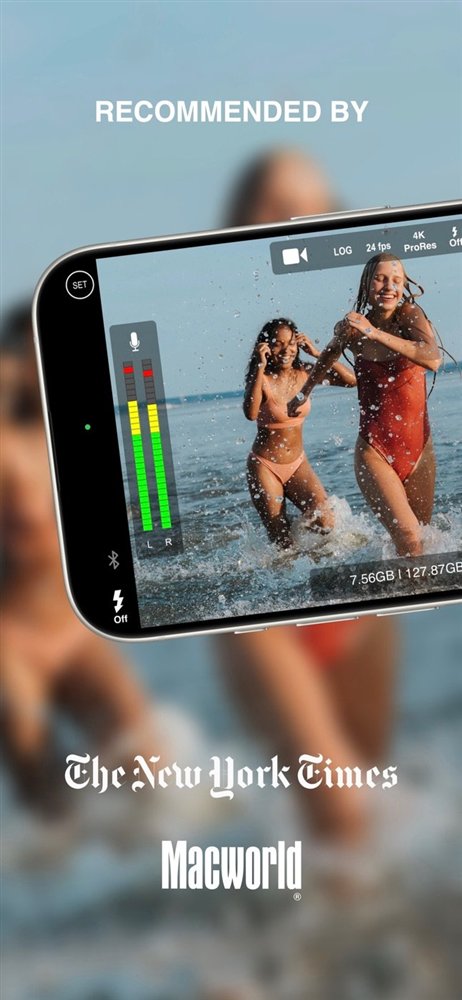
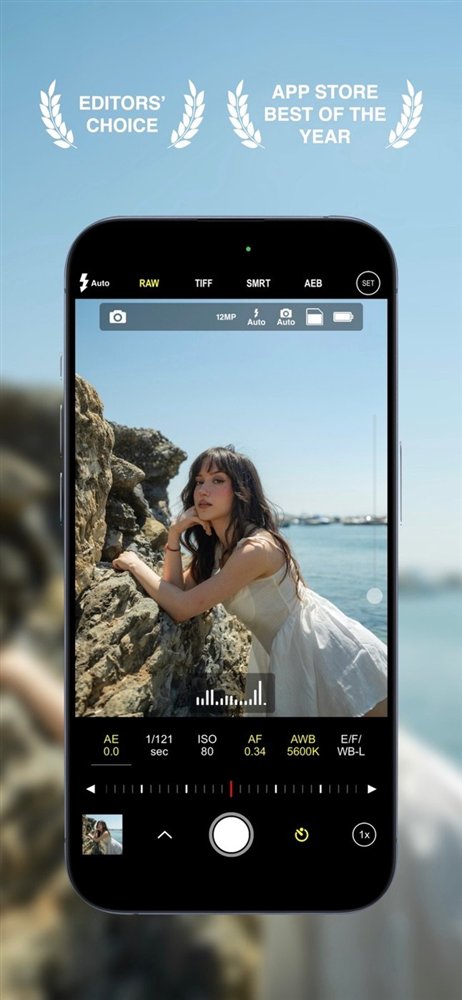
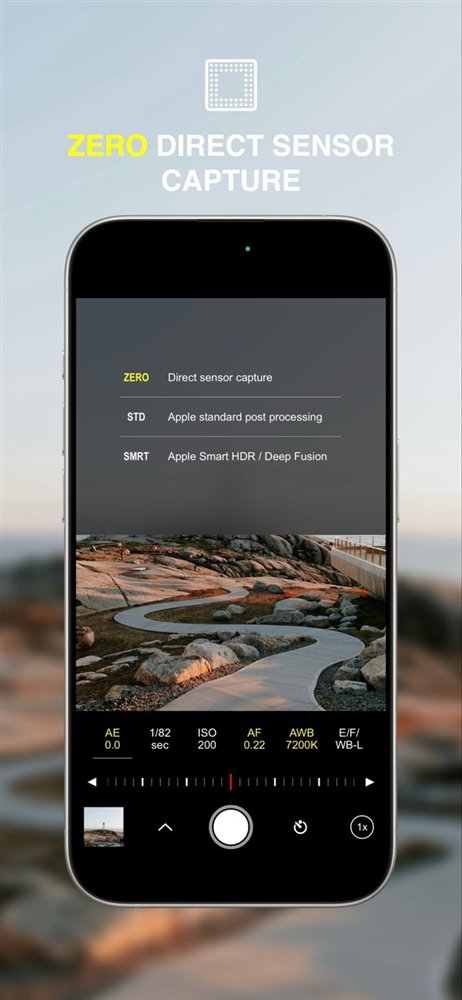
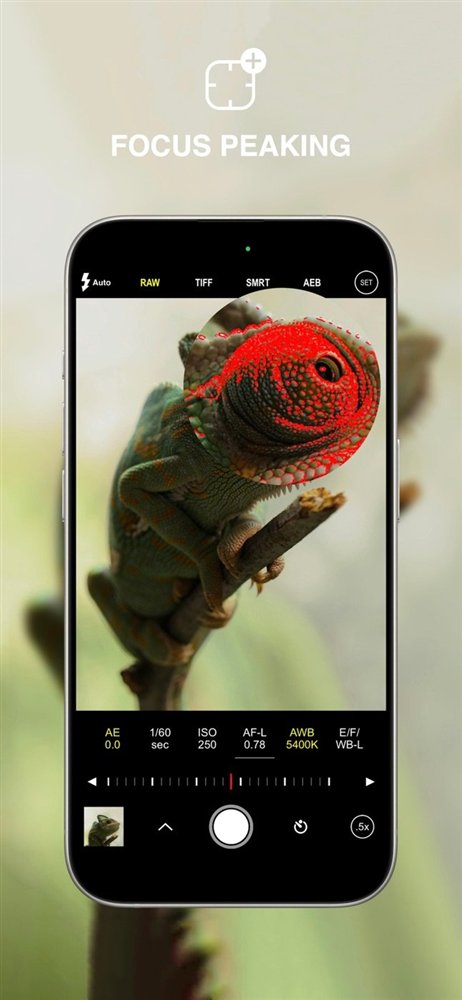
| ProCam (Tinkerworks) | One-time purchase, no subscription | Manual shutter, ISO, focus and white balance in every mode. Video in ProRes with a Log profile (its record screen shows 4K ProRes Log at 24 fps), frame rates from 24 to 240 fps; focus peaking, zebras, a live histogram and audio meters. Photos in RAW (DNG) and TIFF, exposure bracketing in RAW, and a Zero mode that skips Apple's processing. | The one I use with Blackmagic Camera: one app for plates and reference photos, and RAW brackets for HDRIs and chrome balls (section 08). |
| ProCamera (Cocologics) | Subscription, 7-day trial | Not ProCam: a different app with a similar name. ProRes with Log and, on the 17 Pro and later, Log 2 and ProRes RAW; recording to a USB-C drive; RAW exposure bracketing; manual focus with peaking, zebras. | A photo app first, with a serious video mode. |
| Kino (Lux, the makers of Halide) | One-time purchase | Simple manual controls with automatic 180° shutter, Apple Log and Apple Log 2, ProRes, preset looks. | Quick manual shooting with good defaults. |
| Filmic Pro | Subscription | For years the reference manual app. It was bought in 2022 and the team was laid off at the end of 2023: development has slowed down. | Only if you already use it; the free apps above now do more. |
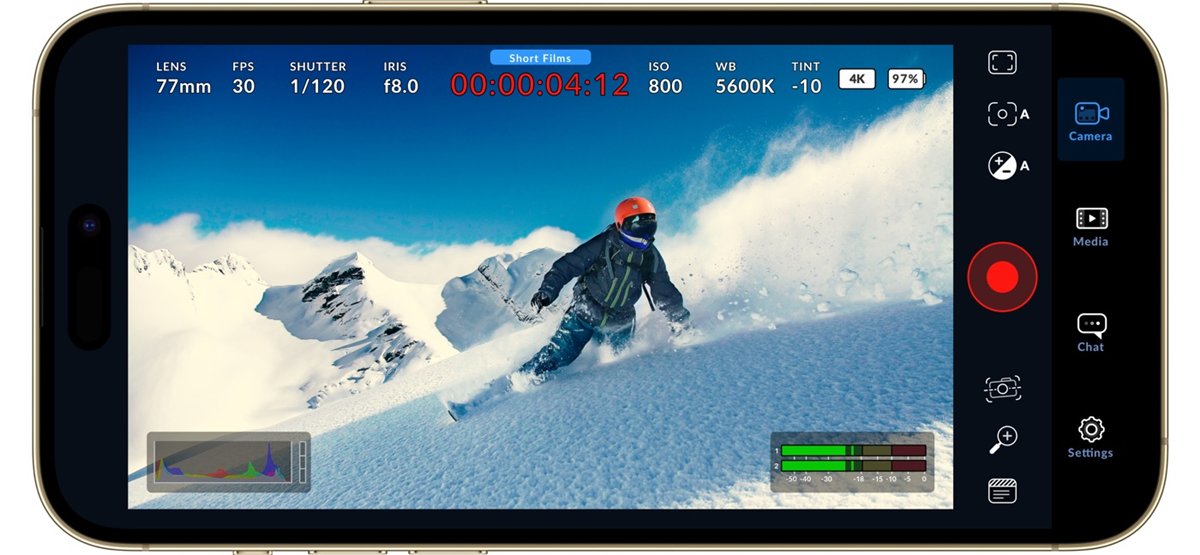
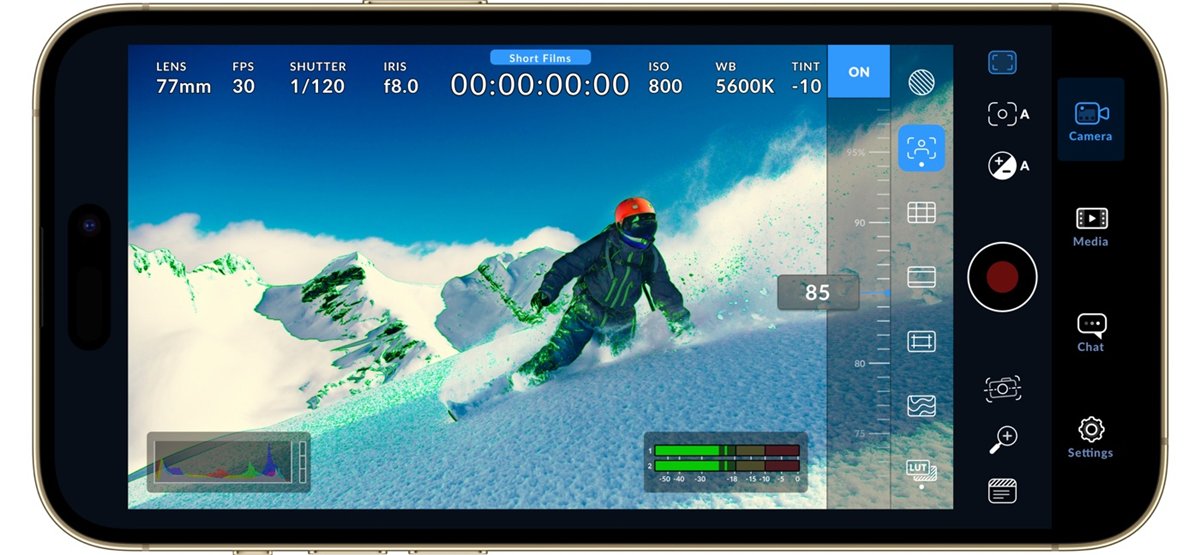
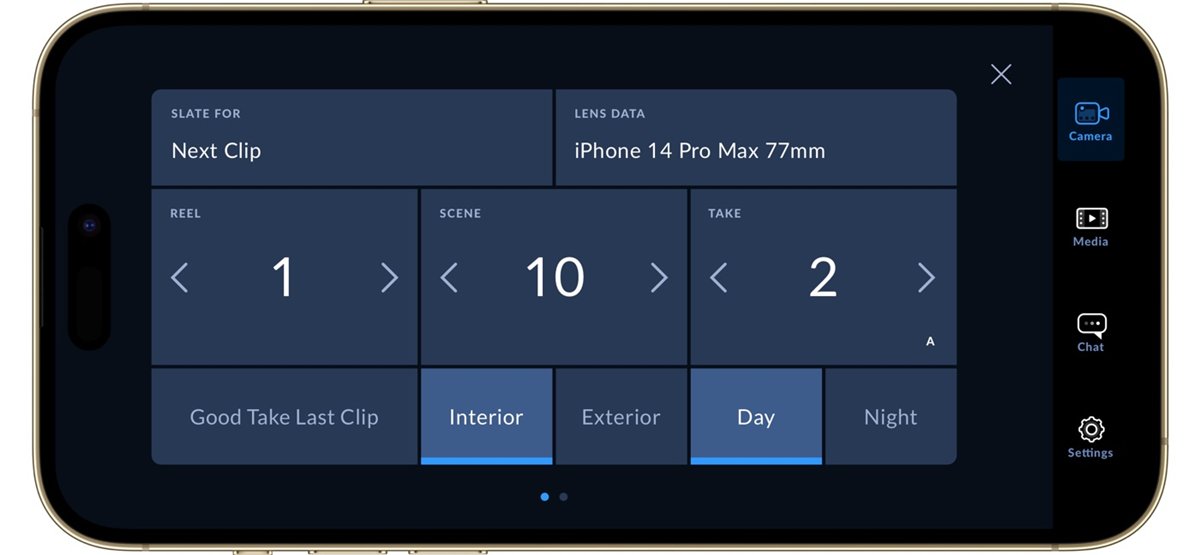
 Blackmagic Camera: the full guide (Simon Horrocks)
 How to use Final Cut Camera (Tyler Stalman)
- Whatever app you choose, test it first: record 30 seconds, copy the file to the computer and read it in Nuke. Check frame rate, number of frames, colour space and metadata before the shoot, not after.
- Use one app for a whole sequence: different apps process the image differently, even with the same settings.
06. Tracking, LiDAR and scanning apps
The iPhone knows where it is: ARKit tracks the movement of the phone with the camera and the motion sensors, and the Pro models have a LiDAR scanner that measures depth. Some apps record this together with the video, so the camera move comes already tracked. It's not a replacement for a proper matchmove on a final shot, but it's a very good start, it's perfect for previs and virtual production, and the scans are great reference.
| app | what it records | exports | notes |
|---|---|---|---|
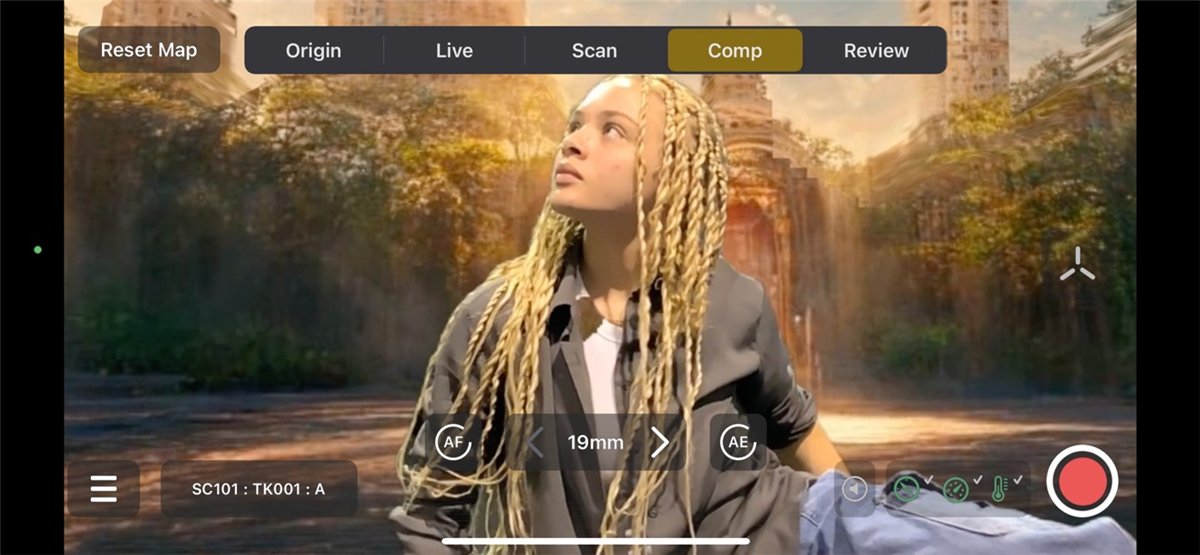
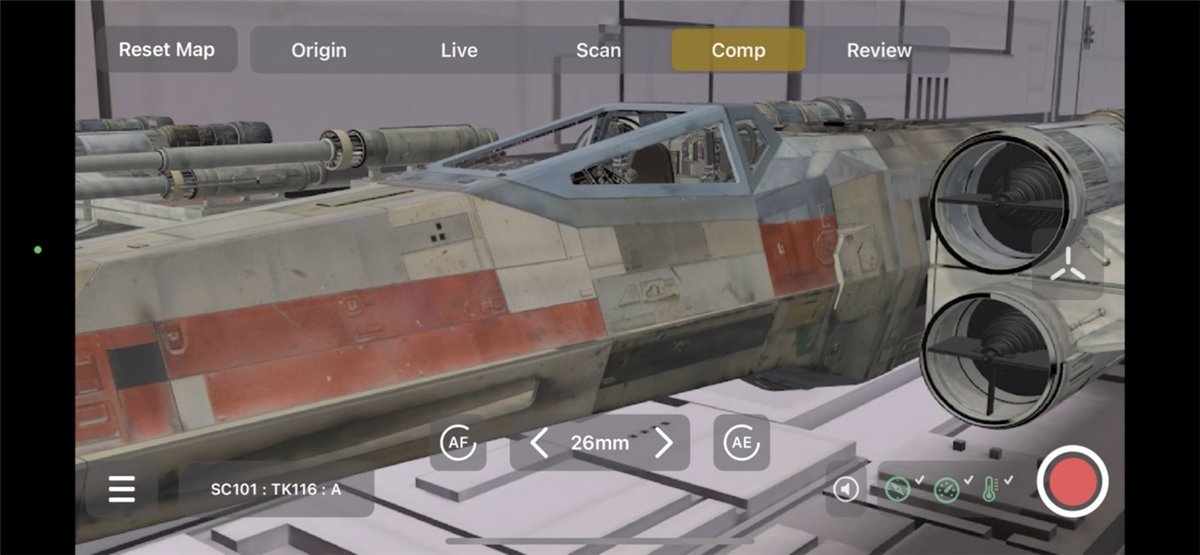
| Lightcraft Jetset | Video with the live camera track and scans of the set; shows CG in the viewfinder. | With Autoshot: Nuke, Blender, Unreal, SynthEyes, Resolve; USD cameras. | Free tier with a watermarked 1080p H.264; paid subscriptions for full quality. Made for virtual production. |
| Omniscient | Video, camera track and a scan of the space. | Alembic, USD, FBX cameras, OBJ scans, .mov video. | Imports into Nuke through Alembic or FBX (no dedicated plugin). |
| CamTrackAR (FXhome) | Video with the camera track and anchor points. | HitFilm and Blender for free; more formats in the paid tier. | Easy way to get a camera into Blender. |
| Skyglass | Virtual production with LiDAR and cloud rendering. | Camera data and video. | Real-time CG backgrounds on the phone. |
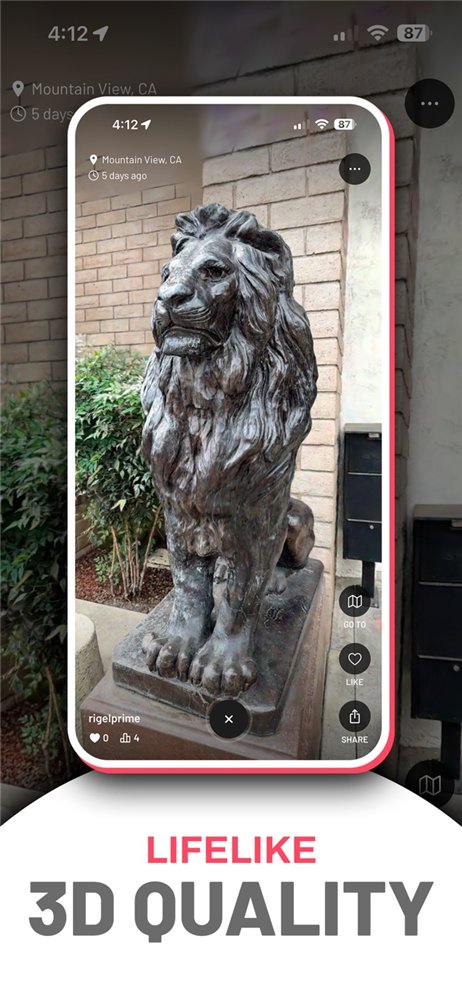
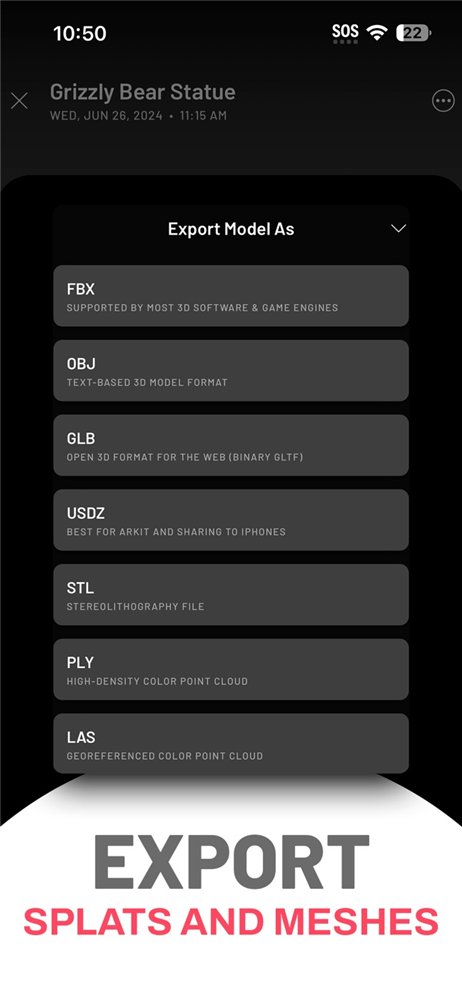
| Scaniverse | LiDAR and photo scans of objects and spaces, also Gaussian splats. | FBX, OBJ, GLB, USDZ, STL, PLY, LAS. | Free, with good exports: my first choice for set scans. |
| Polycam | LiDAR and photogrammetry scans. | Free: glTF; paid: OBJ, FBX and more. | Very good scans; most exports need a subscription. |
 Jetset Cine: the iPhone as a camera tracker (VP Land)
 Scaniverse: the best meshes and splats (Niantic)
- The AR track is noisy on fine detail and drifts on long takes: refine it in the tracker or use it as a starting point.
- The LiDAR scan is coarse (a few centimetres) and ranges about 5 metres: good to place a ground plane, walls and big objects, not for small detail.
- Scale is real: AR tracks and scans are in metres. In Nuke, a scene in the right scale makes lights, defocus and depth effects behave.
- More: scanning a single object in section 10; a full matchmove of the plate, with the lens numbers and the distortion, in section 14.
07. What to shoot on set besides the take
A plate without reference is a guess. These take a few minutes on set and save days in comp. Most of them a phone can do, even when the main camera is a cinema camera.
- A clean plate: the same move or the same locked frame without actors, for every setup. It's the first thing you need for paint, cleanup and removing rigs.
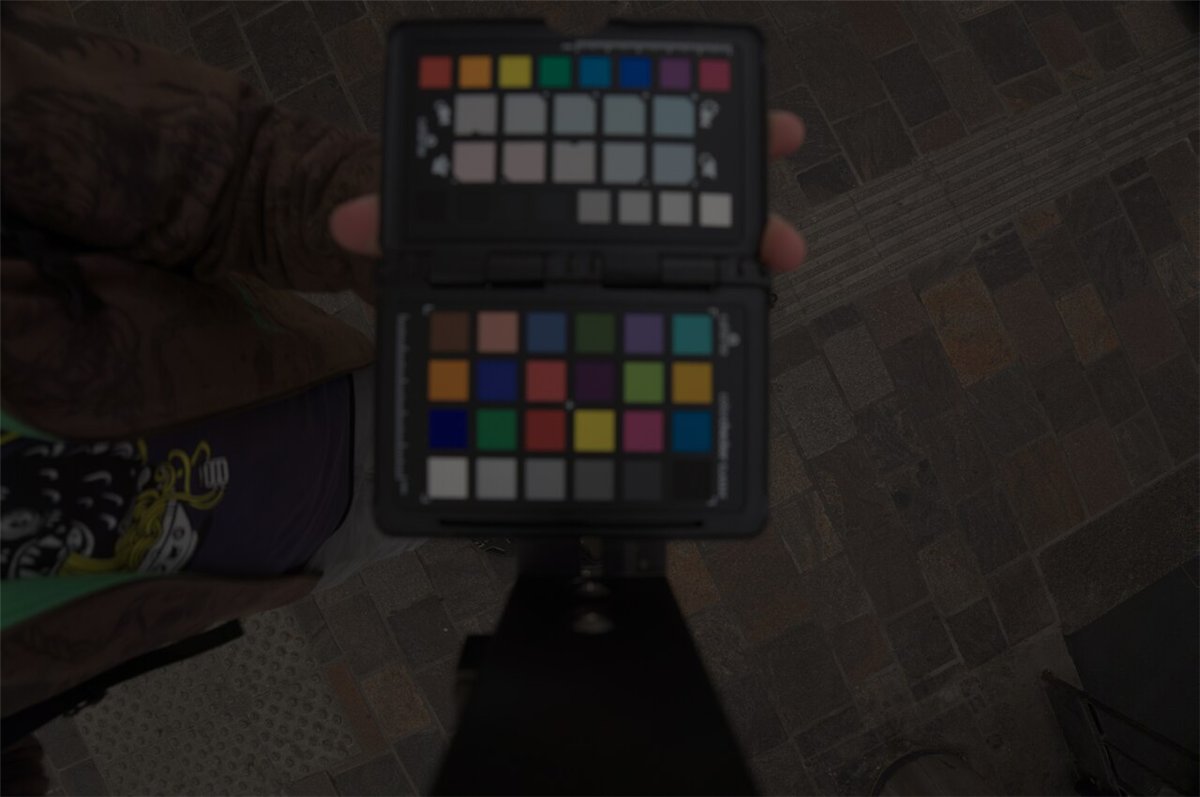
- A colour chart and a grey card at the start of each setup, in the light of the scene. They tell the comp, and the CG lighting, what neutral and 18% grey are on this plate.
- A grey ball and a chrome ball where the CG will be: the grey ball shows the direction and softness of the light, the chrome ball reflects the whole environment.
- An HDRI of the environment, from the position of the CG, with bracketed exposures. A normal phone panorama isn't HDR: use an HDRI app, a 360° camera or a camera with bracketing (section 08).
- A lens grid (a checkerboard or distortion chart) for every lens and setting you use, with the same lens correction and resolution as the plates. This is what lets you undistort and redistort: no chart? Print my checkerboard (section 14, and my STMap page).
- A LiDAR scan of the set and measurements: heights, distances between landmarks, the height of the camera from the ground. Matchmove will ask for them.
- Tracking markers on flat surfaces and on green screens, if the shot will be tracked. Remove them in comp later: it's easier than tracking a plain wall.
- Reference photos in ProRAW at 48MP: textures, set details, the light rig, the actors' costumes in the light of the scene.
- A slate or at least metadata in the file: scene, take, lens, shutter, ISO, white balance, frame rate. Blackmagic Camera writes them into the clip.
08. HDRIs and 360° images with the iPhone
An HDRI is a 360° photo saved in floating point, with the real brightness of everything in it, the sun and the lamps included. CG uses it to light and reflect the scene; in comp it gives the reflections, an environment for the 3D and a reference of where the light comes from. It needs two things: the whole sphere (a 2:1 lat-long, or equirectangular, image) and the whole range of light, from the shadows to the sun (several exposures merged into a 32-bit EXR). A normal phone panorama does the first badly and the second not at all. Some apps now do both with the iPhone alone; a 360° camera does them faster and better.
Why one exposure isn't enough: measured in Nuke
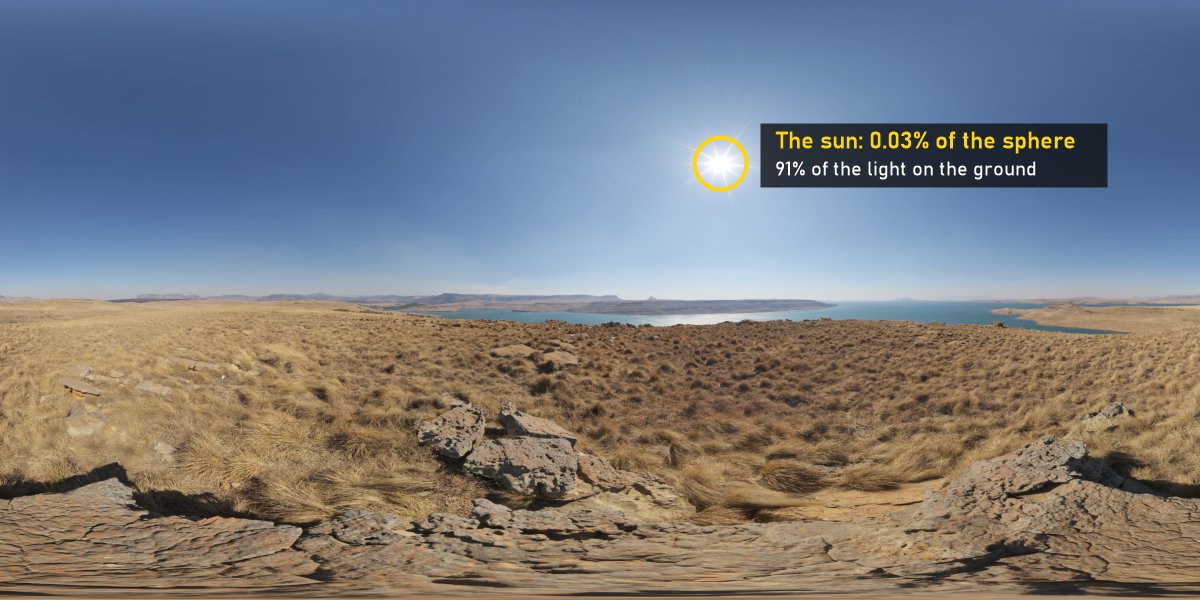
I exposed the HDRI so that its average sits at 0.18, like a camera on auto would, and then measured what a single exposure keeps. The light on the ground is the light on an upward-facing surface, weighted the way a diffuse surface sees it.
- 25 stops from the darkest to the brightest pixel. A phone exposure holds about 10 to 12.
- The sun reads 22,400, 16.9 stops above 0.18. It covers 0.03% of the sphere and gives 91% of the light on the ground.
- Clipped at 1.0, as one exposure would be, the HDRI keeps 9.1% of the light. Four more stops of brackets (clipped at 16) keep 9.8%: to light with the sun you have to reach the sun, or replace it with a CG light.
- For reflections and fill light the clipped sun matters much less: the sky, the ground and the shapes around are all there.
Apps that shoot an HDRI with the iPhone alone
| app | what it does | output | notes |
|---|---|---|---|
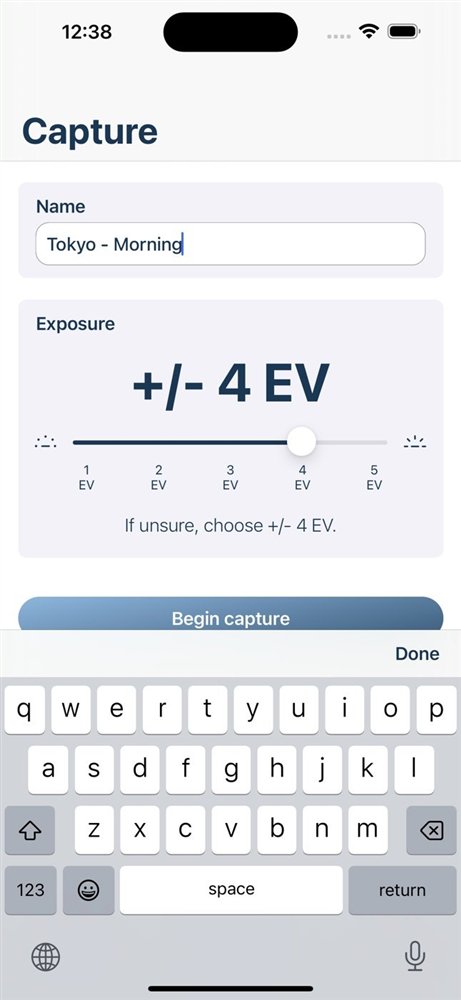
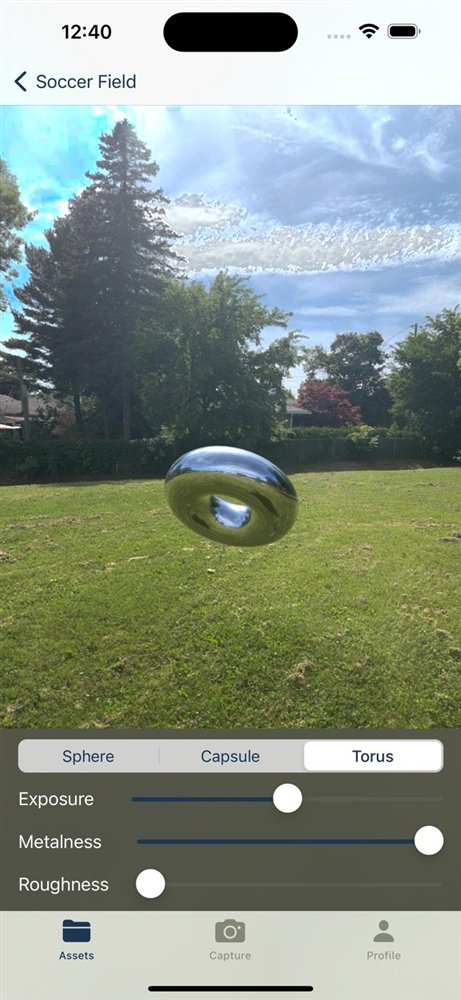
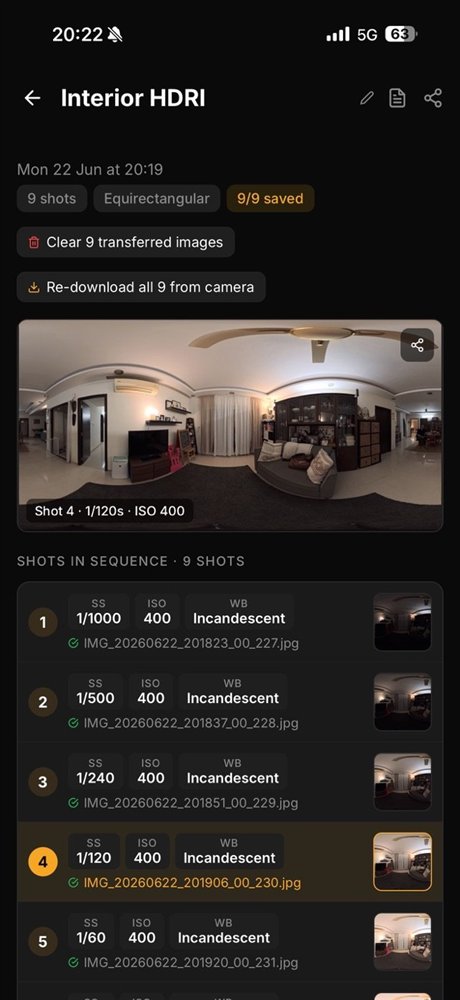
| HDReye | Guides you through a bracketed panorama: you choose the range (it suggests ±4 EV) and follow the prompts; stitched online. | 32-bit EXR, JPEG. | Free to shoot; $2.99 per HDRI or $6.99 a month (US prices). About 90 seconds a sphere. Reviews are mixed on seams and resolution: good for reflections and quick lighting. |
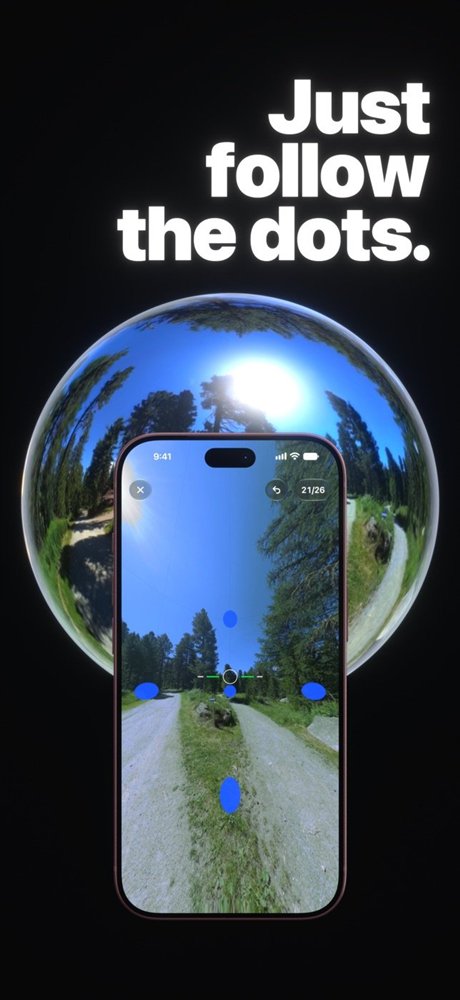
| HDRI Studio | 18 dots to follow (26 in tight spaces): at each one the ultra wide shoots a RAW bracket. One extra photo of the ground removes your feet. Rendered online. | 32-bit EXR, scene-linear Rec.709, exact 2:1, 4K or 8K. | New in 2026: test it before a job. Two renders free, then credits or Pro; Pro also exports the original RAW brackets. Needs iOS 17 and a RAW-capable ultra wide. |
| Teleport: 360° Camera | From the makers of HDReye: guided 360° photo spheres. | 360° JPEG, not HDR. | Backgrounds, location reference, VR and Street View. |
| 360 Photo Cam | A few photos, a sphere in seconds. | 360° JPEG, not HDR. | Quick location reference. |
| ProCam and a stitcher | AEB bracketing in RAW on a tripod with a nodal clamp, every position by hand. | DNG brackets: merge and stitch in PTGui (paid) or Hugin (free). | Full control and the highest resolution from a phone, but slow, and anything that moves ghosts. |
Do you need a 360° camera?
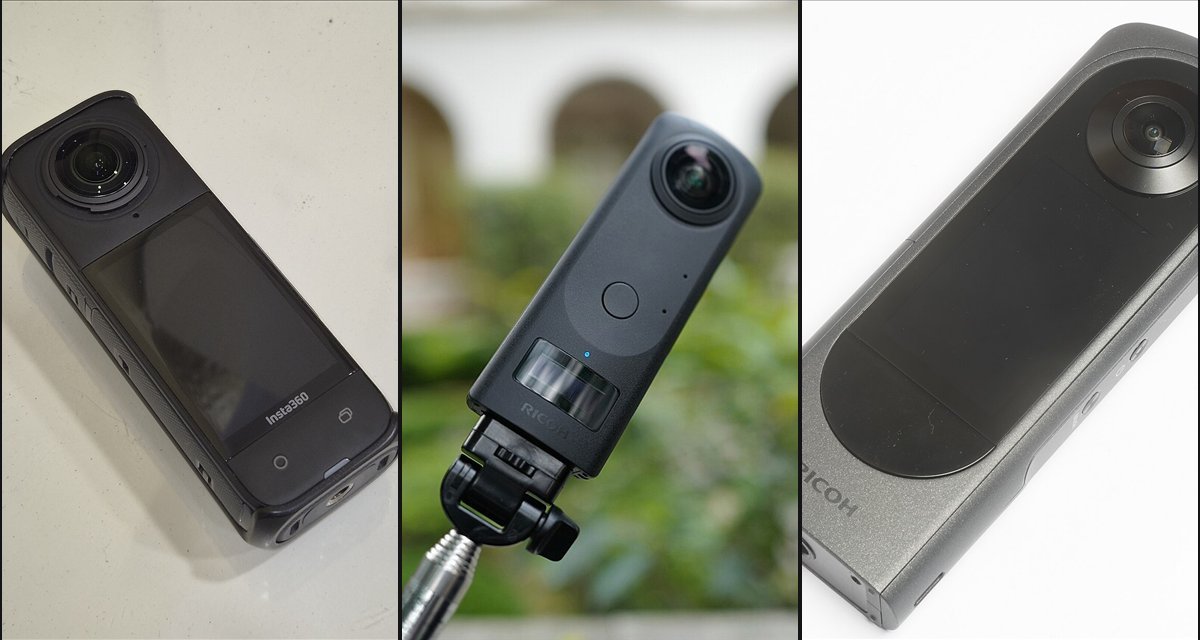
For reflections, fill and a lighting reference now and then, no: an app or a chrome ball is enough. If you shoot an HDRI on every setup, yes: a 360° camera has two fisheye lenses back to back, so every bracket covers the whole sphere in one shot. A full set takes under a minute, nothing to stitch by hand, and the result is the same every time. For hero lighting in full sun, a stills camera with a fisheye still gives the most range and resolution.
| route | resolution | range and sun | time | good for |
|---|---|---|---|---|
| iPhone app (HDReye, HDRI Studio) | 4K to 8K lat-long | Bracketed; the sun usually clips | 1.5 to 3 minutes | Reflections, fill, quick lighting, previs |
| iPhone and a chrome ball | About 2K usable; the back of the sphere is stretched | RAW brackets with ProCam; you're in the reflection | 1 minute | The direction and colour of the light, on every setup |
| 360° camera (Insta360 X series, Ricoh Theta) | Insta360 X5: 72MP photos, 11904×5952, DNG | Brackets in the camera or from an app; very bright suns still clip | Under a minute | HDRIs on every setup, location 360s, splats |
| Camera, fisheye and nodal head | 16K and more | 7 to 9 brackets 2 EV apart, plus an ND for the sun | 5 to 10 minutes | Hero lighting, HDRI libraries |
How to shoot it
- Where the CG will be, at the height of the CG object (or of the camera, for reflections). An HDRI shot ten metres away lights from the wrong place.
- Lock everything but the shutter: lowest ISO, white balance in Kelvin (5600K for daylight), focus. Only the shutter changes between brackets.
- Brackets 2 EV apart, from the exposure where the darkest shadow has detail to the one where the brightest light no longer clips. Check the darkest frame: no white pixels on the lamps.
- The sun: with a phone it will clip. Either shoot one more exposure through an ND 3.0 (10 stops), or let it clip and put a directional CG light where the shadows point. The HDRI gives the sky and the bounce, the light gives the sun.
- Turn around the lens, not around your hand: the apps tell you, a nodal clamp does it for you. Nobody walking through.
- Grey ball, chrome ball and colour chart in the same spot (section 07): they let you check the HDRI against the plate.
- Write down the time and where north is: the CG team will match the sun.
In Nuke
- Read: the EXRs of the phone apps are scene-linear Rec.709. In the studio config that's Linear Rec.709 (sRGB); Nuke converts it to ACEScg.
- SphericalTransform converts between Lat Long map, Mirror Ball, Cube, Angular map 180 and 360, Sphere and 180° Fisheye. For a chrome ball: input Mirror Ball, output Lat Long map, in a 2:1 format.
- In 3D: the classic EnvironmentLight takes the lat-long on its input; the GeoDomeLight of the new 3D system takes it as its texture file.
- Check it before you hand it over: exposure it so the grey ball, or a grey card in the HDRI, reads 0.18, the same as on the plate.
 HDReye: an HDRI with your phone (Dimitris Katsafouros)
 Create HDRIs with your phone (Nik Kottmann)
 The fastest HDRI for VFX: Ricoh Theta Z1 (Alex Pearce)
 Creating HDRIs with the Insta360 X5 (bdsCovered)
Helper: your HDRI, route and brackets
Your HDRI, step by step
The answer below updates as you click. The range of each scene is a typical value; the sun is the one I measured above.
1 What is it for?
2 What light?
3 What do you have?
Python: paste it in the Script Editor, then point the Read at your file
09. Gaussian splats with the iPhone
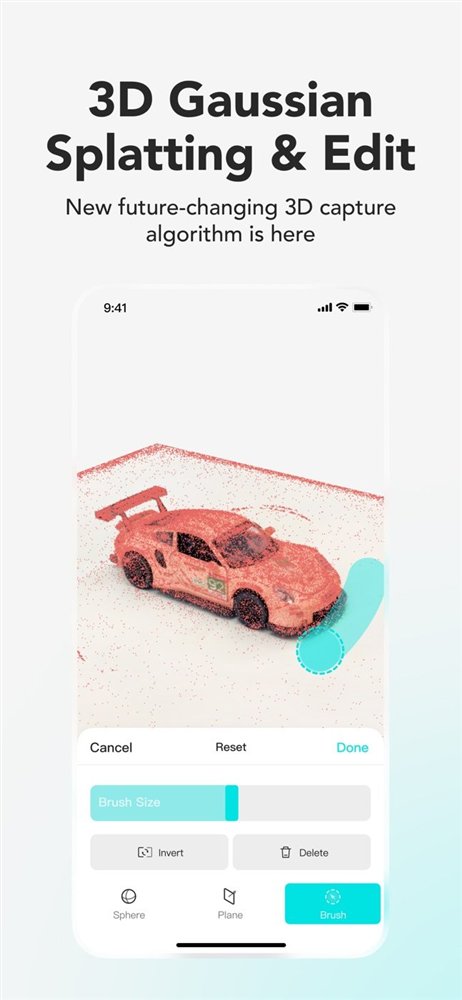
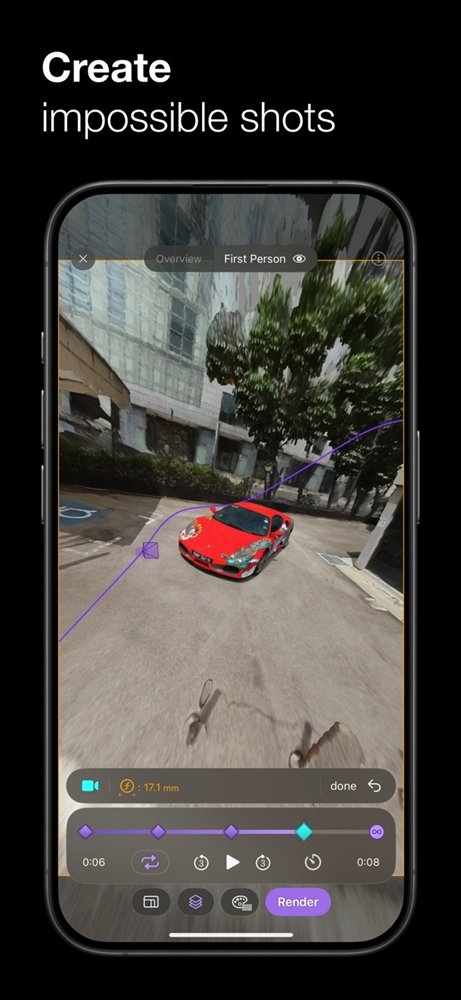
A Gaussian splat is a 3D capture made of hundreds of thousands, or millions, of small, soft, coloured and semi-transparent blobs, trained from photos or a video of a place or an object. It isn't a mesh: there are no surfaces, no UVs, and the light is baked in. But it renders the look of the real thing, fine detail, hair, leaves, glass and shine that changes with the angle, where a photogrammetry mesh falls apart. For VFX it means set and prop reference you can look around, environments and set extensions for moves close to the path you captured, previs and layout, and, since Nuke 17.0, renders straight in comp.
The apps
| app | where it trains | exports | notes |
|---|---|---|---|
| Scaniverse (Niantic Spatial) | On the phone for phone captures; larger areas and 360° cameras in the cloud. | PLY, SPZ (Niantic's open format); USDZ on the paid plans. | Free for phone splats; commercial rights with Pro. The easiest start. |
| Polycam | Cloud. | PLY. | LiDAR, photogrammetry and splats in one app; most exports need a subscription. |
| KIRI Engine | Cloud. | PLY. | Crop and delete splats in the app; very good on objects. |
| Luma 3D Capture | Cloud. | PLY; plugins for Unreal, Unity and Blender. | Camera moves rendered in the app. Luma now works on AI video and the app was last updated in January 2026: fine for tests, not for a pipeline. |
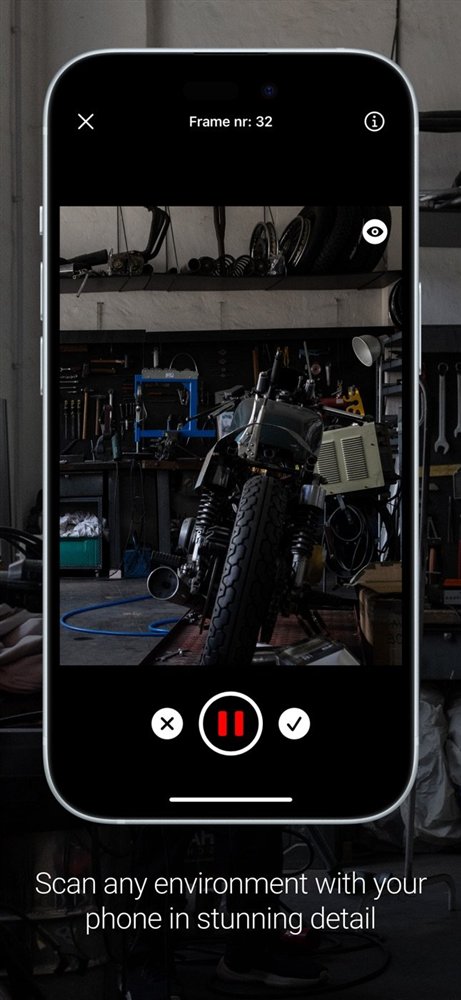
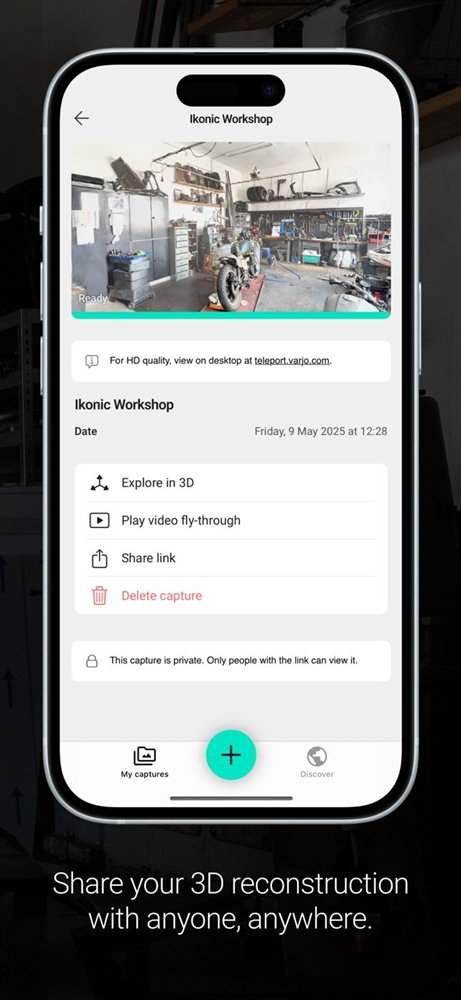
| Teleport (Varjo) | Cloud. | View on the phone, in the browser and on the desktop. | Made for whole rooms and spaces. |
| On the computer | Postshot (Jawset: Windows, NVIDIA GPU), Brush (open source: Windows, macOS, Linux). | PLY. | Train from your own iPhone photos or video, with cameras from COLMAP or RealityScan. The most control. Clean up in SuperSplat, free in the browser. |
How to shoot a splat: the opposite of a plate
- A fast shutter, 1/250 or faster. A plate wants motion blur (180°); a splat wants every frame sharp. Blackmagic Camera or ProCam lock it.
- Lock exposure, white balance, focus and lens. If the phone changes them during the capture, the colours flicker across the splat and the lens switch breaks the cameras.
- Slowly, with overlap: two or three loops around an object at different heights; in a space, walk a path looking both inwards and outwards.
- Nothing moving, soft light (overcast is best), and watch your own shadow.
- Photos beat video on sharpness: RAW or 48MP photos with lots of overlap. From 4K video, 2 or 3 frames a second are enough.
- Measure something: a splat trained from photos has no real scale, unless the app uses LiDAR or ARKit.
Splats in Nuke 17

Nuke 17.0 reads splats natively in the new 3D system, and 17.1 adds animated splats, SPLAT export and basic relighting. I loaded a public splat and a test PLY I wrote, and rendered both headless. This is what I found.
- GeoImport reads .ply and .splat. In the interface, the Import Scene Graph dialog opens; from Python, setting the file is enough.
- SplatRender has three inputs: bg, cam and scn. The cam input takes a Camera node (Camera4, or the camera from your track); it refuses a GeoCamera, and a GeoCamera added to the scene doesn't drive the render. The splat goes into scn.
- Upside down: scans trained with COLMAP-style cameras come in with y pointing down. A GeoTransform with rotate x 180 stands them up.
- Out of SplatRender: rgba and depth.Z, in ACEScg by default (output_colorspace), with motion blur and deep options. With depth you can ZDefocus and hold out like any CG render.
- Cleanup: a FieldShape into GeoDeletePoints removes the floaters (or everything outside, with Invert); GeoGrade grades the splat; GeoMerge puts several together.
- The limits: the light is baked in, and the splat gets worse the further the render camera goes from the views you shot.
Python, tested in Nuke 17.0v1: a splat, stood upright and rendered through a camera
import nuke
scan = nuke.nodes.GeoImport()
scan['file'].setValue('/path/to/scan.ply') # .ply or .splat
fix = nuke.nodes.GeoTransform(inputs=[scan])
fix['rotate'].setValue([180, 0, 0]) # COLMAP-style scans come in upside down
cam = nuke.nodes.Camera4() # or the camera from your track
render = nuke.nodes.SplatRender()
render.setInput(1, cam) # cam
render.setInput(2, fix) # scn Nuke 17.0: intro to Gaussian splats (Foundry)
 Your phone is a 3D camera (Radiance Fields)
 A Gaussian splat with only your iPhone (Dmitry Kuz)
 Gaussian splatting from video with Postshot (Black Mixture)
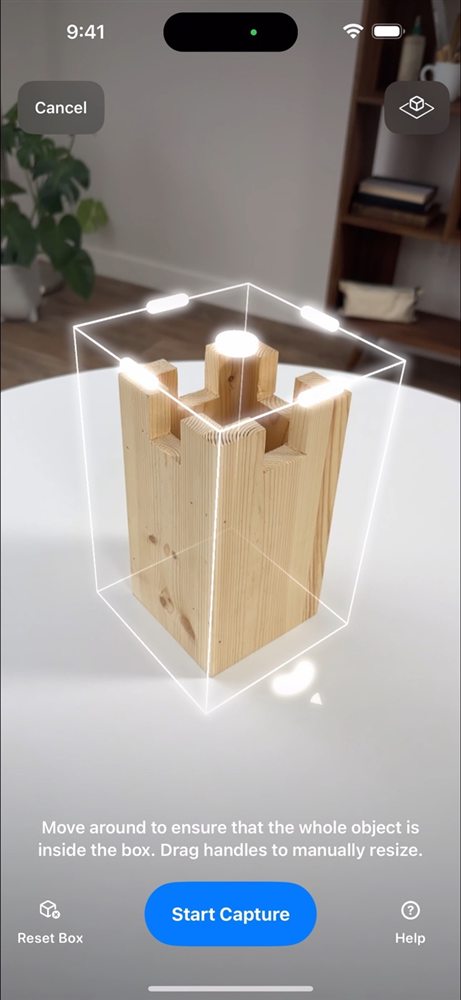
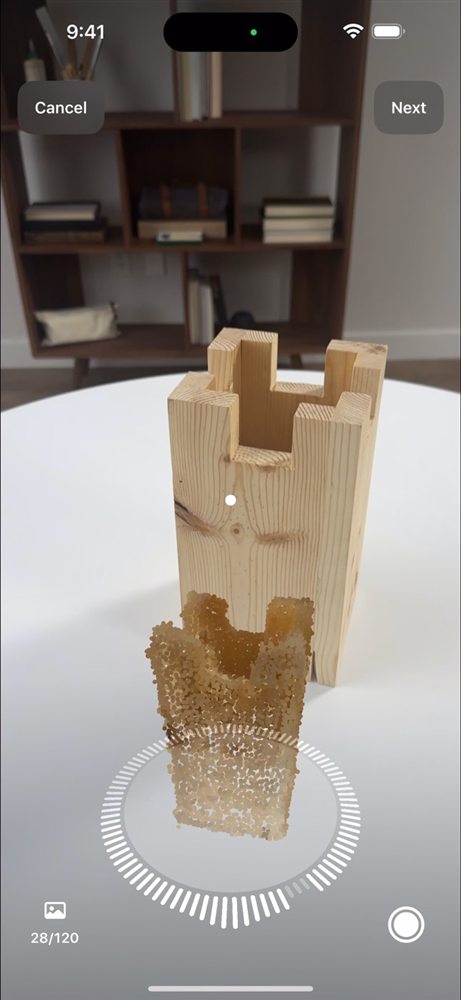
10. Scanning objects in 3D with the iPhone
A prop, a rock, a costume piece, the hero object that CG has to replace or extend: a scan gives the comp a mesh with the real shape and a texture with the real colours. You use it to project cleanups, catch shadows, hold out CG, build a CG double, and as geometry for an object track. A phone scan doesn't replace a scanning studio, but on a set with no scanning budget it's what you have, and it's often enough.
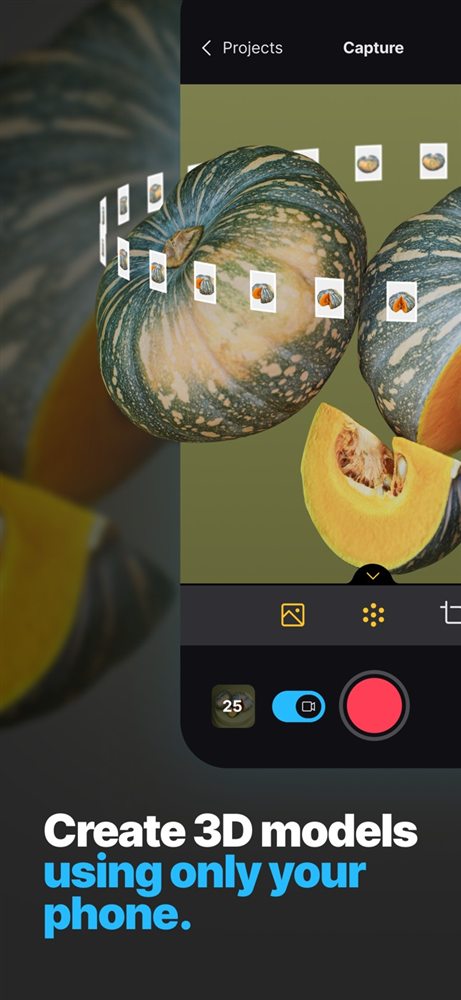
There are three ways to do it. LiDAR is fast and has real scale, but it's coarse (a few centimetres): rooms and big objects. Photogrammetry builds the mesh from many photos around the object: much more detail and a good texture, but it needs a surface with detail on it, and it has no scale of its own. Neural reconstruction (KIRI's Featureless Object Scan) is for the shiny and plain objects that photogrammetry can't solve.
| app | how it scans | exports | price | notes |
|---|---|---|---|---|
| RealityScan Mobile (Epic Games) | Photogrammetry with AR guidance: it shows you which parts already have enough photos. Processed in the cloud. | Uploads to Sketchfab, where you download the model. | Free | From the team behind RealityCapture, now RealityScan on the desktop: for big or difficult scans, shoot with the phone and process on the computer. |
| Reality Composer (Apple) | Object Capture: guided photogrammetry, processed on the phone. Needs an iPhone 12 Pro or later (LiDAR). | USDZ | Free | Very clean on small objects, and the scale is real. Only USDZ, which Nuke 17 reads (below). |
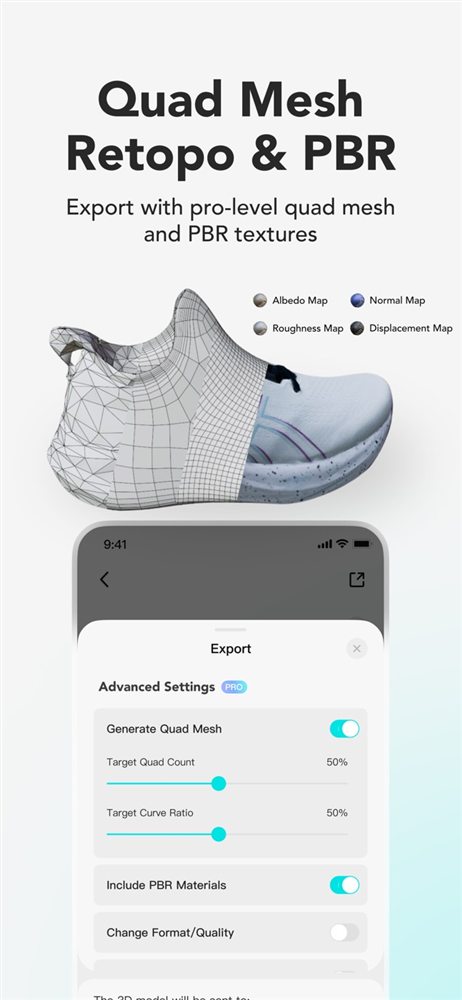
| KIRI Engine | Photo Scan (photogrammetry), Featureless Object Scan (neural, for shiny or plain objects), LiDAR and splats. | OBJ, FBX, glTF, GLB, USDZ, STL, PLY | Free with at least 3 exports a week; Pro subscription | Auto masking, so the object can move during the capture; quad mesh and PBR textures on export. |
| 3d Scanner App | LiDAR, TrueDepth (the front camera, for small objects up close) and a photo mode. | USDZ, OBJ, glTF, GLB, DAE, STL; point clouds in PLY, PTS, PCD, XYZ, LAS | Free | Exports the raw photos too, for photogrammetry on the desktop. |
| Polycam and Scaniverse | LiDAR, photos and splats (section 06). | See section 06 | Free tiers | Better at spaces than at small objects. |
How to shoot an object scan
- Soft, even light: overcast outside, big diffuse sources inside. Hard shadows and highlights end up painted in the texture. The light of the set goes in the HDRI (section 08), not on the scan.
- A matte surface with detail. Shiny, transparent, black or plain surfaces break photogrammetry: use KIRI's featureless mode, or a temporary scanning spray if the owner of the prop agrees.
- Move around the object, not the object: three rings (low, middle, high) and a few from above, with a lot of overlap between photos. For the underside, scan it again on its side; Object Capture asks you to flip it.
- Lock exposure, white balance and focus, and use the main 24mm: the ultra wide has less detail, and a lens switch in the middle confuses the solve. Photos are sharper than video: 48MP or RAW.
- Scale and colour: a ruler or a measured edge in some photos, and the colour chart in one. Write down one real measurement. LiDAR apps and Object Capture give real scale; photo-only apps don't.
The scan in Nuke 17
I tested which files open where, headless in Nuke 17.0v1, with a small OBJ and a USD cube I wrote (as .usda and packed as .usdz):
- GeoImport, the new 3D system, reads USD: the .usda and the .usdz opened without errors. The .obj didn't: "Cannot determine file format". So a USDZ from Reality Composer or KIRI goes straight into GeoImport.
- ReadGeo, the classic 3D system, read the OBJ (and the USD files too). For an OBJ in the new system, convert it to USD first, for example in Blender.
- Check the scale against your measurement, and fix it with a transform: a scan in metres sits correctly in a camera track solved in metres.
- Object tracks: the same scan is the geometry for a geometry track in 3DEqualizer, PFTrack or SynthEyes, when you have to track the object instead of the camera.
 Best practices for RealityScan Mobile (RealityScan)
 Meet Object Capture for iOS (Apple Developer)
 Reality Composer: objects to 3D in minutes (Jacob's QuickTips)
 Photo Scan mode in KIRI Engine (KIRI Engine)
11. Rig and accessories
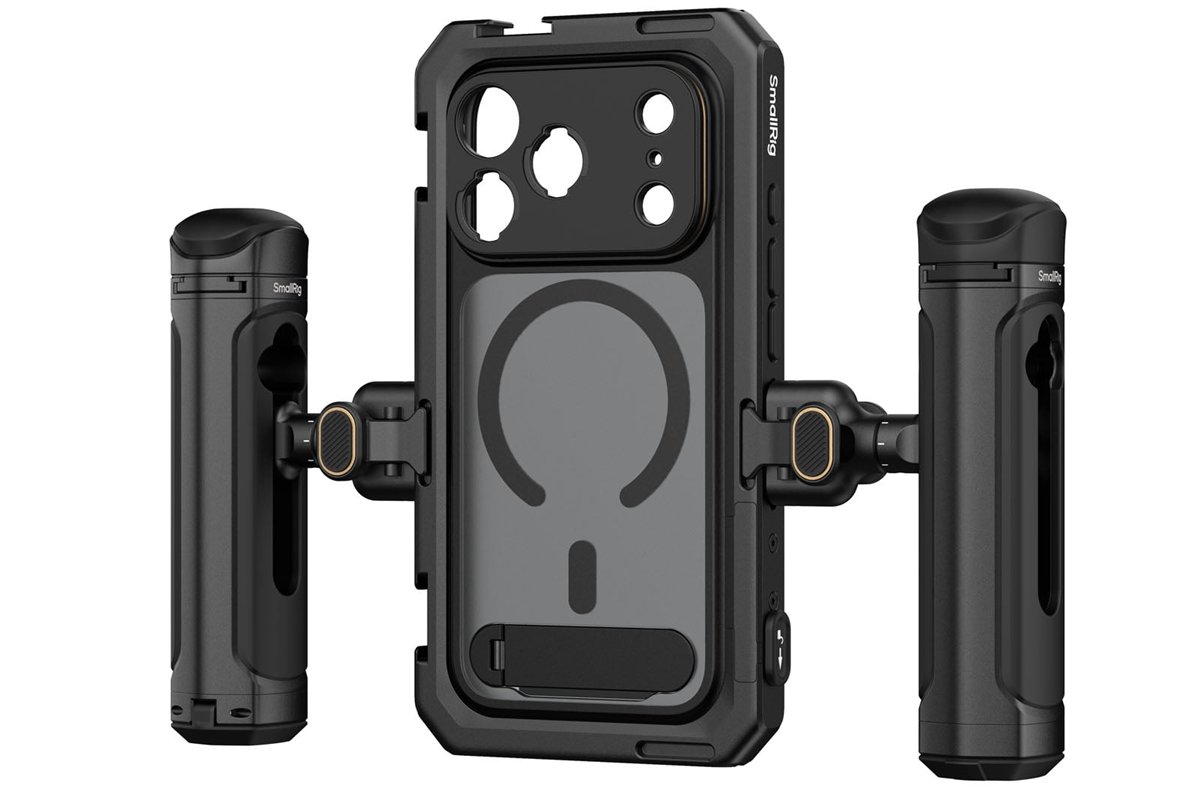
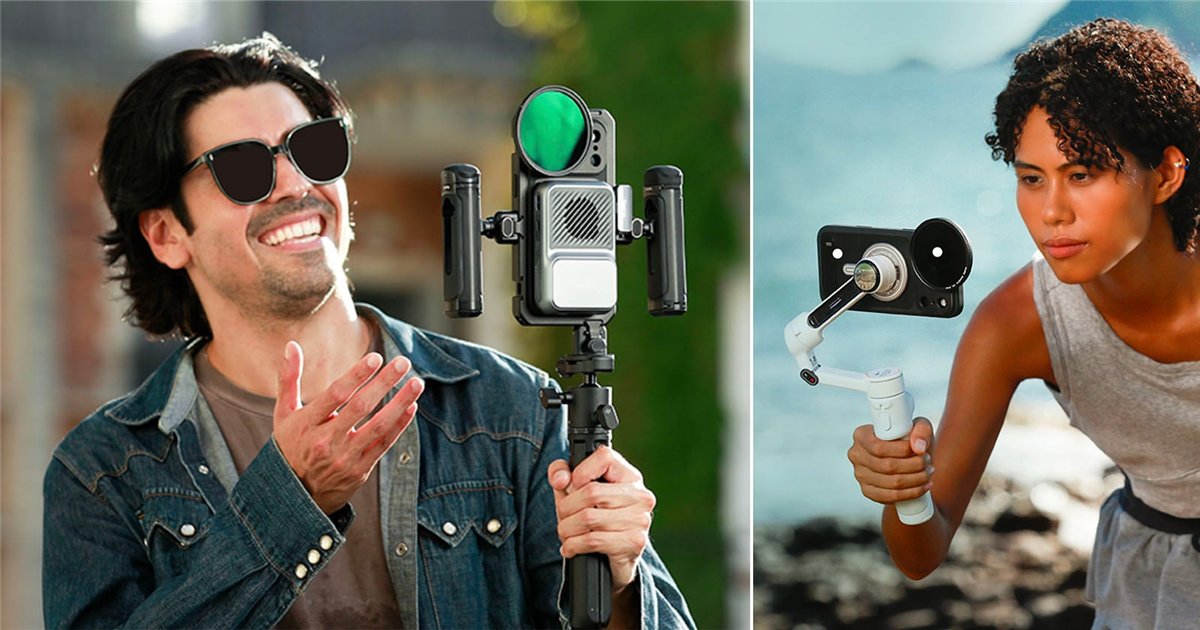
- A cage with a phone clamp: it holds the ND, the SSD, the microphone and the handles, and lets the phone breathe.
- ND filters: magnetic or screw-in filters with a mount for the phone. Fixed NDs (ND 0.6, 0.9, 1.2, 1.8, 2.4) are cleaner than variable ones.
- An external SSD on USB-C, with a fast cable (USB 3, 10 Gb/s): needed for ProRes 4K60, ProRes RAW and long takes. Format it as exFAT or APFS. Test it with your app before the shoot.
- Timecode: a Tentacle Sync E with Blackmagic Camera writes the same timecode as the sound recorder and the other cameras.
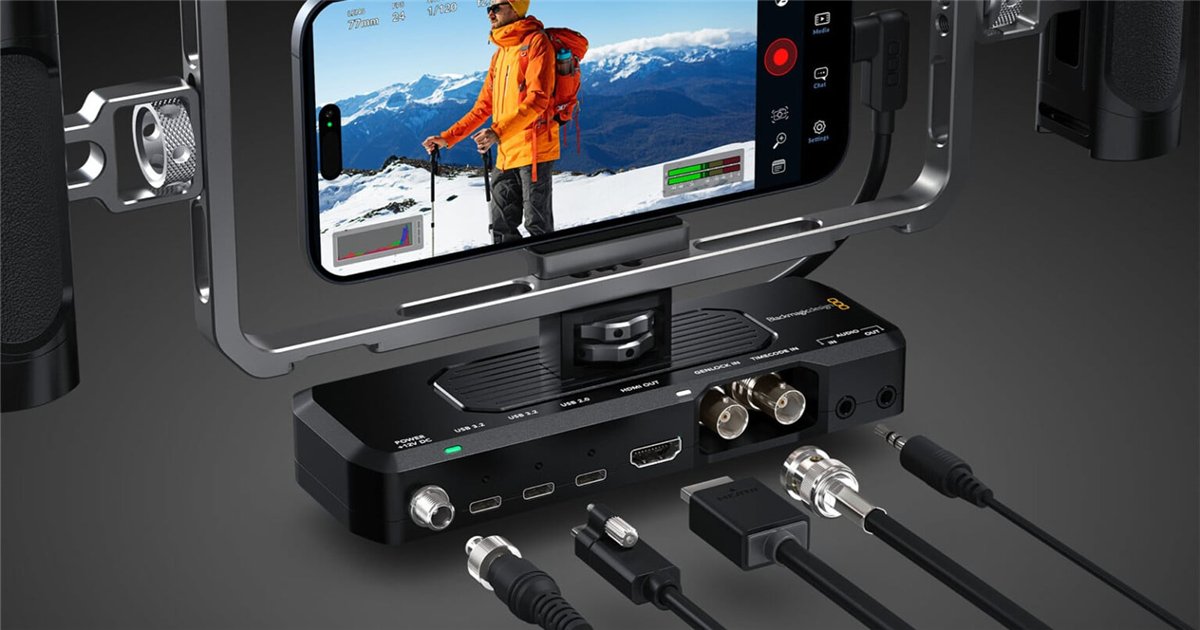
- The Blackmagic Camera ProDock (iPhone 15 Pro to 17 Pro, iOS 26 and later): HDMI out to a monitor, two USB-C ports for recording, timecode in, 12V power, and genlock on the 17 Pro. It turns the phone into a studio camera.
- A tripod and a gimbal: the gimbal with the electronic stabilisation off.
- Power: a power bank or a dummy battery on the cage. ProRes recording drains the battery quickly.
12. From the phone to Nuke
Copy the original files
- From an external SSD: copy the files as they are. From the phone: a cable and the Files app, Image Capture on a Mac, or AirDrop with Options > All Photos Data turned on.
- Never through messaging apps, emails or cloud services that "optimise" videos: they recompress them and sometimes change the frame rate.
- Keep the originals untouched and work on converted copies.
Check the frame rate before anything else
A variable frame rate clip (VFR) looks fine in a player and breaks in Nuke. The quickest check is ffmpeg: it prints two numbers, fps (the average) and tbr (the base rate). If they are different, the clip is VFR. My test clip of 30 frames, with longer gaps between frames in the second half like a phone in low light, gave:
Check a clip: if fps and tbr are different, it's variable frame rate
ffmpeg -i clip.mov
# ...
# Stream #0:0: Video: h264 (High) (avc1 / 0x31637661), yuv420p, 1920x1080, 23.68 fps, 30 tbr
Convert it: constant frame rate and ProRes in one step
This is the command I tested: it converts a VFR clip, H.264 or HEVC, into a constant 30 fps ProRes 422 HQ. Where frames are missing in time, ffmpeg repeats the previous one; no frame of the original is lost. Change fps=30 to the frame rate the clip was meant to have.
VFR or HEVC to constant frame rate ProRes 422 HQ, 10-bit
ffmpeg -i clip.mov -vf fps=30 -c:v prores_ks -profile:v 3 -pix_fmt yuv422p10le -c:a copy clip_prores.movEvery .mov in a folder (PowerShell, on Windows)
New-Item -ItemType Directory -Force prores | Out-Null
Get-ChildItem *.mov | ForEach-Object {
    ffmpeg -i $_.Name -vf fps=30 -c:v prores_ks -profile:v 3 -pix_fmt yuv422p10le -c:a copy ("prores\" + $_.BaseName + "_prores.mov")
}
The same on macOS or Linux
mkdir -p prores
for f in *.mov; do
    ffmpeg -i "$f" -vf fps=30 -c:v prores_ks -profile:v 3 -pix_fmt yuv422p10le -c:a copy "prores/${f%.mov}_prores.mov"
done- profile:v 3 is ProRes 422 HQ (0 Proxy, 1 LT, 2 422, 4 4444). yuv422p10le keeps 10 bits. Converting to ProRes doesn't add quality, but it gives Nuke a file it can read frame by frame.
- Colour isn't touched: the converted clip is still Apple Log (or whatever it was). Don't add LUTs at this step.
- For a long project, convert to EXR sequences instead: in Nuke, read the ProRes and write ACEScg EXR (16-bit half). Frames on disk are safer than a movie file, and every artist reads exactly the same pixels.
The Read node
- Frame range: check that the Read has the number of frames you expect. A VFR clip gives a wrong number (section 15).
- Colour space: with an ACES config (in Nuke 17, the studio config), choose Apple Log as the colour space of the Read. The cg configs don't have camera colour spaces. More in section 16.
- YCbCr matrix: ProRes and H.264 store colour as YCbCr, and the Read has to know which matrix converts it back to RGB. In Nuke 17 the knob is ycbcr matrix in the mov options, with Rec 709 (the default), Rec 601 and Rec 2020. iPhone Log clips are tagged Rec. 2020: if the metadata says so, set Rec 2020, otherwise the colours shift.
- Video levels: next to it, decode video levels chooses full or video range. If the blacks look lifted or crushed compared to the player, this is the first knob to check.
- HEVC: Nuke 17.0 doesn't read it ("unsupported codec"): convert it first, as above.
What the clip itself tells you is in the next section; focal length, film back and lens distortion for the tracker in section 14.
13. The metadata of an iPhone clip
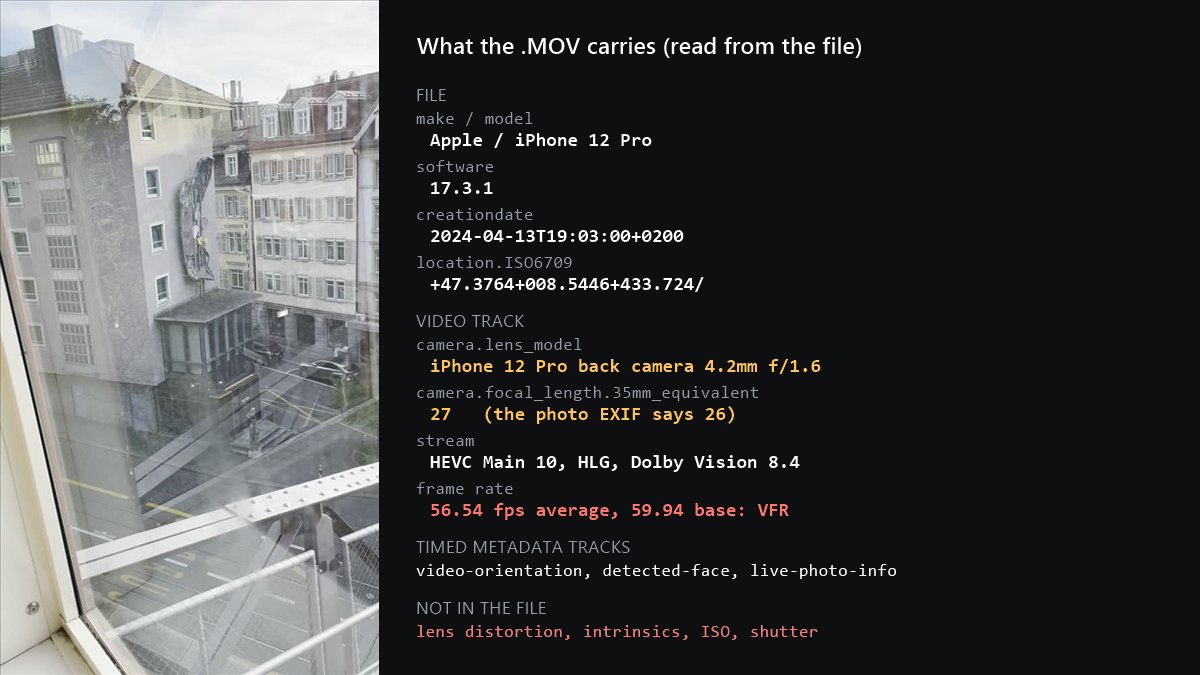
Before trusting a table of lens numbers, look at what the file says. I downloaded three original .MOV files shot on iPhones, never re-encoded, and read every metadata key in them: a clip from the Camera app of an iPhone 12 Pro (HEVC, HDR), the video of a Live Photo from an iPhone 15 Pro, and an H.264 clip from an iPhone X. All the values below are read from those files.
| key (com.apple.quicktime…) | where | value in the files I read | what it's for |
|---|---|---|---|
| make, model, software | file | Apple, iPhone 12 Pro, 17.3.1 (iOS) | Which phone and which iOS: the processing changes between versions. |
| creationdate | file | 2024-04-13T19:03:00+0200 | Date and time with the time zone: shot logs, and lining up with other cameras. |
| location.ISO6709, location.accuracy.horizontal | file | +47.3764+008.5446+433.724/, 14.9 m | Latitude, longitude and altitude: with the date, the position of the sun for the CG light. Remove it before you share a clip. |
| camera.lens_model | video track | iPhone 12 Pro back camera 4.2mm f/1.6 | Which lens shot it, with its real focal length. |
| camera.focal_length.35mm_equivalent | video track | 27 | The field of view of this clip: the best starting focal length for the tracker, with the equivalent film back (section 14). |
| live-photo.auto, content.identifier, live-photo.vitality-score | file | 1, a UUID, 0.93884 (15 Pro Live Photo) | Only in Live Photos: it links the video to its photo. |
| Timed tracks (mebx): video-orientation, detected-face, live-photo-info; in Live Photos still-image-time and live-photo-still-image-transform | their own tracks, frame by frame | Orientation, face bounds and angles, Apple's private data | Not much for comp. The face boxes can seed a roto or a track. |
- What is not there: no lens distortion, no camera intrinsics, no focal length per frame, and no readable ISO or shutter in the Camera app clips. So the metadata can't give you an STMap: that comes from a grid or from the solve (section 14).
- The 35mm equivalent is per clip, and it's the one to use: Apple's 26mm (24mm on newer models) is the photo; the video can be cropped for stabilisation or the mode. The iPhone 15 Pro Live Photo had no lens keys at all.
- The stream tells you more: the iPhone 12 Pro clip is HEVC Main 10 in HLG with a Dolby Vision 8.4 layer, recorded vertical (rotate 90), and it's VFR: 56.54 fps on average against a base of 59.94 (section 15).
- Converting can lose it. I converted the clip to ProRes with ffmpeg, copying the metadata: the file keys survived, the lens keys on the video track didn't. Read them from the original.
Reading it
ffmpeg (4.3) printed the file keys but not the lens keys of the track. I wrote a small PowerShell script that reads the QuickTime boxes directly and prints everything above, tested on the three files. It only reads the file, it doesn't change it.
Windows: download iphone_mov_metadata.ps1 and run it on a clip
powershell -ExecutionPolicy Bypass -File iphone_mov_metadata.ps1 -Path IMG_0001.MOV
# track 1  com.apple.quicktime.camera.lens_model = iPhone 12 Pro back camera 4.2mm f/1.6
# track 1  com.apple.quicktime.camera.focal_length.35mm_equivalent = 27
# file     com.apple.quicktime.model = iPhone 12 Pro
# ...
On a Mac or Linux, exiftool reads the same keys (exiftool -a -G1 IMG_0001.MOV). In Nuke 17 the Read shows the file keys, not the lens keys: on the converted ProRes and on the iPhone X H.264 clip it listed quicktime/apple/quicktime/make, model, software, creationdate and location. The HEVC original doesn't open in Nuke 17.0 at all.
Python, tested in Nuke 17.0v1: print the Apple metadata of the selected Reads
import nuke
for r in nuke.selectedNodes('Read'):
    md = r.metadata()
    print(r.name())
    for k in sorted(md):
        if k.startswith('quicktime/apple/'):
            print('   ', k, md[k])
14. Matchmoving iPhone footage
On an iPhone shot the hard part is usually the 3D track, not the colour. The plate is sharp and clean, but the camera behind it isn't a normal camera: a lens and a sensor a few millimetres wide, rolling shutter, a sensor that moves to stabilise, and software that straightens the image before you see it. This section works for the tracker you use, 3DEqualizer, PFTrack, SynthEyes, Nuke's CameraTracker or Blender: the rules are the same, only the names of the fields change.
What makes an iPhone plate hard to track
| problem | what it does to the track | what to do |
|---|---|---|
| Electronic stabilisation | It crops the frame and warps it differently on every frame. No single lens explains that, so the solve error goes up and the CG slides. | Off for every plate you will track: a setting in Blackmagic Camera and Final Cut Camera. The Camera app always stabilises a little, and Action mode crops hard: for tracked plates, use another app, and a gimbal for smooth moves. |
| Sensor-shift stabilisation (OIS) | The sensor moves under the lens to cancel the shake, so the optical centre wobbles by a few pixels. | It can't be turned off. On a tripod or a gimbal it stays still; handheld, track more points and expect a slightly higher error. |
| Rolling shutter | The sensor is read from top to bottom: in fast pans vertical lines lean, and the solve slides. | Slower moves, and the rolling shutter correction of the tracker. Apple doesn't publish the readout time: let the tracker estimate it, or measure it. |
| Lens switching | Close up or in low light, the Camera app moves to another lens in the middle of the take: a different focal, centre and distortion. | Settings > Camera > Record Video > Lock Camera, and Macro Control on. Camera apps like Blackmagic Camera use one lens until you change it. |
| Autofocus and breathing | The field of view changes a little with the focus distance. | Focus locked; shoot the grid at the focus distance of the shot. |
| Distortion fixed in the phone | Apple's processing straightens the image, but not perfectly, and differently for each lens and mode; the ultra wide most. | Assume some distortion is left: shoot a grid or let the tracker estimate it (below). Keep Settings > Camera > Lens Correction the same for the grid and the plates. |
| Variable frame rate | Frames missing in time: the camera seems to jump. | Convert to a constant frame rate first (section 15). |
The numbers: real focal length, sensor and crop factor
Apple gives 35mm equivalents: 13, 24, 48, 100, 120mm. The EXIF of a photo gives the real focal length of the lens, and the ratio between the two is the crop factor. From it comes the size of the sensor. I took the real focal lengths from the EXIF of photos taken with each model; the sensor sizes are computed, so the last digit is approximate.
| lens | 35mm equivalent | real focal (EXIF) | crop factor | sensor, 4:3 (computed) | horizontal field of view, 16:9 |
|---|---|---|---|---|---|
| Ultra wide, 15 Pro to 18 Pro | 13mm | 2.22mm | 5.86 | 5.9 × 4.4 mm | 106.2° |
| Main, 15 Pro to 17 Pro | 24mm | 6.765mm | 3.55 | 9.8 × 7.3 mm | 71.6° |
| Main 2x (a crop of the main) | 48mm | 6.765mm | 7.10 | 4.9 × 3.7 mm, the centre | 39.7° |
| Telephoto 3x, 15 Pro | 77mm | 9mm | 8.56 | 4.0 × 3.0 mm | 25.3° |
| Telephoto 5x, 15 Pro Max, 16 Pro and 16 Pro Max | 120mm | 15.66mm | 7.66 | 4.5 × 3.4 mm | 16.4° |
| Telephoto 4x, 17 Pro and 18 Pro | 100mm | about 17mm * | 5.86 | 5.9 × 4.4 mm | 19.6° |
| Telephoto 8x (a crop), 17 Pro and 18 Pro | 200mm | about 17mm * | 11.7 | 3.0 × 2.2 mm, the centre | 9.9° |
| Main, 18 Pro (new, variable aperture) | 24mm | check the EXIF | – | – | 71.6° |
* Not from EXIF: computed from the 1/2.55" sensor of the 17 Pro telephoto. Check yours on a photo: exiftool -LensModel -FocalLength -FocalLengthIn35mmFormat IMG_0001.HEIC. The field of view assumes the video uses the full width of the sensor; the 35mm equivalent is measured on the diagonal, as EXIF does.
There are two correct ways to type this into a tracker, and both give the same field of view:
- Real: the real focal length with the real sensor. Main camera: 6.765mm on a sensor 9.76mm wide.
- Equivalent: the 35mm equivalent with an equivalent film back, the full-frame diagonal (43.27mm) cut to the shape of the phone sensor: 34.62 × 25.96 mm for 4:3, 34.62 × 19.47 mm for 16:9. Main camera: 24mm on 34.62mm.
- Never mix them. 24mm on a 9.76mm sensor gives a field of view 3.5 times too narrow. Even the classic 36 × 24 back is a little off: with 24mm it gives 73.7° instead of 71.6°.
- Better than the table: the clip. Camera app clips carry the 35mm equivalent of the video on the video track (section 13). My iPhone 12 Pro clip says 27mm where the photo says 26mm. Use that number with the equivalent film back. Stabilisation and some modes crop the sensor, so the real field of view of a clip can be narrower. Set the focal length as approximate and let the solver refine it, or measure it on the grid.
Helper: your iPhone in the tracker
Choose the phone, the lens and the tracker: the numbers and the fields to fill update as you click.
1 Which iPhone?
2 Which lens? The one in the EXIF of a photo, or the one you chose in the camera app.
3 Shape of the frame and stabilisation
4 Which tracker?
Python, tested in Nuke 17.0v1: sets a CameraTracker and a Camera with these numbers
Lens distortion and STMaps: where they come from
Apple doesn't put the distortion of the lens in the video file: none of the original clips I read has it (section 13), and the ProRAW DNG I opened (an iPhone 12 Pro sample) has no distortion data either: the image is already corrected. What's left is different for every lens and mode, can change from phone to phone, and stabilisation changes it on every frame. So there's no honest "ready" STMap for every iPhone: you make it from your phone, in one of three ways.
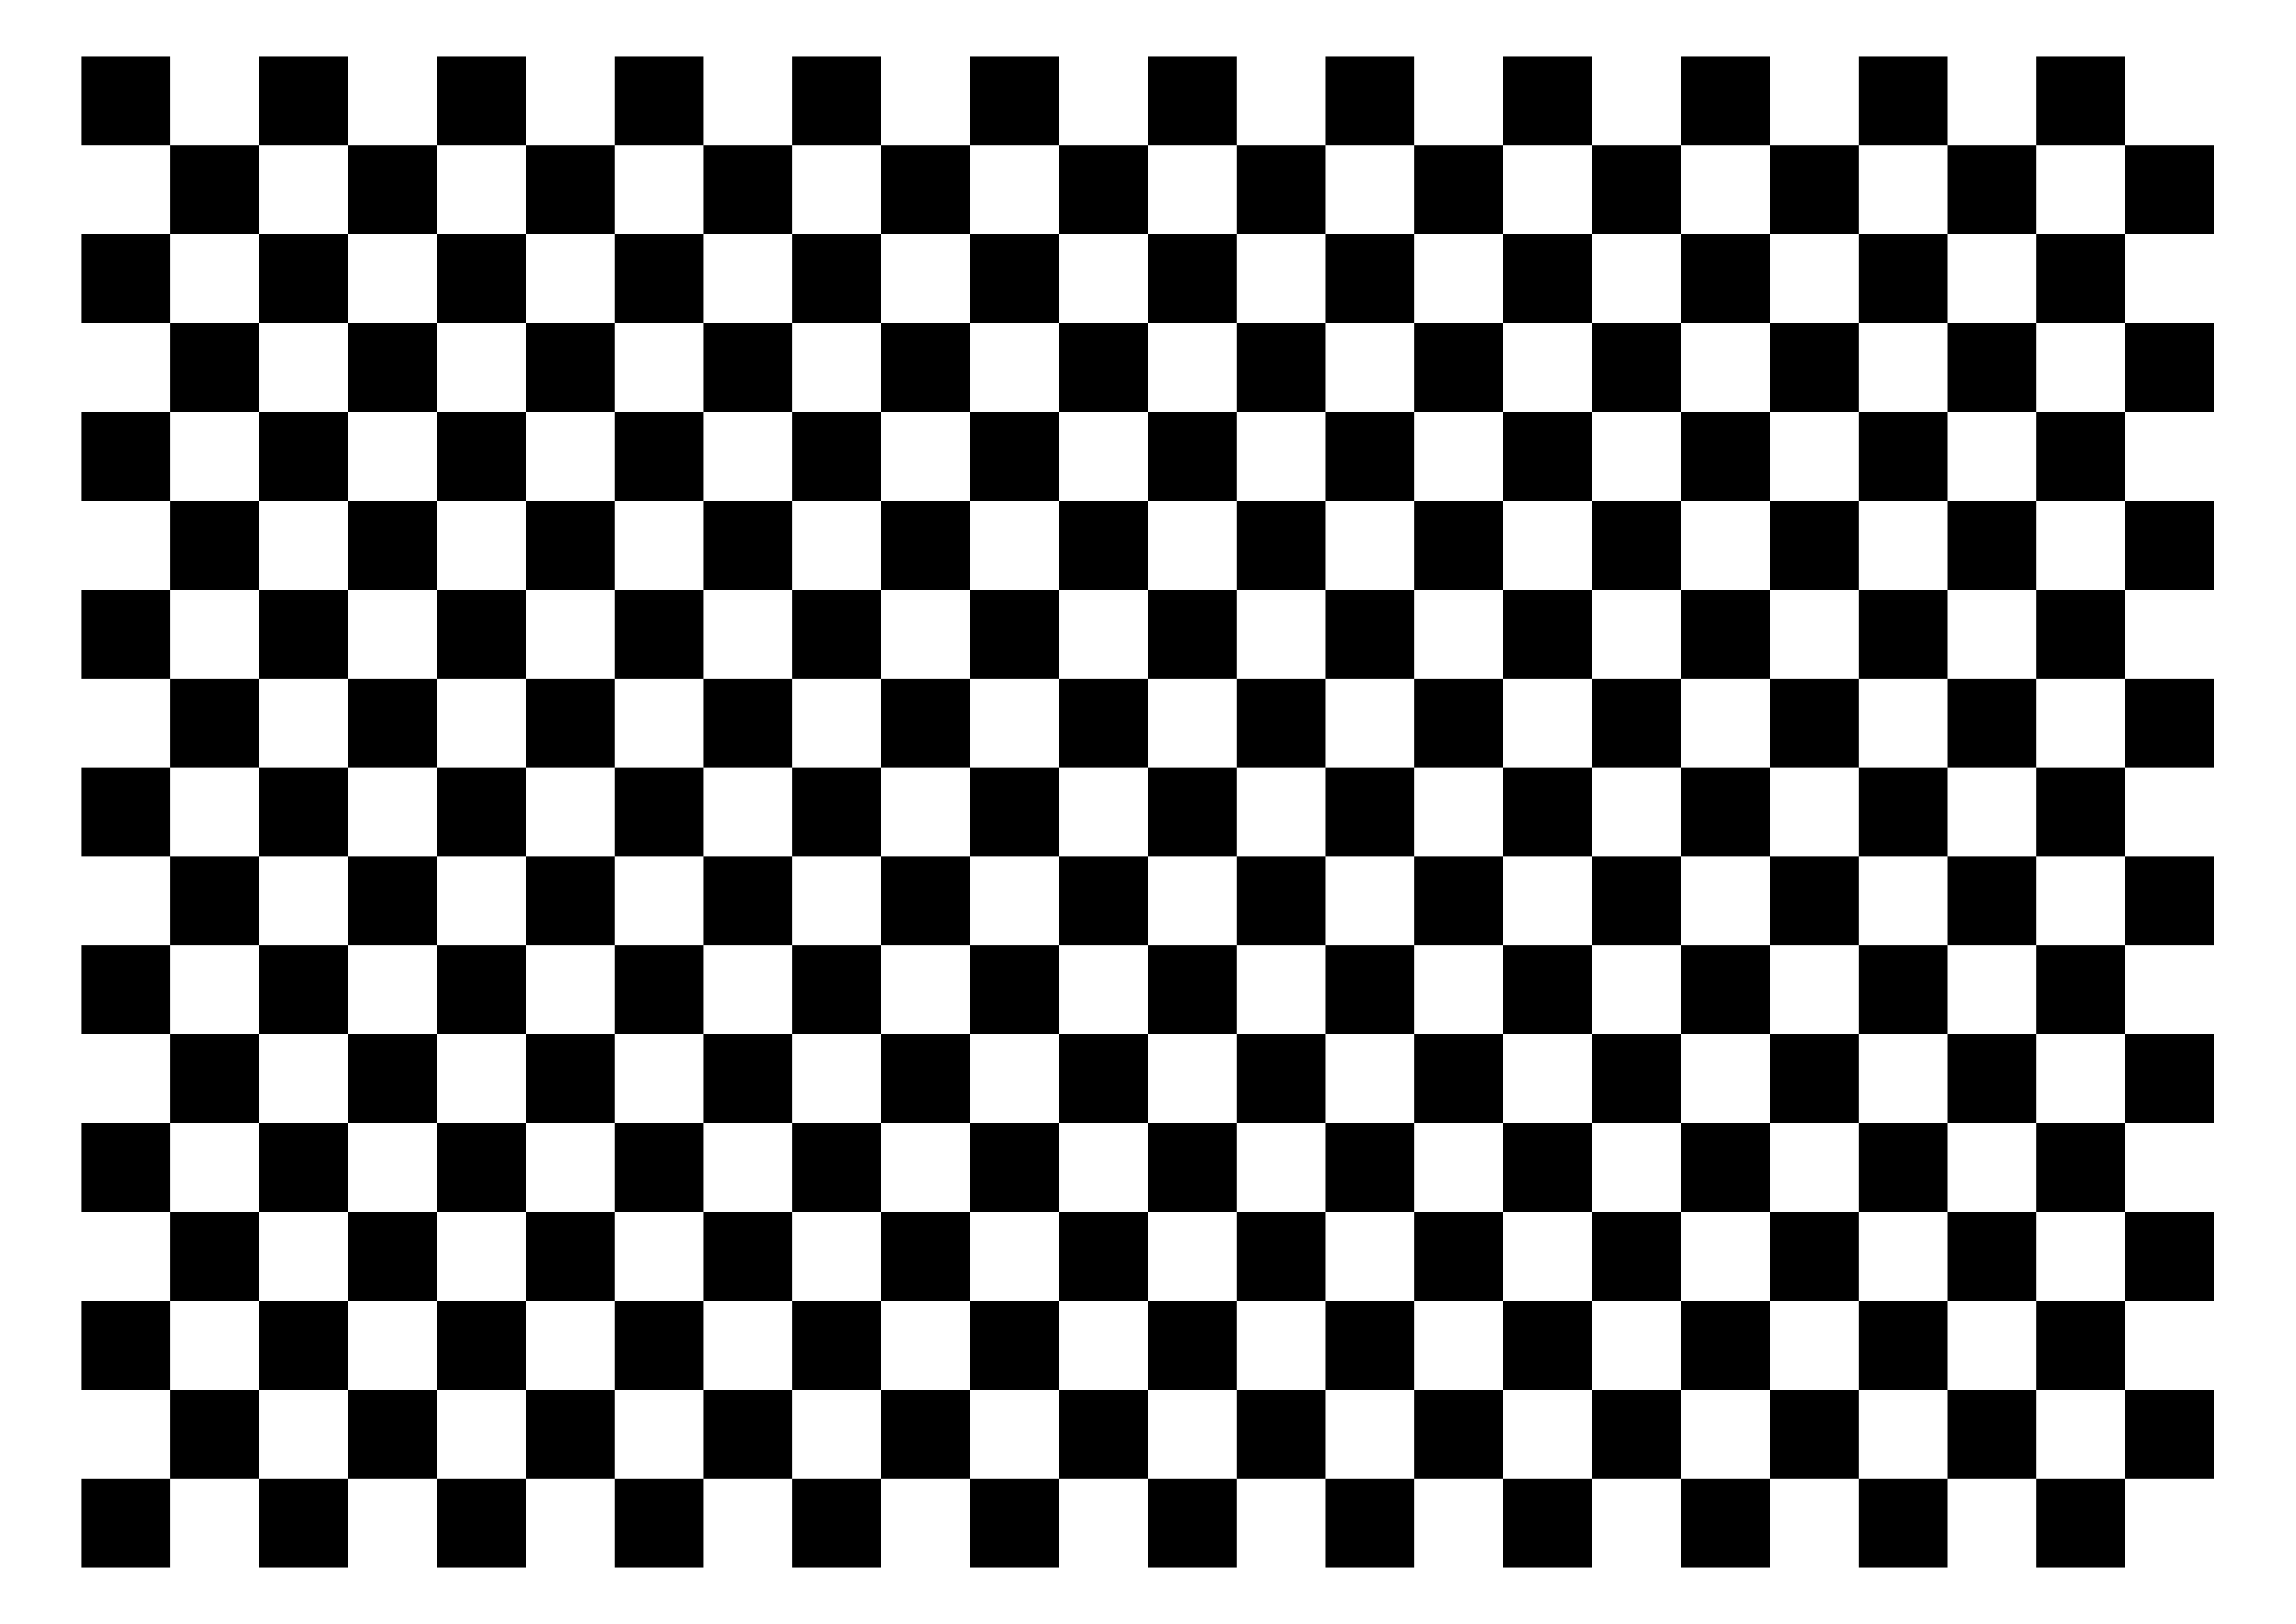
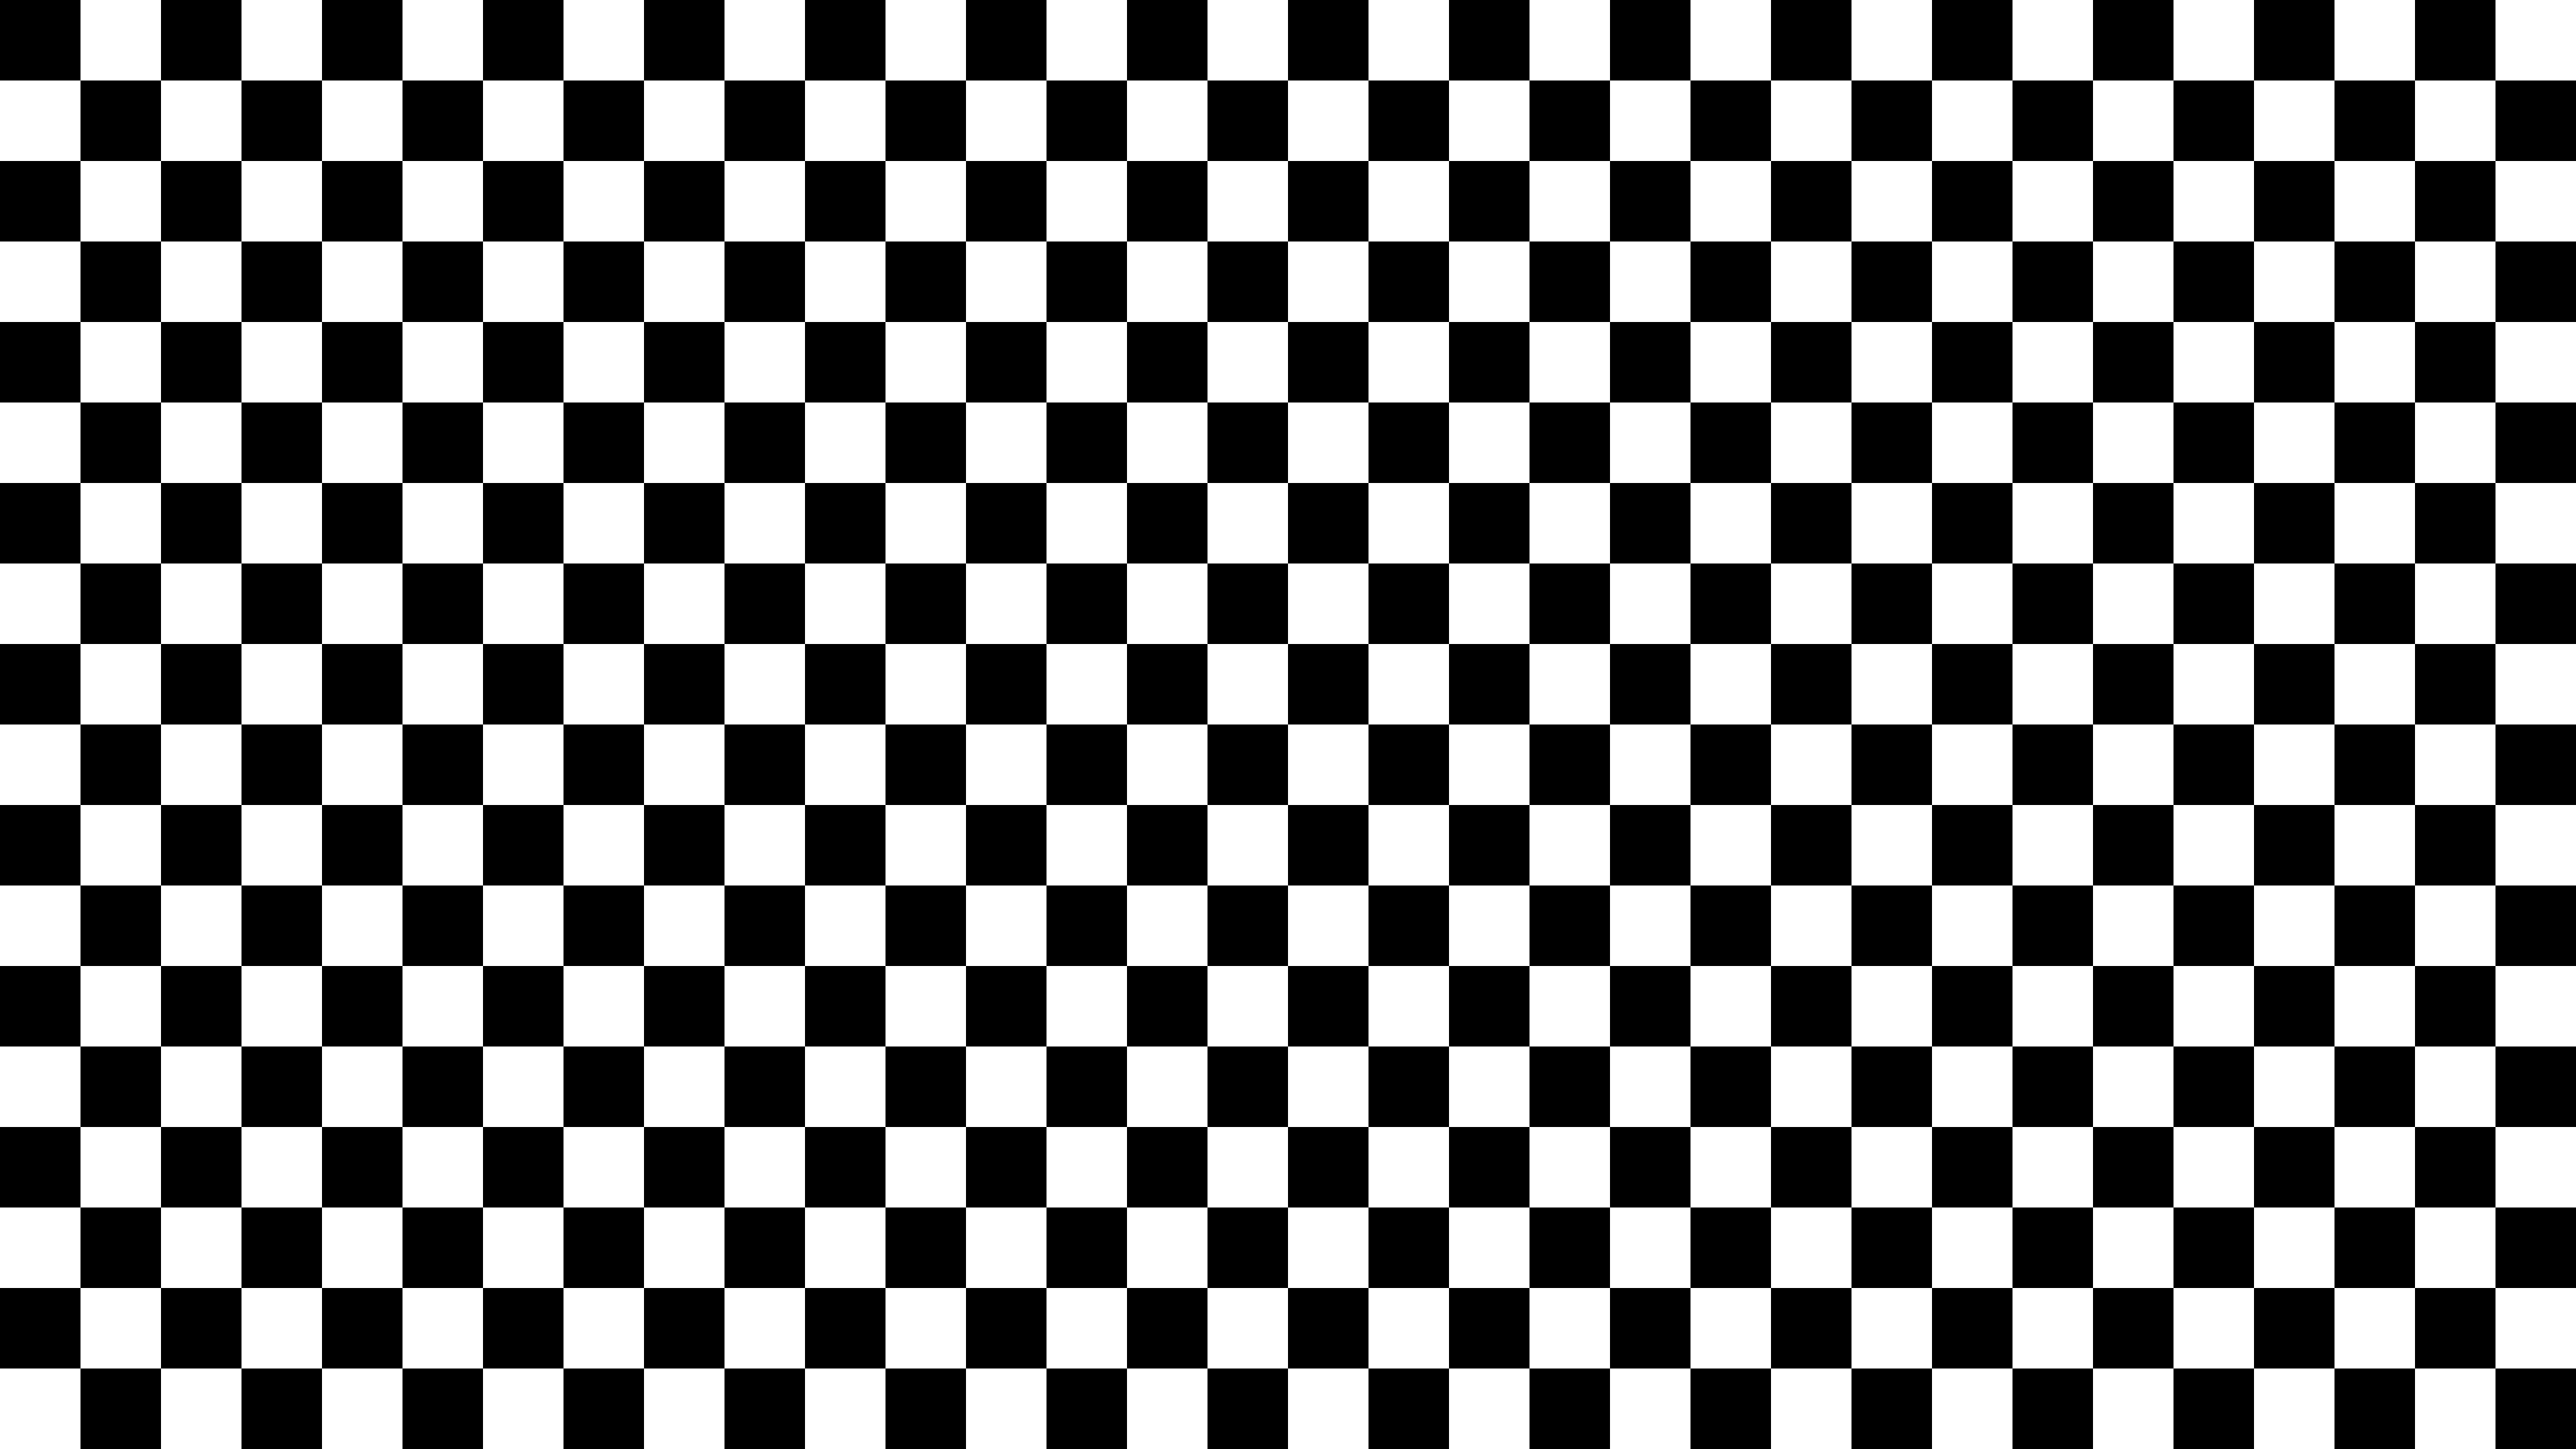
- A printed grid. Download my checkerboard for A3 (PNG at 300 dpi, 24 × 17 squares of about 16 mm, 61 KB), print it on matte paper and glue it flat on a rigid board, like foam board: a wavy sheet adds its own distortion. No printer? Show the 4K version full screen on a 4K TV at 100%, without scaling. Shoot it with the same lens, format, stabilisation and focus as the plates: straight on and filling the frame, then a few frames turned and tilted. In NukeX, LensDistortion with the detection set to Grids: Detect, then Solve, and write the STMap as below. I don't give a ready STMap: without a grid shot on your phone, it would be a guess.
- No grid: straight lines in the shot. Edges of buildings, door frames, tiles. In LensDistortion you draw lines along them, and it solves the distortion that makes them straight.
- Nothing at all: the solve. CameraTracker with Lens Distortion: Unknown Lens, or the distortion parameters in 3DEqualizer, PFTrack and SynthEyes, estimate it from the shot itself. Less precise than a grid, but it needs nothing on set.
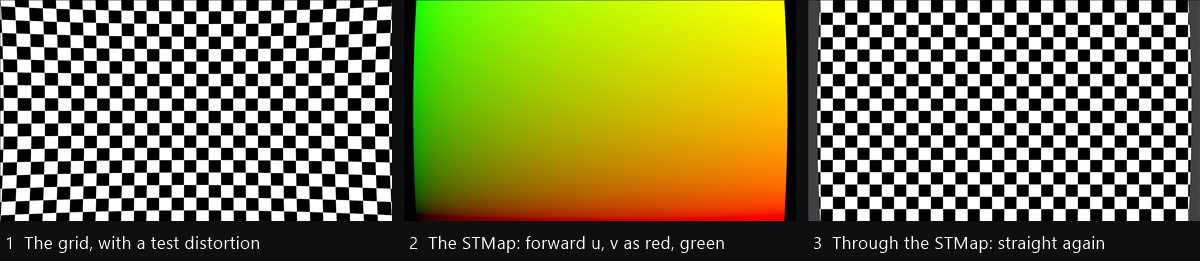
- Two maps in one file. LensDistortion with Mode set to STMap writes forward.u, forward.v and backward.u, backward.v. In an STMap node, UV channels forward undistorts the plate, backward redistorts the CG. In my test the backward map gave exactly the same image as LensDistortion's own Redistort (difference 0.0 on 280 samples).
- 32-bit float, always. Written as 16-bit half, my UHD map was off by up to 0.93 pixels on the right half of the frame: half float has steps of 1/2048 between 0.5 and 1.0, almost 2 pixels at 3840. In 32-bit float the error was 0.
- Overscan. Undistorting pulls the corners in: render the CG with overscan, then redistort it back to the plate format.
- One STMap per lens, format and stabilisation setting, and name it so: iphone17pro_24mm_uhd_stabOff_stmap.exr. How STMaps work inside: my STMap page.
Python, tested in Nuke 17.0v1: write the STMap of a solved LensDistortion as a 32-bit EXR
import nuke
ld = nuke.selectedNode() # the LensDistortion you solved on the grid
ld['output'].setValue('STMap')
keep = nuke.nodes.Remove(inputs=[ld], operation='keep', channels='forward', channels2='backward')
w = nuke.nodes.Write(inputs=[keep], file='/path/to/iphone_24mm_uhd_stmap.exr', file_type='exr')
w['channels'].setValue('all')
w['datatype'].setValue('32 bit float')
nuke.execute(w, 1, 1)
# then: an STMap node, uv = forward to undistort the plate, backward to redistort the CG How to shoot distortion grids (Matchmove machine)
 Why you need a lens distortion grid (Hugo's Desk)
 Lens distortion pipeline, export to Nuke (3DEqualizer)
 STMap lens distortion workflow in Nuke (VFXLUNCHBOX)
15. Lab: a variable frame rate clip in Nuke
I built a test clip like a phone in low light: 30 frames, the first 11 at 1/30 s, then 1.5 times further apart. ffmpeg reads it as "23.68 fps, 30 tbr". Each frame has its number written into the pixels, so after rendering every frame from Nuke 17.0v1 I could read which source frame it shows. These are the real results.
What Nuke shows, frame by frame
Nuke frames 1 to 39: the number is the source frame you see. Red: error.
The 30 frames of the source: faded ones never appear in Nuke.
- Read straight, the clip had a frame range of 1 to 38, longer than the real 30. Frames 1 to 12 were right; after that only every third frame rendered, and the 18 frames in between gave errors. 10 real frames, including the last two, were never shown. A render farm would fail on this clip, or worse, a comp would be built on the wrong frames.
- After the conversion, the clip has 39 frames at a constant 30 fps, all the 30 source frames are there in order, and 9 frames are repeated to fill the gaps in time. That's the right answer: those repeats were in the original timing, the phone just didn't record them.
- The repeated frames are where the original had a gap. If you need smooth motion there, it's a retime job (with Kronos or VectorGenerator), not something to hide.
16. Apple Log in Nuke
Apple Log is a log curve, like the ones of cinema cameras: it stores the scene in a flat image where every stop of light gets about the same number of code values. In Nuke you don't grade it: you convert it to linear with the colour space of the Read, comp in linear, and look at it through a display transform. Move the line on the image.
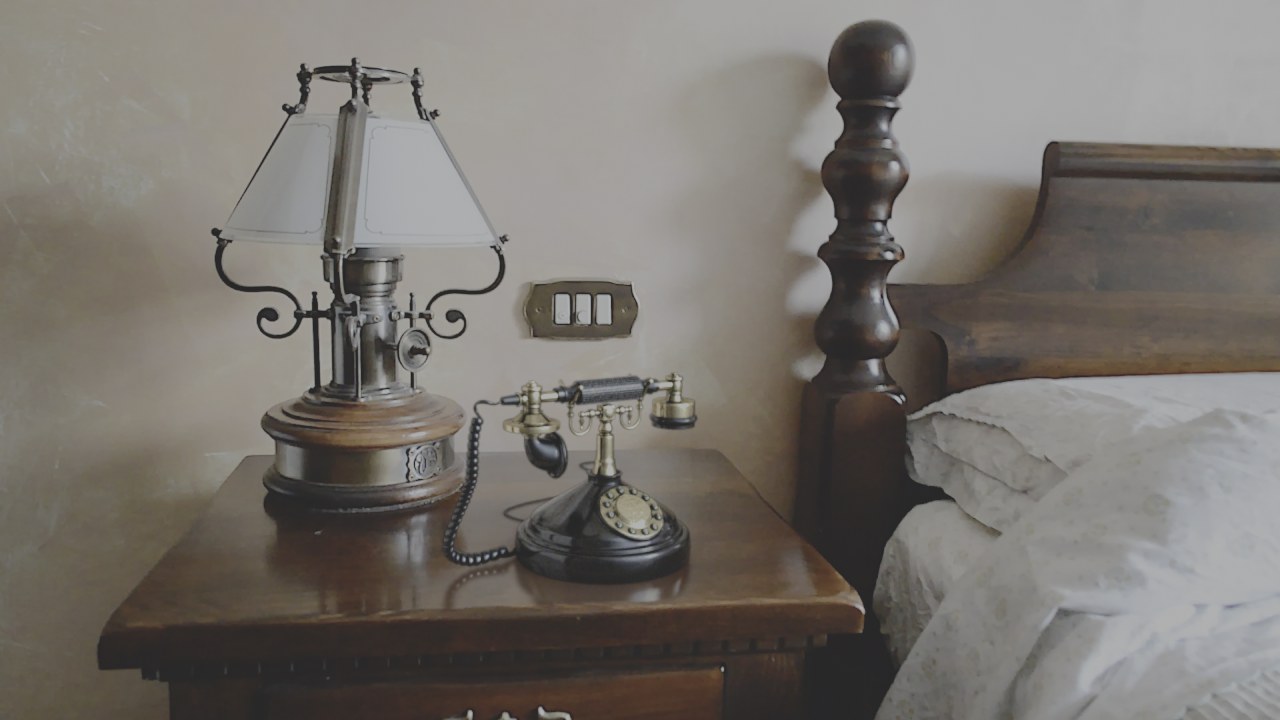
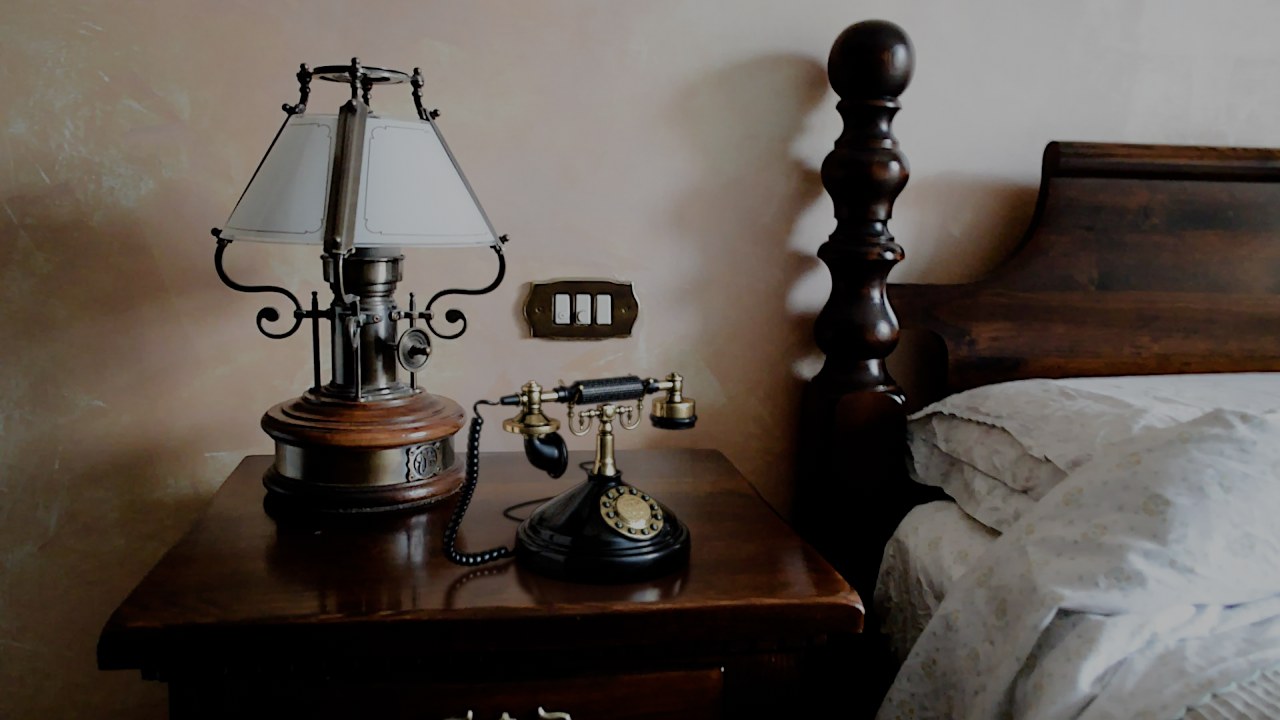
A frame of Viscount 1920, my CG model integrated into live action, converted to Apple Log in Nuke 17 with the studio config (not a phone clip), to show the same pixels both ways. Left: the log codes as they are, what the phone screen shows without a LUT. Right: the Read set to Apple Log, viewed through "ACES 2.0 - SDR 100 nits (Rec.709)", the default view of the config.
- The config: in Project Settings > Color, choose the studio config (in Nuke 17: fn-nuke_studio-config-v3.0.0_aces-v2.0, or the v2.2.0 one with ACES 1.3). It has the colour spaces of the cameras, Apple Log included, with the Rec.2020 primaries. The working space is ACEScg.
- The numbers I measured: 18% grey is stored as 0.488 in Apple Log, a much higher code than ARRI LogC4 (0.278) or ACEScct (0.414). Black is 0.151. The top code, 1.0, becomes 12.0 in ACEScg: about 6 stops above grey. The lab below shows the whole curve.
- Apple Log 2 has the same curve but a different colour space, Apple Wide Gamut. The Nuke 17.0 configs don't have it: reading Log 2 as Apple Log gives the right brightness but the wrong colours. If you shoot Log 2, ask the colour pipeline for a config or a conversion that has it, or shoot Apple Log for VFX.
- Write: render the plates as EXR in ACEScg (or in the colour space the show asks for). Never write Apple Log back to EXR "by mistake": an EXR is expected to be linear. My ACES FAQ has the rules for Read and Write.
17. Lab: Apple Log against the other log curves
Every camera brand has its own log curve. They all do the same job, but they put grey, black and the highlights at different code values. I measured these curves in Nuke 17, converting from scene linear to each log space with the studio config. Move the slider: it's the exposure in stops above or below 18% grey. Click the names to hide or show a curve.
From scene linear to log code values
Horizontal: stops from 18% grey. Vertical: the code value in the file, from 0 to 1. A curve that reaches 1 earlier clips the highlights sooner.
- Apple Log reaches the top early: at about +6 stops above grey it's at code 1.0, where LogC4 still has room for several stops. The phone's sensor doesn't hold more anyway, so it uses the codes for the range it has.
- The shadows start high: black is 0.151 in Apple Log, 0.093 in LogC4 and LogC3, 0.073 in ACEScct. That's why log images look grey: nothing is near 0.
- Grey is where you expose: if your app shows the code value at the centre, a grey card at the right exposure reads about 0.49 in Apple Log (about 500 in 10-bit). Lower means underexposed, and noise.
18. The checklist before you press record
Tick them on set. The page remembers your ticks in this browser only; nothing is sent anywhere.
iPhone VFX plate checklist
19. Helper: your iPhone clip in Nuke
You have the clips from the phone and a Nuke script to start. Tell the helper what the clips are and how you comp. It tells you whether to convert them first (and gives you the exact command), how to set the project and the Read, what numbers you should see in the Viewer, and how to write the plates. At the end there's a Python snippet that sets your selected Reads. Every name and every number comes from Nuke 17.0v1.
Not sure what the clip is? This prints the codec, the frame rates, the number of frames and the colour tags
ffprobe -v error -select_streams v:0 -show_entries stream=codec_name,profile,r_frame_rate,avg_frame_rate,nb_frames,color_transfer,color_primaries -of default=nw=1 clip.movYour clip, step by step
The answer below updates as you click.
1 How was it recorded? The Camera app: Settings > Camera > Formats > ProRes Encoding. In ffprobe, color_transfer=arib-std-b67 is HLG (HDR video).
2 Which codec? ffprobe: codec_name is prores, hevc or h264.
3 Is the frame rate constant? ffprobe: if r_frame_rate and avg_frame_rate are different, it's variable (VFR).
4 Which config is the Nuke script in? Project Settings > Color > OCIO config.
5 What is the clip for?
Python: select the Read nodes of the clips, paste it in the Script Editor and run it
- Why Rec 2020 in the YCbCr matrix: ProRes stores the colour as YCbCr, and the Read needs the matrix the camera used to go back to RGB. iPhone Log and HDR clips use the Rec.2020 one; Nuke's default is Rec 709. The wrong matrix shifts the colours a little (skin, skies) without anything looking broken.
- Data Range: in Nuke 17 the mov reader defaults to Full Range. If the blacks look lifted or the whites look dull compared to QuickTime or the phone, try Video Range, and check a black and a white patch.
- The numbers to expect: with the Read in Apple Log, a grey card exposed right reads 0.18 in the Viewer (it's 0.488 in the file), and the brightest code becomes 12.0. If the grey card reads 0.49, the Read is still on the wrong colour space.
20. Useful links
- Apple: about Apple ProRes on iPhone
- Apple: change video recording settings (Auto FPS, Lock Camera, Lock White Balance)
- Apple: iPhone 17 Pro technical specifications
- Apple: iPhone 18 Pro technical specifications
- Blackmagic Camera for iPhone
- Apple: the Final Cut Camera user guide
- Lightcraft: introduction to Jetset
- Scaniverse
- HDReye: 360° HDRIs with the iPhone
- HDRI Studio
- Poly Haven: free CC0 HDRIs
- Foundry: importing Gaussian splats in Nuke 17
- Brush: open-source splat training
- SuperSplat: clean splats in the browser
- Foundry: colour management in Nuke
- ffmpeg: the fps filter
- Foundry: lens distortion from a grid
- Foundry: working with STMaps
- RealityScan Mobile
- Apple: Object Capture
- ACES in Nuke: the FAQ
- 8-bit images in ACES
- Linear and log in Nuke
- STMap: undistort and redistort
- Free test images and footage
- Compositing: topics, books and free material