Matrices in Nuke, the series: Convolution Matrix · Transform Matrix · ColorMatrix · Convolve & Deconvolution · 3D Matrices · Morphology · CornerPin & Homography · BlinkScript Matrices
In the Convolution Matrix page the kernel was a tiny grid of 3x3 numbers. Now let's make it big: what if the kernel is a whole image? Draw a hexagon, use it as a kernel, and every pixel spreads into a hexagon. That's a lens bokeh, and that's what Nuke's Convolve node does.
Then we go further. Big kernels are slow, so Nuke computes them with the Fourier transform, where a blur becomes a simple multiplication. And if a blur is a multiplication… can we divide it back? Give the computer the bokeh, and get the sharp image from the blurry one. That's deconvolution, and at the end of the page you can try it yourself.
Useful Links
- https://learn.foundry.com/nuke/content/reference_guide/filter_nodes/convolve.html
- https://learn.foundry.com/nuke/content/comp_environment/filters/filters.html
- https://learn.foundry.com/nuke/content/reference_guide/filter_nodes/bokeh.html
- https://maxvanleeuwen.com/project/unblurring-images/
- https://www.nukepedia.com/tools/gizmos/filter/wiener-deconvolve/
- https://www.nukepedia.com/tools/gizmos/filter/lenskernelfft_v01/
- https://www.nukepedia.com/tools/gizmos/filter/custom-bokeh/
- https://www.youtube.com/watch?v=KuXjwB4LzSA
- https://betterexplained.com/articles/an-interactive-guide-to-the-fourier-transform/
- https://www.gnu.org/software/gnuastro/manual/html_node/Convolution-theorem.html
- https://docs.opencv.org/4.x/de/d3c/tutorial_out_of_focus_deblur_filter.html
- https://www.mathworks.com/help/images/ref/deconvwnr.html
- https://www.mathworks.com/help/images/ref/deconvlucy.html
- https://strollswithmydog.com/elements-of-richardson-lucy-deconvolution
- https://en.wikipedia.org/wiki/Wiener_deconvolution
- https://en.wikipedia.org/wiki/Richardson-Lucy_deconvolution
- https://discuss.pixls.us/t/convolution-with-fourier-transform-bokeh/42265
Index
- 01. An image as a kernel
- 02. The Convolve node in Nuke
- 03. Why the highlights matter
- 04. Fourier in five minutes
- 05. Blur = multiplication
- 06. Deconvolution: dividing back
- 07. Wiener filter
- 08. Richardson-Lucy
- Deconvolution Lab (try it here)
- 09. Which blurs can be undone?
- 10. Deconvolution in Nuke
- Nodes to paste in Nuke
- 11. A note on privacy
01. An image as a kernel
A 3x3 convolution matrix mixes every pixel with its 8 neighbours. A Convolve does exactly the same thing, but the matrix is an image: a kernel of 41x41 pixels is a matrix with 1681 numbers. The rule doesn't change: centre the kernel on a pixel, multiply, add everything together, move to the next pixel.
Here's the nice way to think about it: every pixel of the image is replaced by a copy of the kernel, as bright as the pixel. A single bright point becomes a perfect hexagon if the kernel is a hexagon. That's what happens in a real lens: the aperture blades shape the light of every out-of-focus point. In optics the kernel is called PSF, point spread function: literally, how a point spreads.
02. The Convolve node in Nuke
You find it in Filter → Convolve. It has two main inputs: image, the plate to blur, and filter, the kernel. The important knobs:
- filter channel: which channel of the filter input is the kernel. By default the alpha, so a Roto shape works out of the box.
- use input channels: uses the same channels of the filter as the image, so you can have a different kernel for red, green and blue (real lenses do that: chromatic aberration in the bokeh).
- filter bounds: shape uses the bounding box of the kernel and its centre; format uses the whole format, so you can offset the kernel to shift the result.
- normalize: divides the kernel by the sum of its pixels, so the image keeps the same brightness. Leave it on, unless you want to play.
To make a kernel: a Roto with a hexagon or a circle (feather 0, the blades are sharp), a Flare, a photo of a real bokeh, or a lens kernel shot on set. Keep it centred and small compared to the image.
Convolve, Defocus, ZDefocus, Bokeh. Convolve applies the same kernel everywhere. For real depth of field use ZDefocus (its filter type can be an image) or the newer Bokeh node, which reads depth, deep data or a camera and accepts a custom kernel input. Under the hood they are all convolutions.
03. Why the highlights matter
I added a few tiny highlights to the test image, 2x2 pixels each, with values between 250 and 750 (a sun reflection on a wet leaf can easily be over 100 in a linear EXR). Then I convolved it with the hexagon. On the left the highlights keep their real values: each one becomes a bright, sharp hexagon. On the right I clamped the image to 1 before the convolve, like an 8-bit plate does: the energy is gone and the bokeh almost disappears.
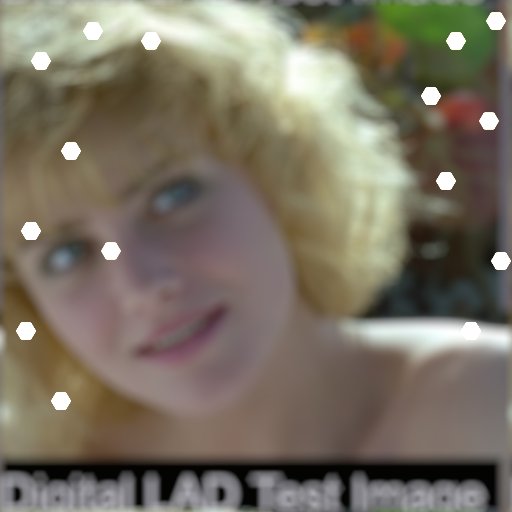
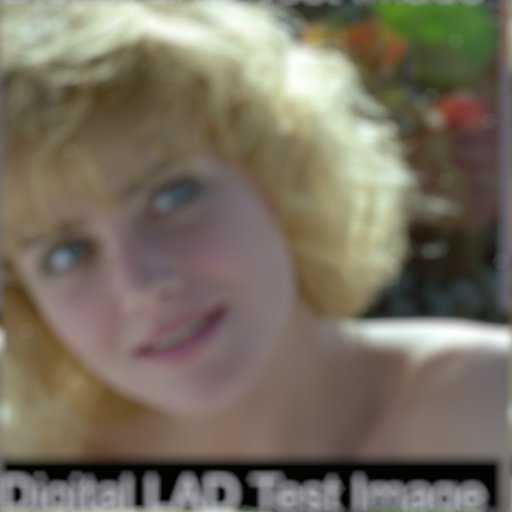
That's why defocus belongs in linear light, on float images. If your plate is clipped, boost the highlights before the defocus (keyed from the brightest areas) to give them back their energy.
04. Fourier in five minutes
Any image can be written as a sum of waves: stripes of different size, direction and strength. Big soft shapes are slow waves (low frequencies), edges, hair and text are fast waves (high frequencies). The Fourier transform takes the pixels and tells you how much of every wave is inside the image. The inverse Fourier transform puts the waves back together: nothing is lost, it's the same image seen from another side.
The pictures below are the spectra: the centre is frequency zero (the average), the further from the centre the faster the wave, and the brighter the pixel the stronger that wave. The FFT (Fast Fourier Transform) is simply the fast algorithm to compute it.
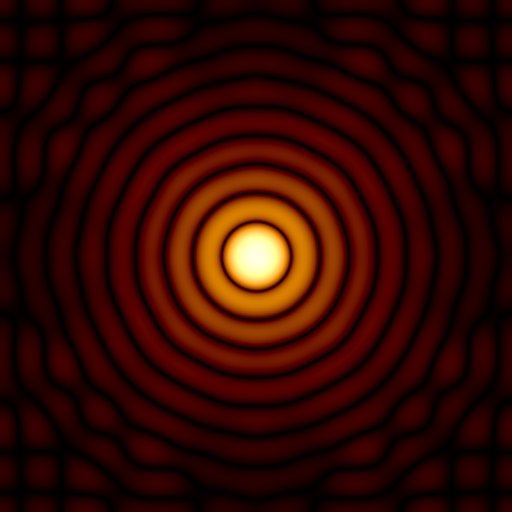
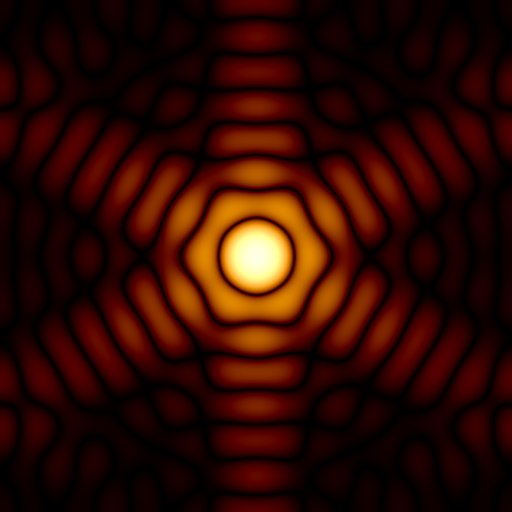
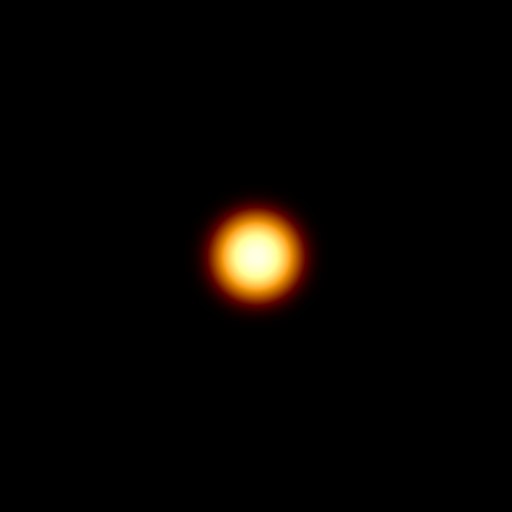
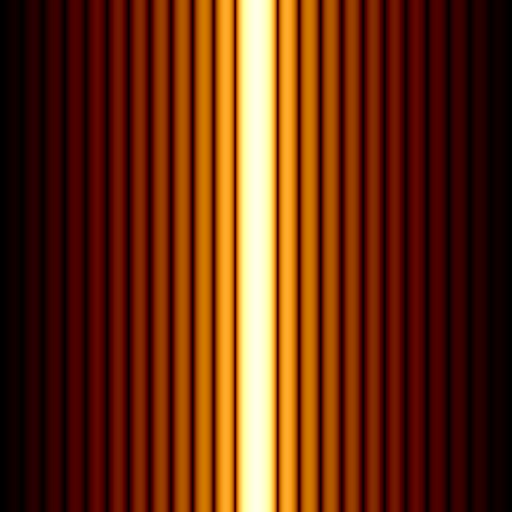
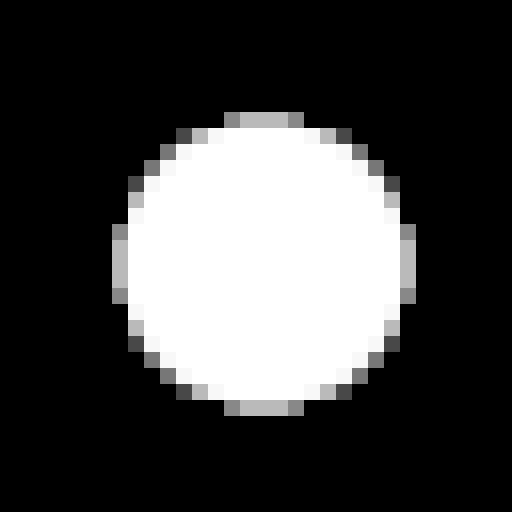
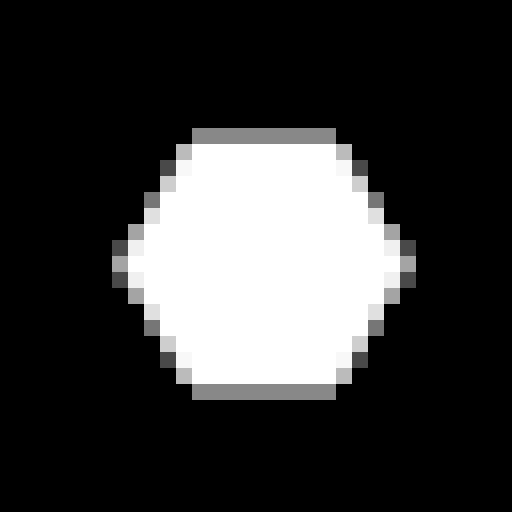
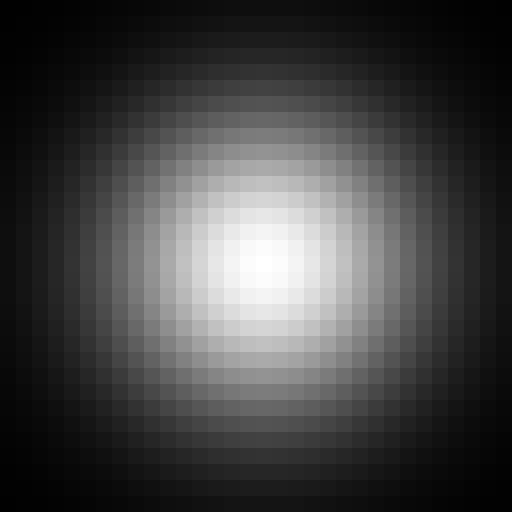
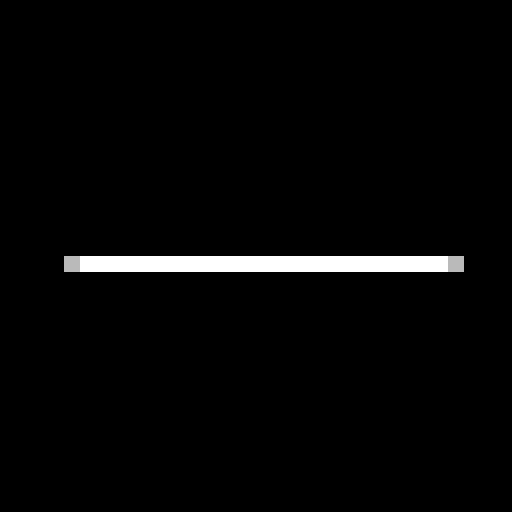
Look at them as filters: bright means "this wave passes", black means "this wave is removed". All of them keep the centre (the slow waves) and remove the fast ones: that's what a blur is. But look at the dark rings of the disc and of the hexagon: at those exact frequencies the information is multiplied by zero. Remember them, they come back in a moment.
05. Blur = multiplication
This is the convolution theorem, the most useful sentence of the page: a convolution in the image is a multiplication in the frequency domain.
image ⊗ kernel = FFT-1( FFT(image) × FFT(kernel) )
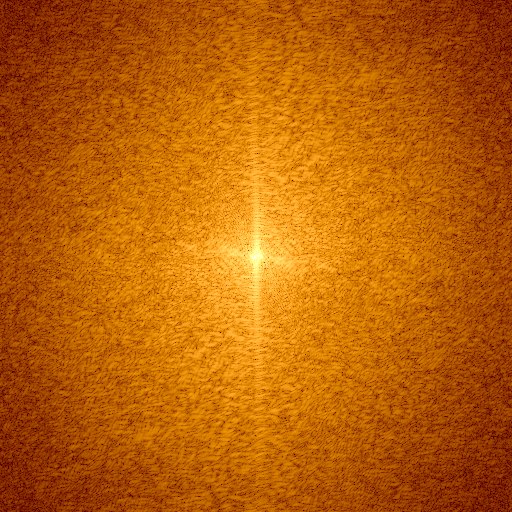
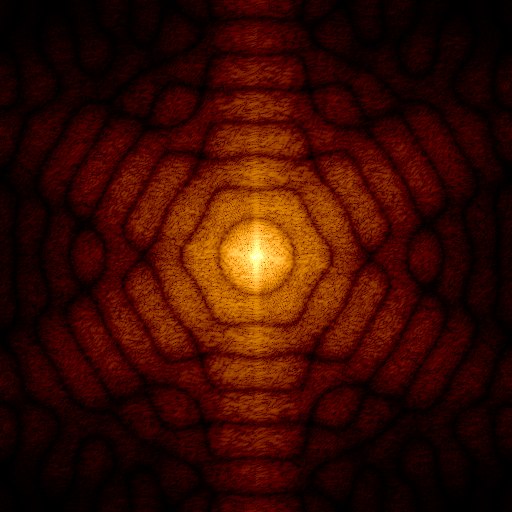
The fine details of the sharp image (all that orange far from the centre) are cut away, and the pattern of the hexagon is printed on the result. Why does Nuke care? Because the direct convolution costs pixels × kernel pixels: an HD frame with a 101x101 bokeh is about 20 billion multiplications per channel. With the FFT the cost hardly depends on the kernel size. That's why the Convolve documentation says you don't need to crop big kernels: it uses FFTs.
Wrap-around. The FFT thinks the image repeats like a tile: what blurs out of the right edge comes back from the left. When you work with FFTs yourself (or with FFT-based gizmos) pad the image first, with some edge extension, and crop it back at the end.
06. Deconvolution: dividing back
If the blurred spectrum is the sharp spectrum times the kernel spectrum, then the sharp one is the blurred one divided by the kernel spectrum. Same kernel, one division, inverse FFT, done:
sharp = FFT-1( FFT(blurred) ÷ FFT(kernel) )
Let's try. I blurred the test image with the hexagon and saved it like a normal 8-bit file, with a tiny bit of grain (you can barely see it). Then I divided:
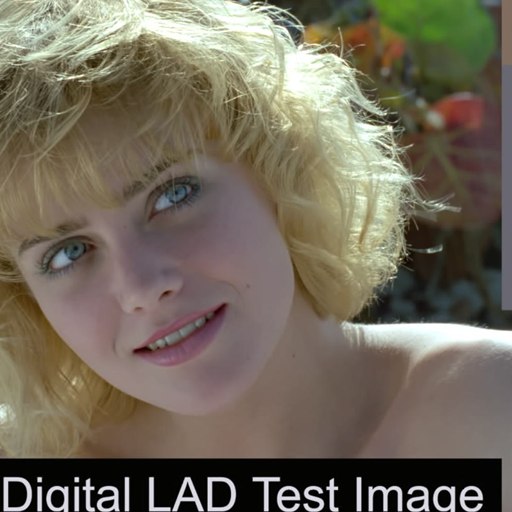
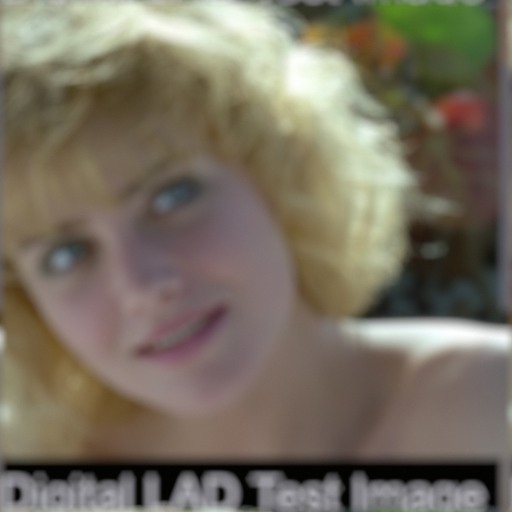
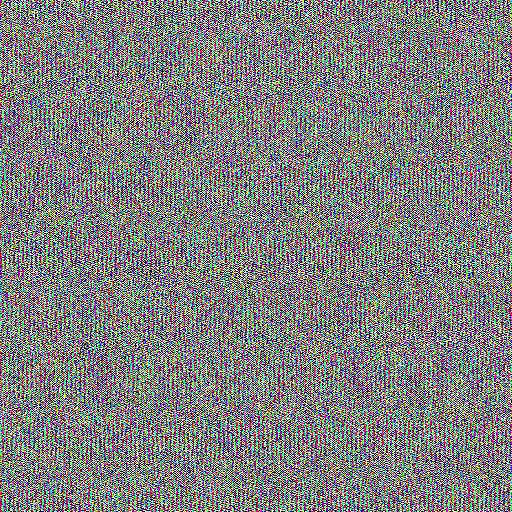
Pure noise. Remember the black rings of the spectrum? There the kernel is zero, or almost: the blur has multiplied those waves by 0.0001, and dividing by 0.0001 multiplies everything that lives there by 10000. In a perfect world that would give the details back, but those frequencies now contain only grain and 8-bit rounding, and we amplify that ten thousand times. The maths is right, the data is not.
07. Wiener filter
The fix by Norbert Wiener is beautifully simple: don't divide where the kernel is too weak. Add a small number K to the denominator:
sharp = FFT-1( FFT(blurred) × conj(H) ÷ ( |H|2 + K ) ) with H = FFT(kernel)
Where the kernel is strong, K doesn't matter and you get the full division. Where the kernel is weak, K wins and those frequencies are left alone instead of exploding. K is the noise-to-signal ratio: more noise, bigger K.
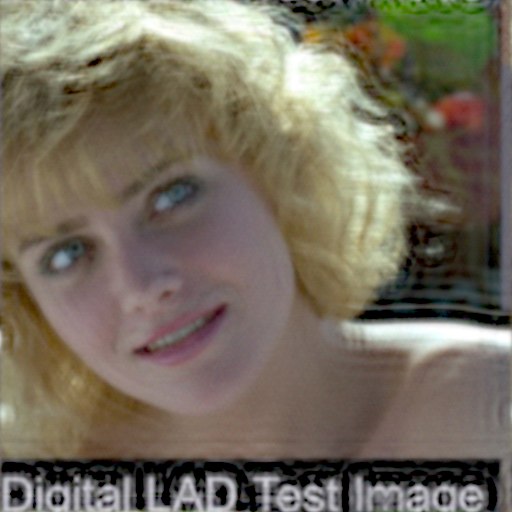
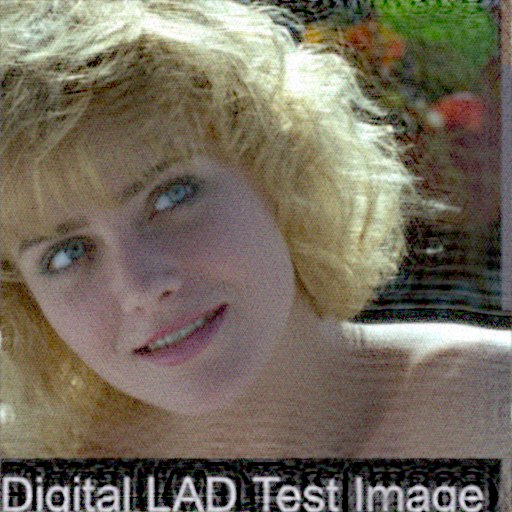
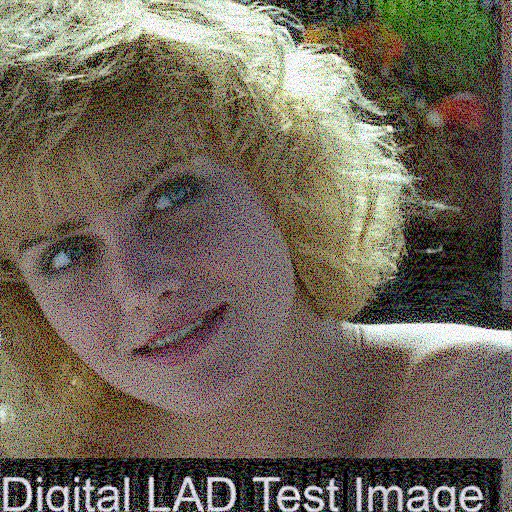
The text "Digital LAD Test Image" is unreadable in the blurred plate and readable again after one division. The price is the ringing: thin echoes around strong edges, typical of every deconvolution.
08. Richardson-Lucy
Richardson-Lucy works the other way: no division of spectra, but a guess that improves step by step, using only convolutions.
estimatenew = estimate × ( ( blurred ÷ (estimate ⊗ kernel) ) ⊗ kernelflipped )
In words: blur your current guess with the kernel, compare it with the real blurry plate (a ratio, 1 where they match), blur the ratio back and use it to correct the guess. Start from the blurry plate itself and repeat. Pixels never go negative and the total light is preserved, which is why astronomers and microscopists love it. With a symmetric kernel (disc, hexagon) the flipped kernel is the kernel itself.

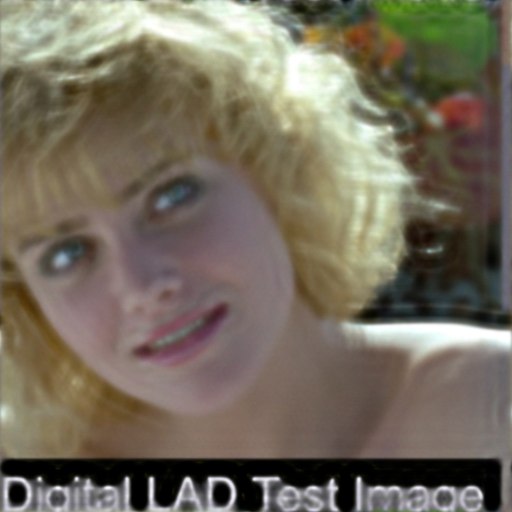
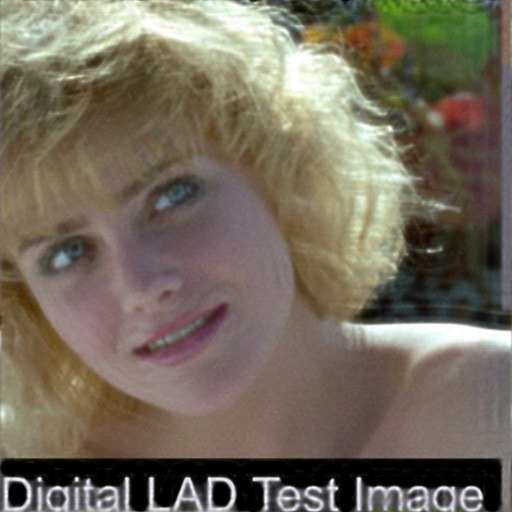
More iterations, more detail, but also more noise and ringing: at some point you are sharpening the grain. Knowing when to stop is part of the job.
Deconvolution Lab
Your turn. On the left of the wipe the plate blurred by the "lens", on the right the Wiener deconvolution. Change the bokeh, add noise, and try to get the image back. The most important experiment: move restore radius away from lens radius and see what a wrong kernel does. Everything is computed in your browser with FFTs, in linear light.
Try: Gaussian + grain 1% (it gets hard), hexagon with K = 0.000001 (the garbage of chapter 06), restore radius 10 instead of 9 (rings everywhere). Drag on the image to move the wipe.
09. Which blurs can be undone?
Go back to the four spectra of chapter 04. Hard-edged kernels (disc, hexagon, motion line) have spectra with rings and stripes that go on and on: many fine details are weakened, but they survive above the noise, and the deconvolution can pull them out. A Gaussian spectrum is a soft blob that drops to nothing very quickly: the fine details are pushed below the grain and no division can bring them back. Same blur size to the eye, very different recovery.
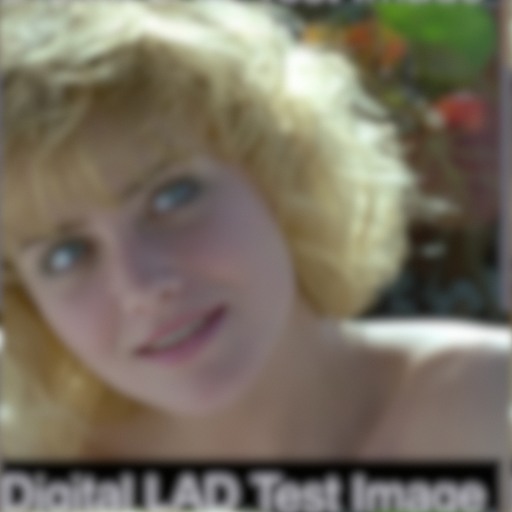
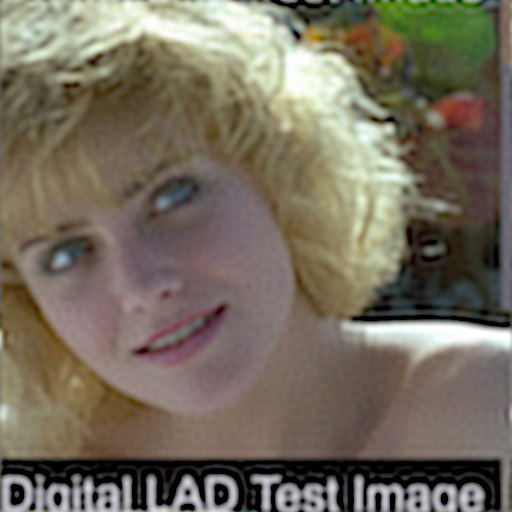
And the most important rule: you need the right kernel. Here is the hexagon plate restored with a hexagon of radius 12 instead of 9:
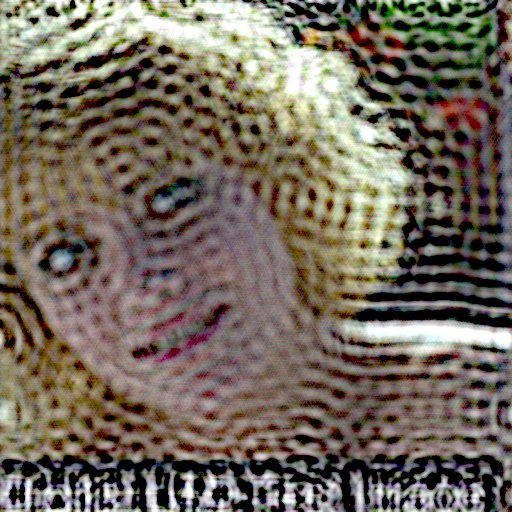
How do you find it? Look for a small highlight in the plate: an out-of-focus point is the kernel, you can crop it and use it. For a blur made in software, blur a single white pixel on black with the same settings and you have its exact kernel. Or shoot a point light out of focus with the same lens and aperture, as in Bob Roesler's LensKernelFFT (link at the top).
10. Deconvolution in Nuke
Nuke has no Deconvolve node out of the box, but you can build one. Two ways:
- Wiener: Jeremy Peacock's Wiener Deconvolve gizmo on Nukepedia does exactly chapter 07 with Nuke's FFT tools, and includes a node to generate defocus kernels. Its Smooth is our K, Prescale pads the image to avoid the wrap-around problems at the edges.
- Richardson-Lucy: it only needs Convolve and Merge nodes, so we can build a real Deconvolve node. One iteration is: Convolve the estimate, divide the plate by it, Convolve the ratio, multiply the estimate. A BlinkScript isn't a good fit here: every iteration needs the whole image blurred before the next one can start, and a Blink kernel works pixel by pixel.
Copy the script below, paste it in the Script Editor and run it. It creates a Group called RL_Deconvolve with two inputs, plate and kernel. Do it once: then copy the Group (Ctrl+C) and paste it in any script, or save it as a gizmo, and you have your copy-paste node.
import nuke

ITERATIONS = 15      # more = sharper, but also more noise and ringing
FLIP_KERNEL = False  # True if the kernel is not symmetric (pentagon, cat's eye...)


def make(classes, **knobs):
    """Create the first node class that exists in this version of Nuke."""
    for cls in classes:
        try:
            return getattr(nuke.nodes, cls)(**knobs)
        except Exception:
            pass
    raise RuntimeError("Can't create any of: " + ", ".join(classes))


def filter_input(node):
    """Index of the Convolve input called 'filter' (1 if Nuke doesn't tell us)."""
    try:
        for i in range(node.maxInputs()):
            if "filter" in node.inputLabel(i).lower():
                return i
    except Exception:
        pass
    return 1


def convolve(image, kernel):
    node = make(["Convolve2", "Convolve"])        # Filter > Convolve
    f = filter_input(node)
    node.setInput(f, kernel)
    node.setInput(1 - f, image)
    node["normalize"].setValue(True)
    return node


def build_rl_deconvolve(iterations=ITERATIONS, flip=FLIP_KERNEL):
    group = nuke.nodes.Group(name="RL_Deconvolve")
    group.begin()
    plate = nuke.nodes.Input(name="plate")       # input 0
    kernel = nuke.nodes.Input(name="kernel")     # input 1
    kernel_flipped = kernel
    if flip:
        try:
            kernel_flipped = nuke.nodes.Mirror2(inputs=[kernel], flip=True, flop=True)
        except Exception:
            kernel_flipped = nuke.nodes.Mirror(inputs=[kernel], Horizontal=True, Vertical=True)

    estimate = plate                                             # first guess: the plate itself
    for i in range(iterations):
        reblur = convolve(estimate, kernel)                      # the guess seen through the lens
        safe = nuke.nodes.Expression(inputs=[reblur],            # never divide by zero
                                     expr0="max(r, 1e-5)", expr1="max(g, 1e-5)", expr2="max(b, 1e-5)")
        ratio = nuke.nodes.Merge2(inputs=[safe, plate], operation="divide")      # plate / reblur
        correction = convolve(ratio, kernel_flipped)
        estimate = nuke.nodes.Merge2(inputs=[estimate, correction], operation="multiply")
        estimate["label"].setValue("iteration %d" % (i + 1))

    nuke.nodes.Output(inputs=[estimate])
    group.end()
    group["label"].setValue("%d iterations" % iterations)
    return group


build_rl_deconvolve()
Connect your out-of-focus plate to plate and the bokeh to kernel: a small, centred image with the shape in the alpha (a Roto is perfect). The plate should be linear, ideally an EXR without clipped highlights. Fifteen iterations means thirty Convolves, so it isn't fast: render it once and work on the result. Start with few iterations and go up until the grain starts to grow.
I tested the maths of this tree in the images and in the Lab above, not inside every version of Nuke: node and knob names can change between versions. If something doesn't connect, open the Group and check the first Convolve: image must be the estimate, filter the kernel.
Ready to paste in Nuke
Click a box, copy it (Ctrl+C / Cmd+C) and paste it in Nuke's Node Graph (Ctrl+V / Cmd+V).
Hexagon bokeh kernel. A Constant (256x256) and an Expression that draws a hexagon in rgb and alpha. Change radius in the User tab and plug it into the filter input of a Convolve (or the kernel input of RL_Deconvolve).
Disc bokeh kernel. The same with a round aperture.
Highlight boost. Gives the energy back to clipped highlights before a defocus (chapter 03): everything brighter than threshold is multiplied up to boost, with a smooth transition. Put it before the Convolve and a Grade after if you need to bring the level down.
Before you deconvolve. Work in linear on float images and avoid clipped highlights. Pad the frame with edge extension and crop it back after. Denoise first if you can, because deconvolution sharpens grain too. And remember that real defocus changes with depth: one kernel is right only for one distance, so key or split the plate by depth.
Where it helps. Bringing back some detail for tracking or clean-up, extracting textures, and the classic trick Erwan Leroy describes in the Nukepedia comments: re-defocus. Deconvolve a soft plate, then defocus it again with a nicer, bigger bokeh, instead of blurring a blur.
11. A note on privacy
If a blur can be partially undone, a blur is not a safe way to hide a face, a licence plate or a password in a screenshot. Max van Leeuwen shows it very well in his article (link at the top): he unblurs images made with box and hexagon blurs, and even optically defocused video. If something must disappear, cover it with a solid colour.
The matrix series
If you are in love with Matrices :) have a look at the other pages:
Convolution Matrix
Transform Matrix
ColorMatrix
3D Matrices