In this tutorial I will show you some pros and cons of the Vector Blur in Nuke 9.0 VS Vector Blur in Nuke 10.5v2.
You can download here a basic script with the test I'm going to show you:
Download Examples
Useful Links
- http://learn.foundry.com/nuke/11.1/content/reference_guide/filter_nodes/vectorblur.html?cshid=VectorBlur2
- http://learn.foundry.com/nuke/11.1/content/comp_environment/3d_compositing/adding_motion_blur_vectorblur.html
- http://www.youtube.com/watch?v=8WJjqGDGddI
NODES
- OLD node (NUKE 9)
Copy and Paste directly in Nuke. This is the Node you can find in Nuke 9 as default.
set cut_paste_input [stack 0]
version 9.0 v4
push $cut_paste_input
VectorBlur {
 name VectorBlur2
 selected true
 xpos -285
 ypos -18
}
These are the properties:
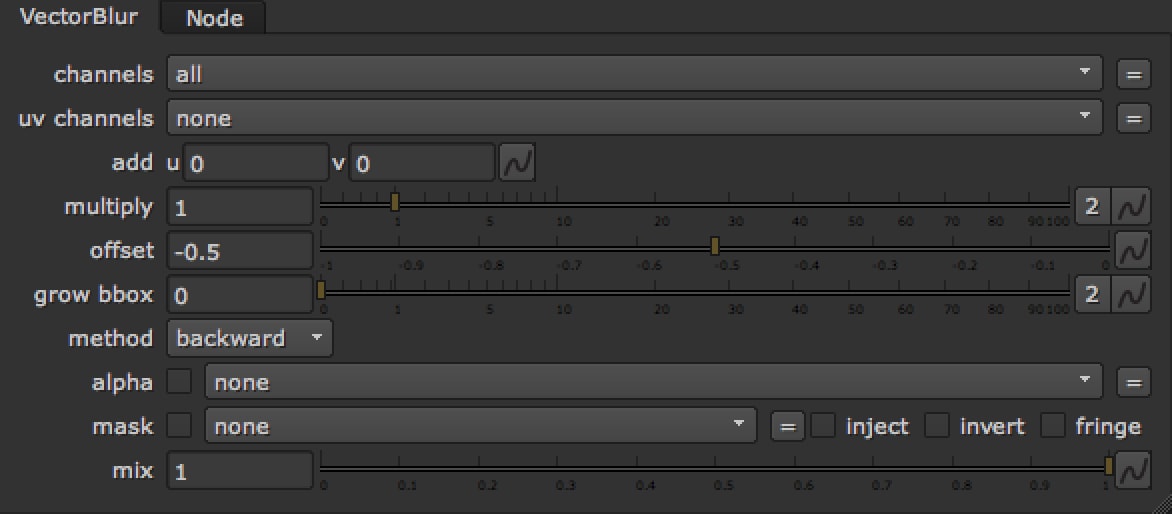
- NEW node (NUKE 10)
Copy and Paste directly in Nuke. This is the Node you can find in Nuke 10 as default.
set cut_paste_input [stack 0]
version 10.5 v2
push $cut_paste_input
VectorBlur2 {
 name VectorBlur1
 selected true
 xpos -464
 ypos -91
}
These are the properties:

Comparison
In this example we see all the differences between the two Vector Blur nodes. First of all copy and paste in nuke this script, or download the .nk file.
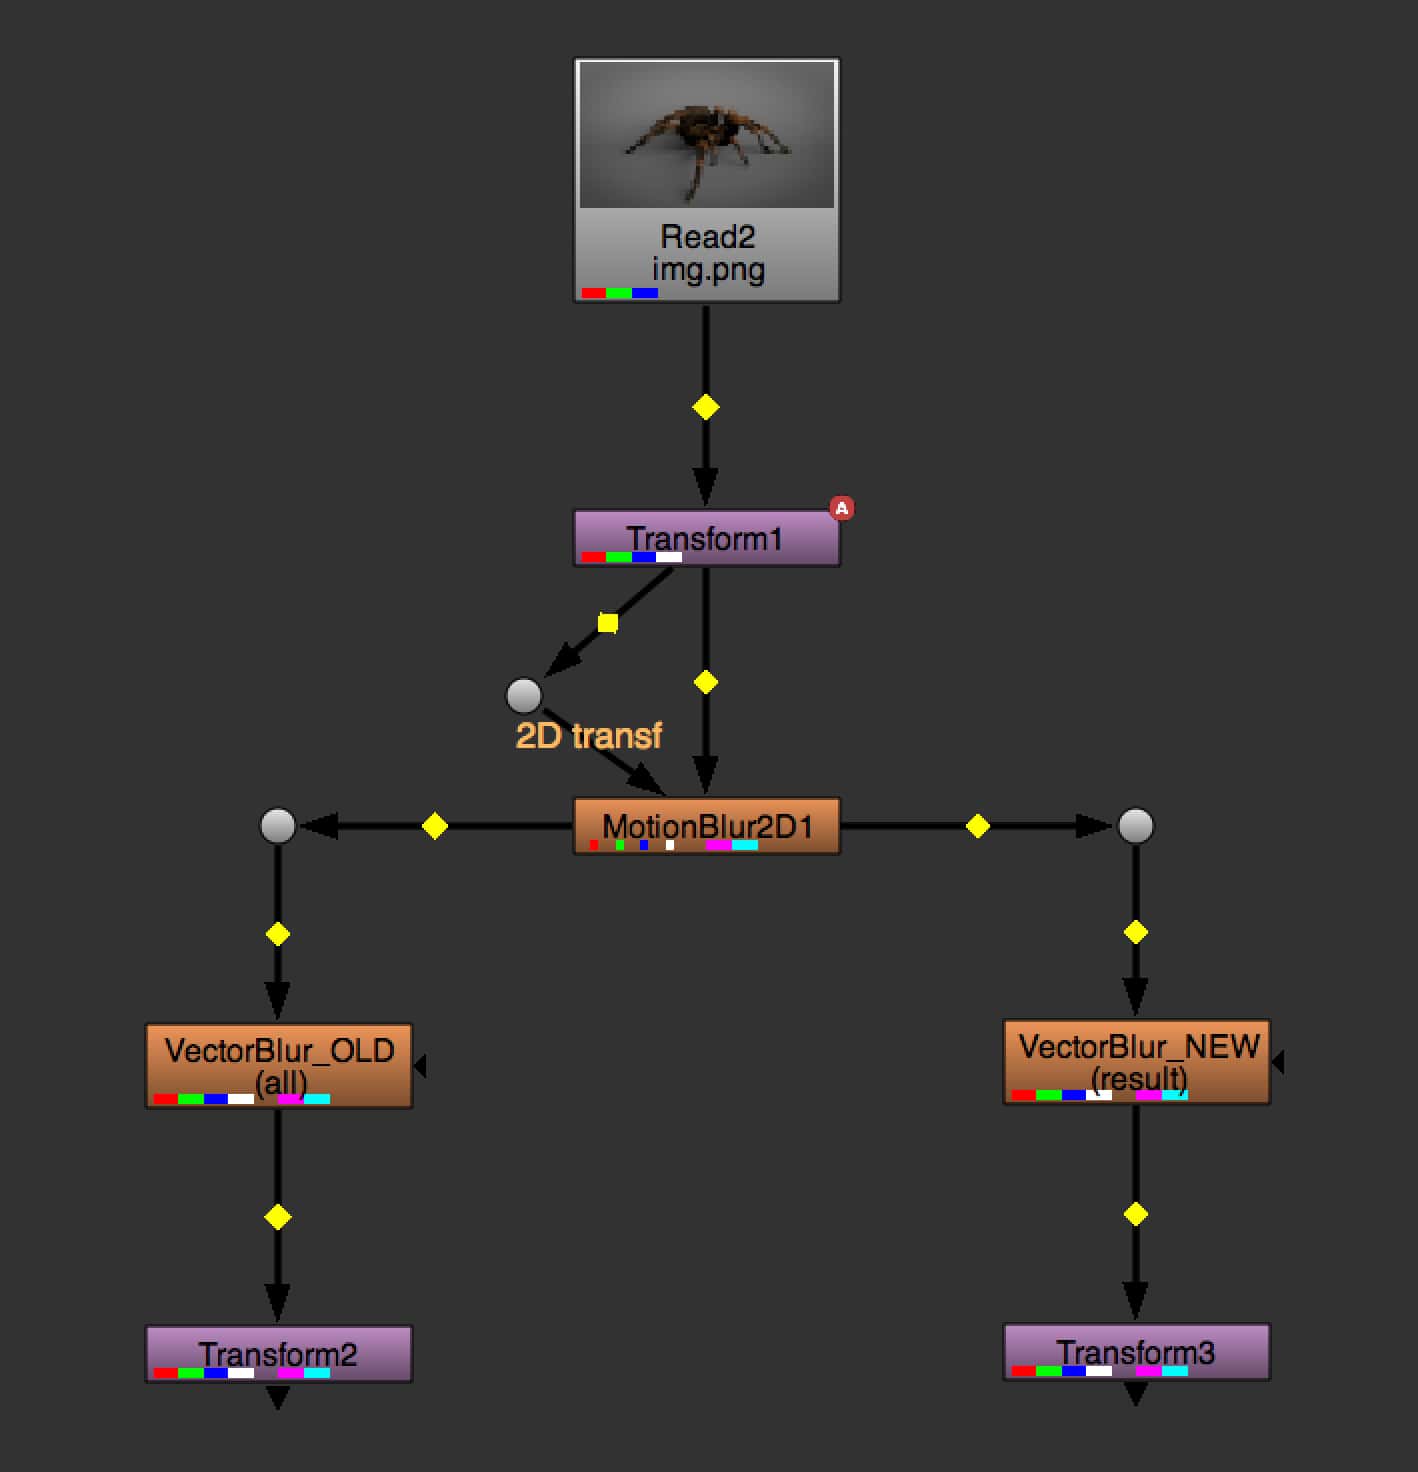
As you can see in previous script, I applied the same transformation to the plate (from 0 to 800 on the x axis), moving the image out of the format. Then, with the Motion Blur Node I'm going to create the vector of motion.
At the end with the 2 VectorBlur nodes, apply the motion blur to the image. With the last Transform node I move back the image. Please, watch the Frame 7.
Click here: show/hide Script for Nuke
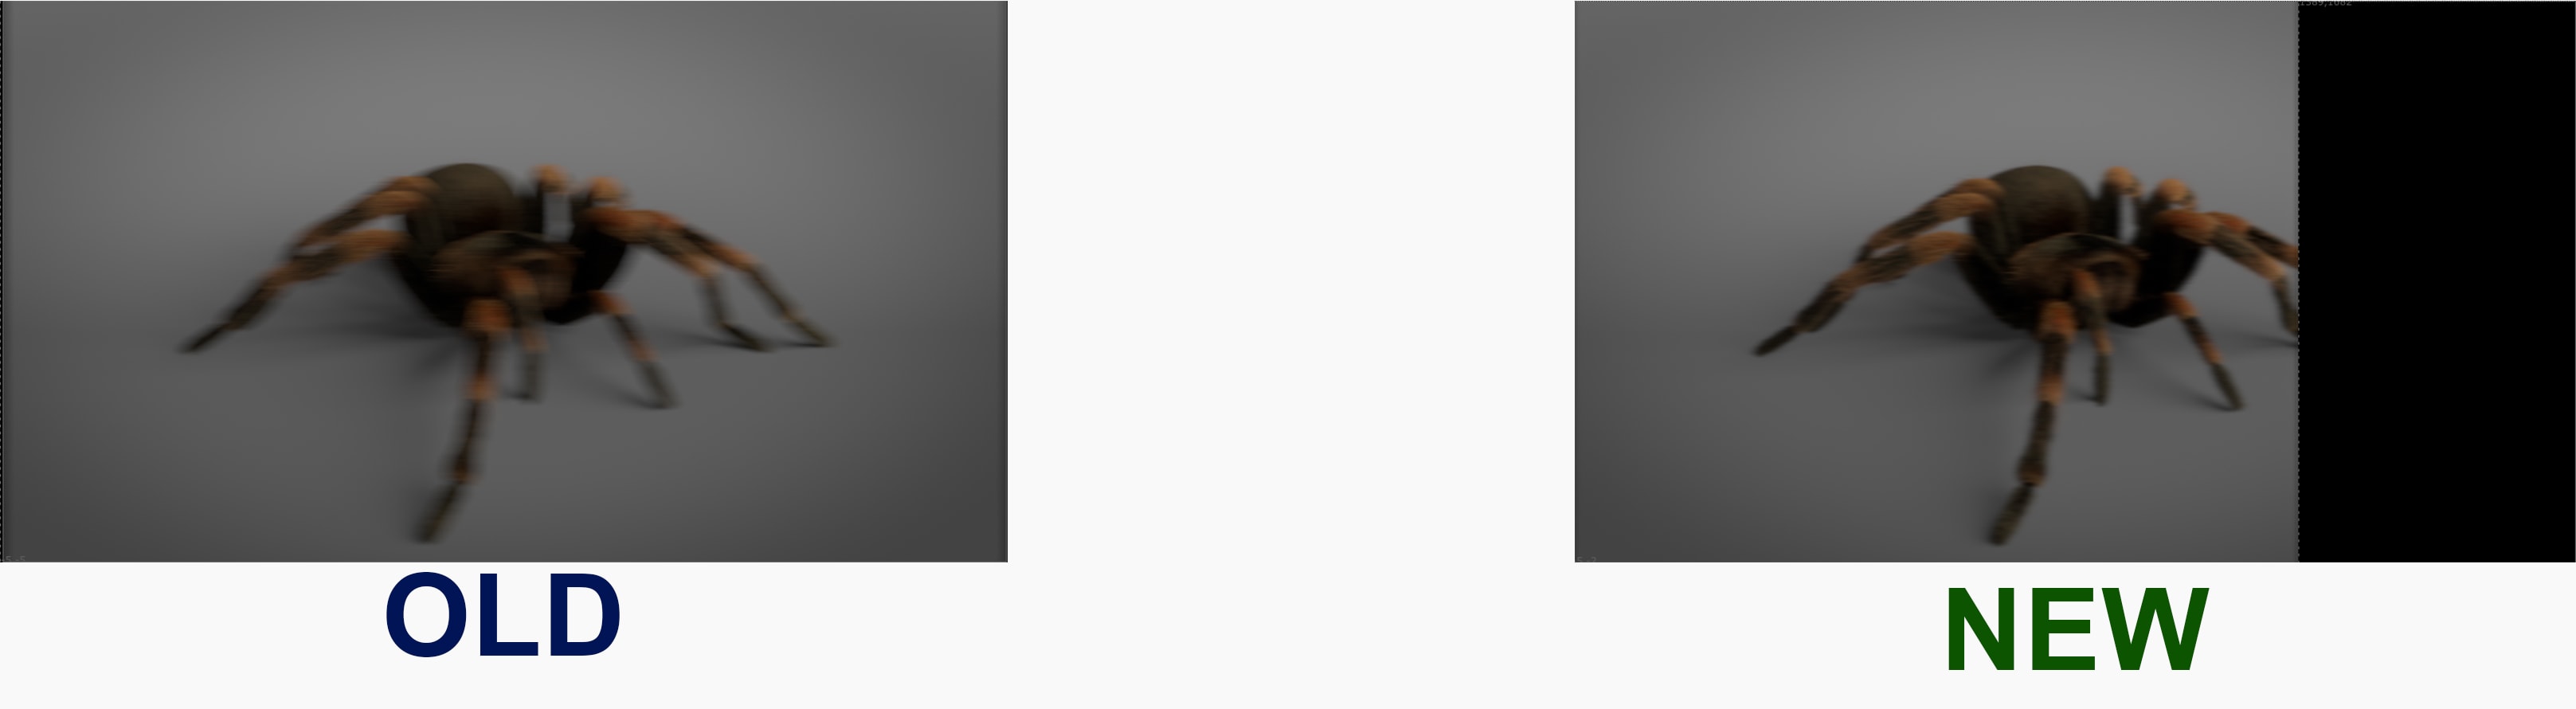
I used the same attributes in both of the nodes. The result, as you can see, is too strong and too fake with the old node, but the pro is the Bounding Box: the old VectorBlur keeps the original BBox without cropping the image, instead of the new node.
So, if you need this feature, use the VectorBlur from Nuke 9.